Activity › Forums › Astrotechniek › Methoden en Technieken › Data calibration workflow and processing in APP
Tagged: APP
- This topic has 25 replies, 4 voices, and was last updated 9 years, 4 months ago by
 Musquetier.
-
AuthorPosts
-
March 18, 2017 at 16:35 #12883
 HaverkampParticipant
Hi all,
@supernov , Vincent Groenewold, shared some lights, bias, darks, flats with me. 5 of each to illustrate the steps required for a proper workflow.
I am using APP version 1.033-5
I will go through the steps required to get good data calibration using master bias, master dark, master flat en Bad Pixel Mapping.
And I will completely process the data as good as APP can, to get the best stack from this data.
I will post each step in a new message
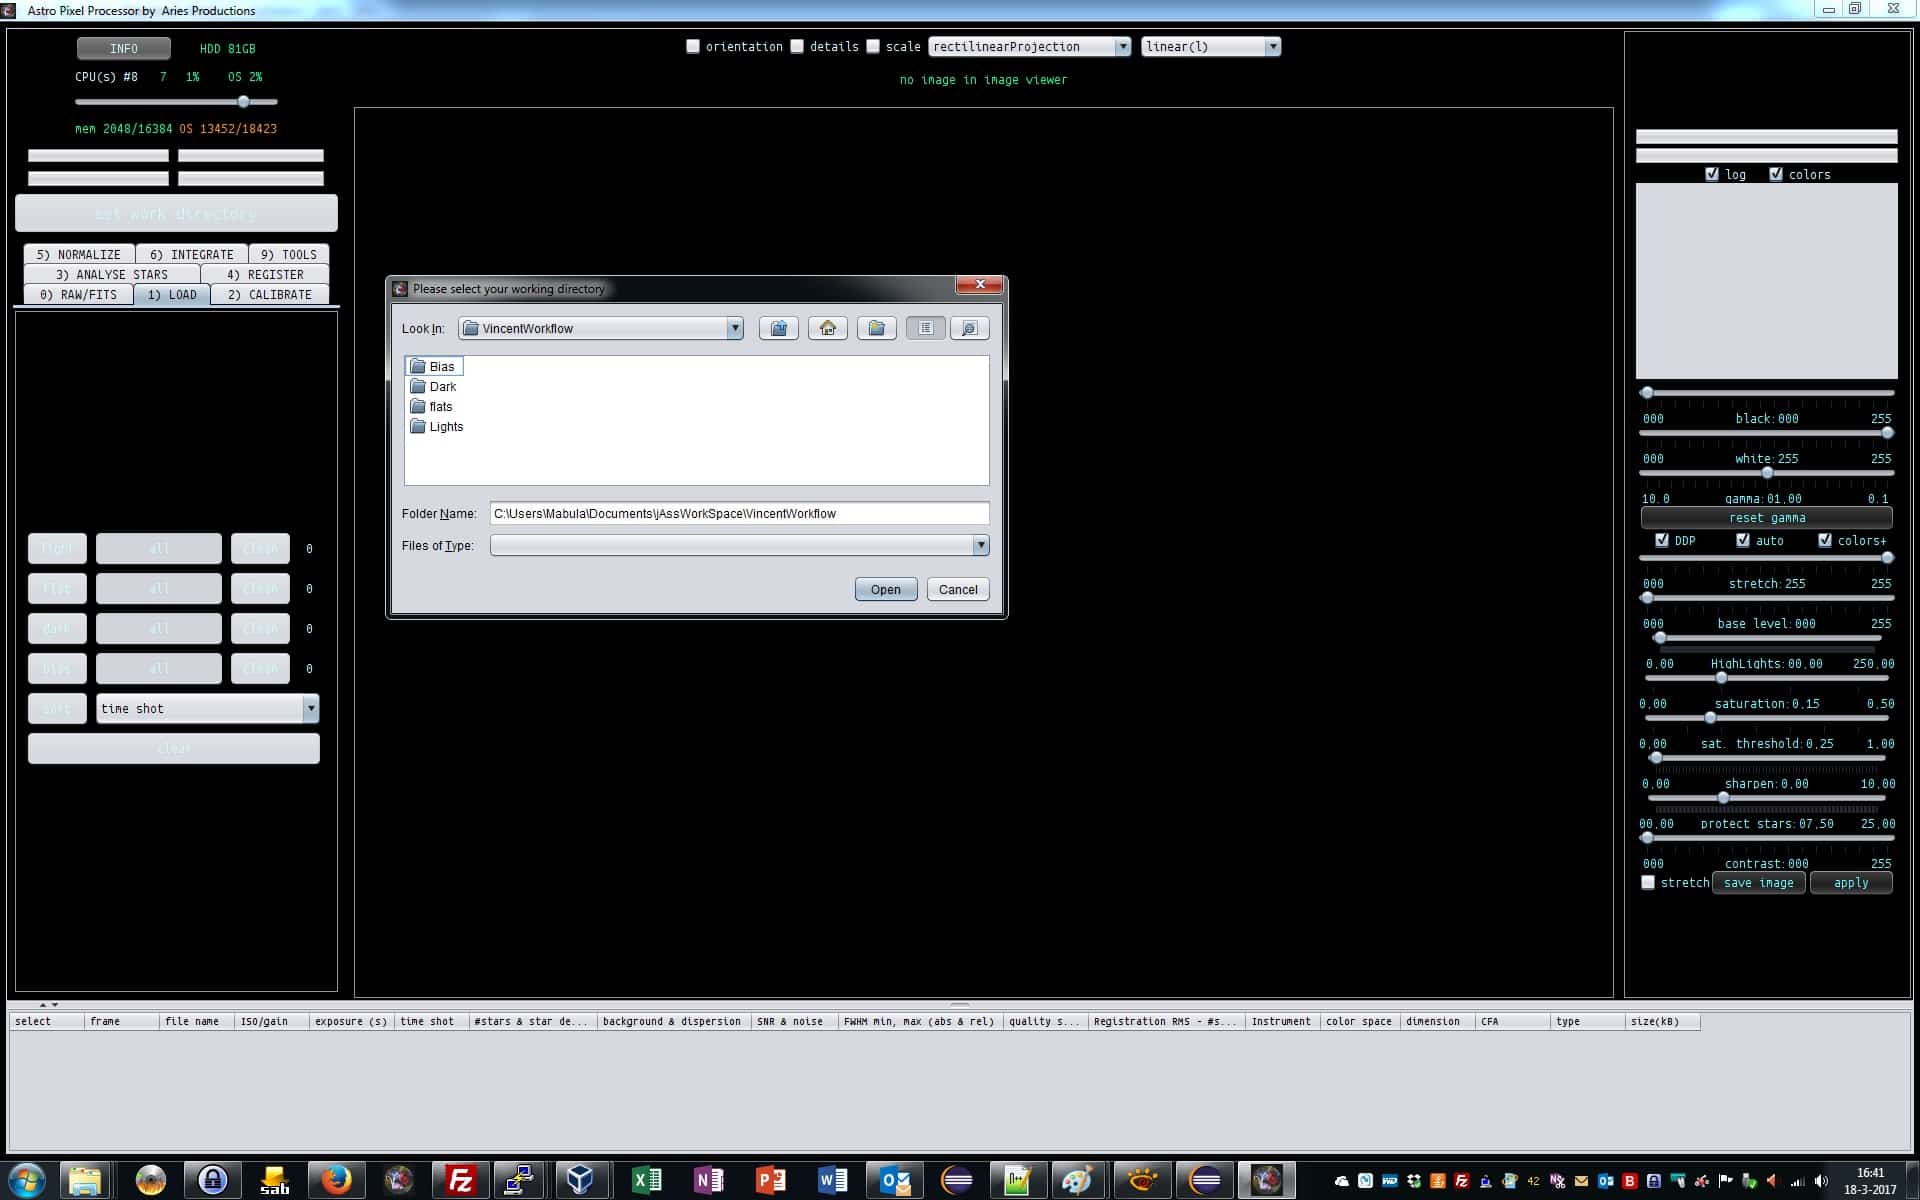
March 18, 2017 at 16:42 #12886HaverkampParticipantWe start APP and select our Working Directory.
This Work Directory will be used for temporary files during stacking and the results will be saved here. Try to use a hard disk partition with enough free space and possibly the fastest drive you have on your computer. This will speed things up.
We choose the folder with our project data, with separate folders for lights, bias, darks, flats
 March 18, 2017 at 16:52 #12890HaverkampParticipant
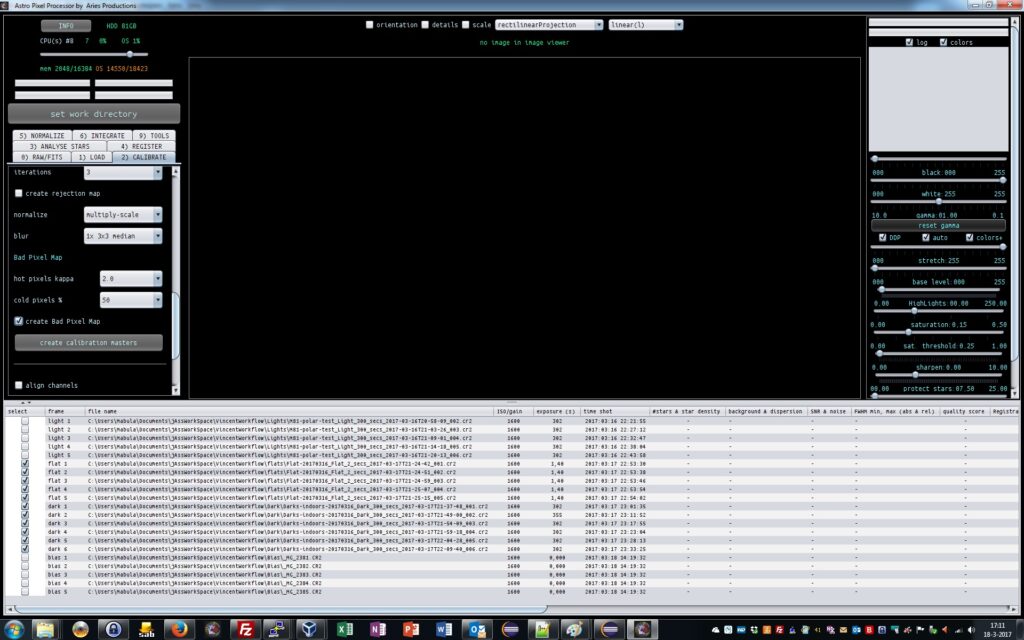
We load all data:
light frames by pusing the light button, darks by pushing the dark button, flats by pushing the flats button etc..
Notice how the files in the filelist show their type.
And in the 1) LOAD panel, we see a counter for the number of frames we have just loaded.
 March 18, 2017 at 16:57 #12893HaverkampParticipant
We see that all data is shot using ISO 1600.
The light frames have an exposure of 300 seconds. just like the darks, one of the darks is 350 seconds, but that’s no problem.
We don’t have a Bad Pixel Map yet of the sensor of VIncent’s camera. Let’s make that first using his darks and flats.
The bad pixel map will correct the non-linear pixels of the sensor, hot and cold if there are any.
We go to 2) CALIBRATE
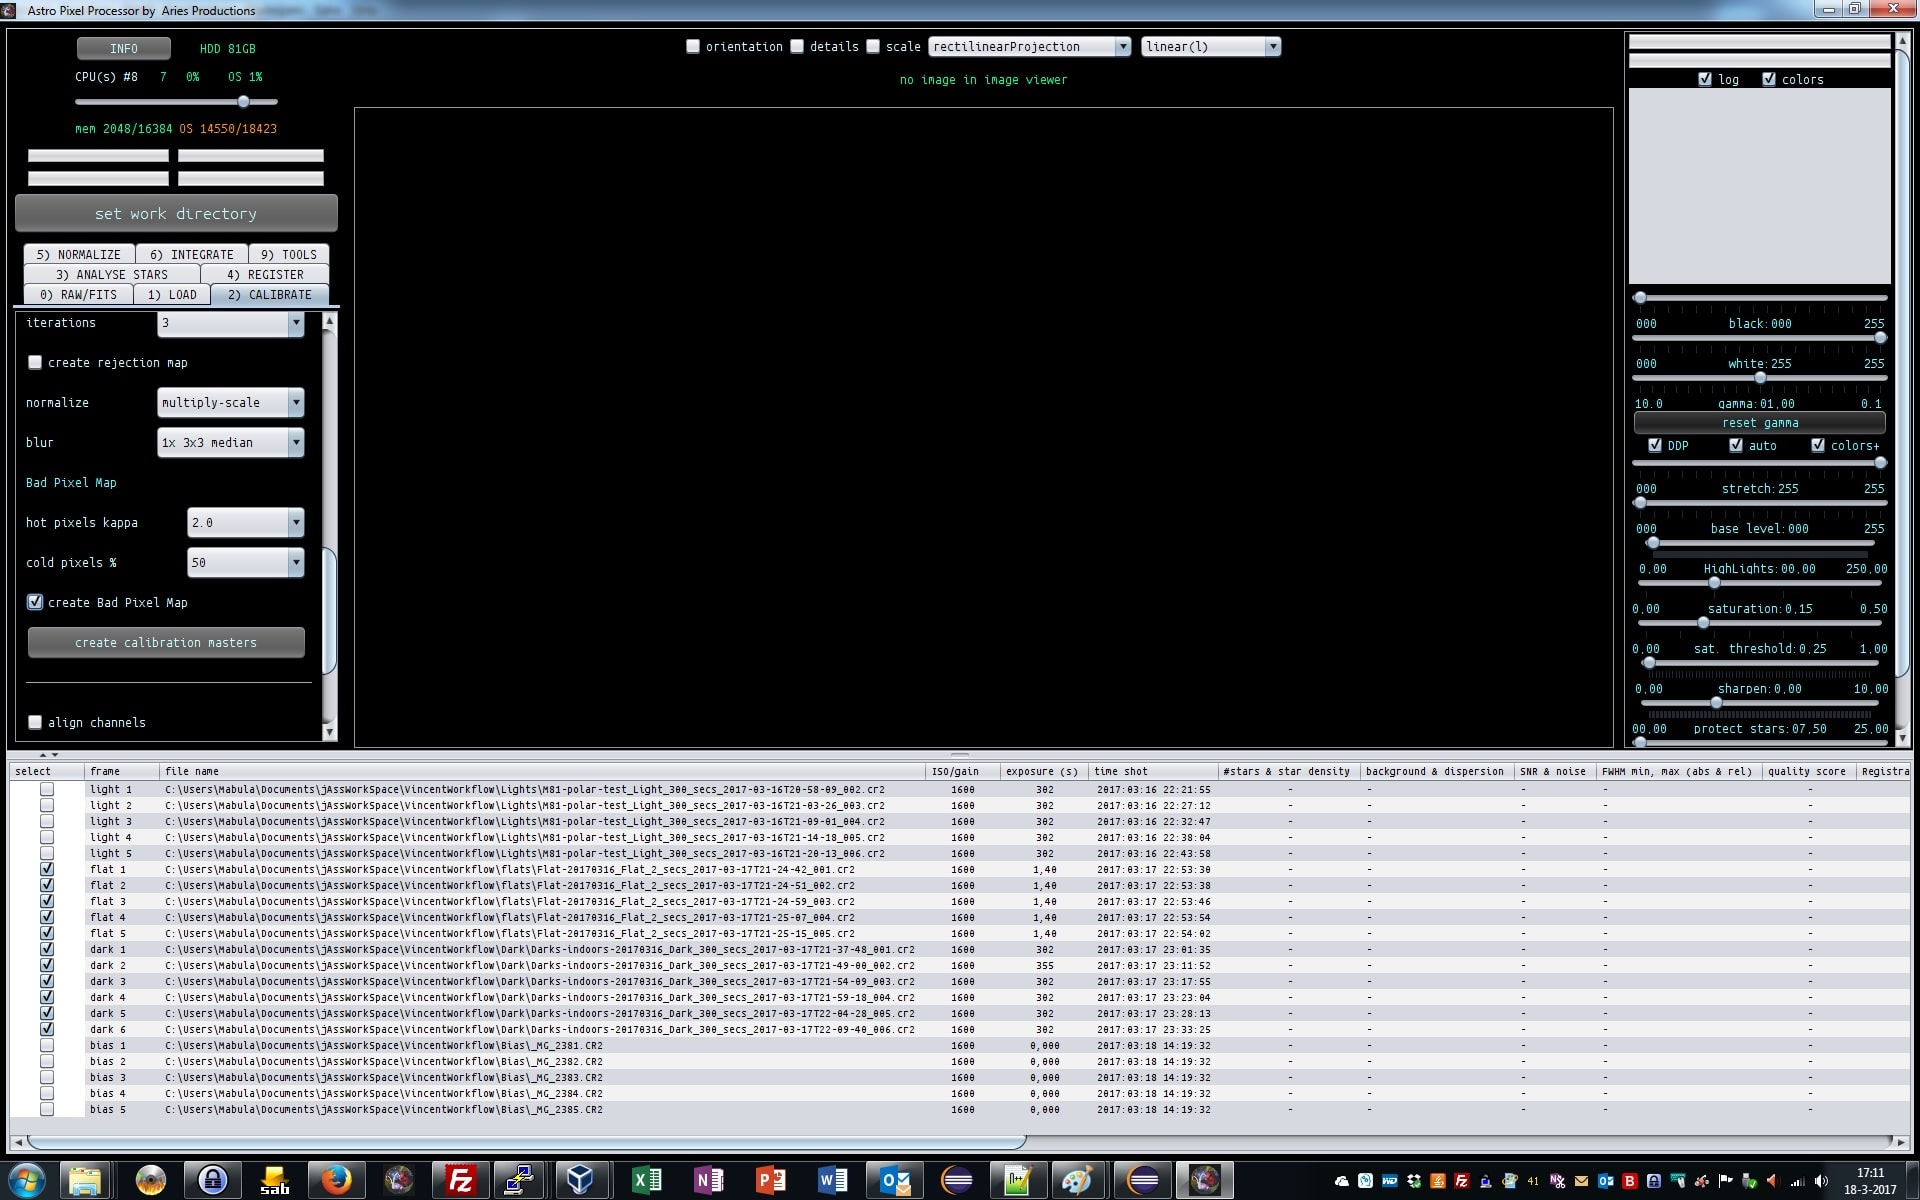
March 18, 2017 at 17:07 #12895HaverkampParticipant2) CALIBRATE
we scroll down to the Bad Pixel Map options and select create bad pixel map.
If you create a good Bad Pixel Map, you will be able to use this for a very long time with high efficiency.
The bad pixel map will be created using only the darks and flats.
First we deselect the lights and bias, by clicking on the all button next to the lights and bias buttons in 1) LOAD
 March 18, 2017 at 17:19 #12899HaverkampParticipant
The Bad pixel map uses darks for hot pixel detection, en flats for cold pixel detection.
Hot pixel kappa setting : default is 2 kappa.
Cold pixel % : default is 50%.
The darks and flats are combined to a masterdark and masterflat internally.
Then the masterdark is locally analysed. All pixels that deviate more than the
PixelValue > LocalMedian + (HotPixelKappa* StandardDeviation) means hot !
are considered hot pixels and will be marked like that in the bad pixel map.
The masterflat is analysed globally. All pixels that are less than cold pixel % from the median of the masterflat are consideres cold pixels.
PixelValue < ColdPixel% * GlobalMedian means cold !
If you have very strong vignetting, you possibly need to lower this value. Otherwise 50% is fine in most cases.
We leave the settings at their default and click on create calibration frames. Since we selected create Bad Pixel Map. Only a BPM will be created. No Master dark or Master Flat will be created yet.
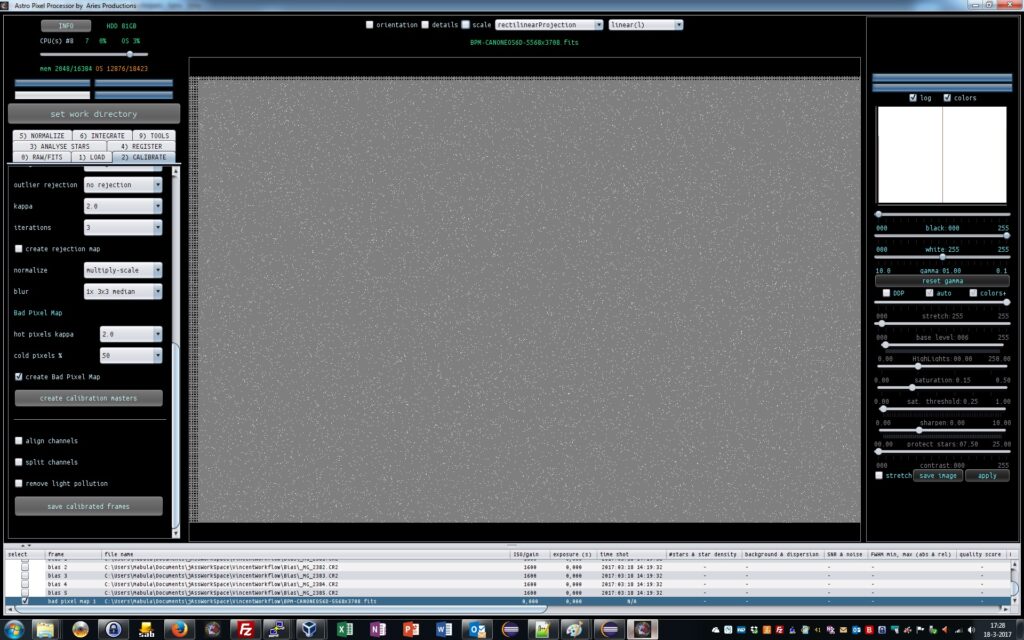
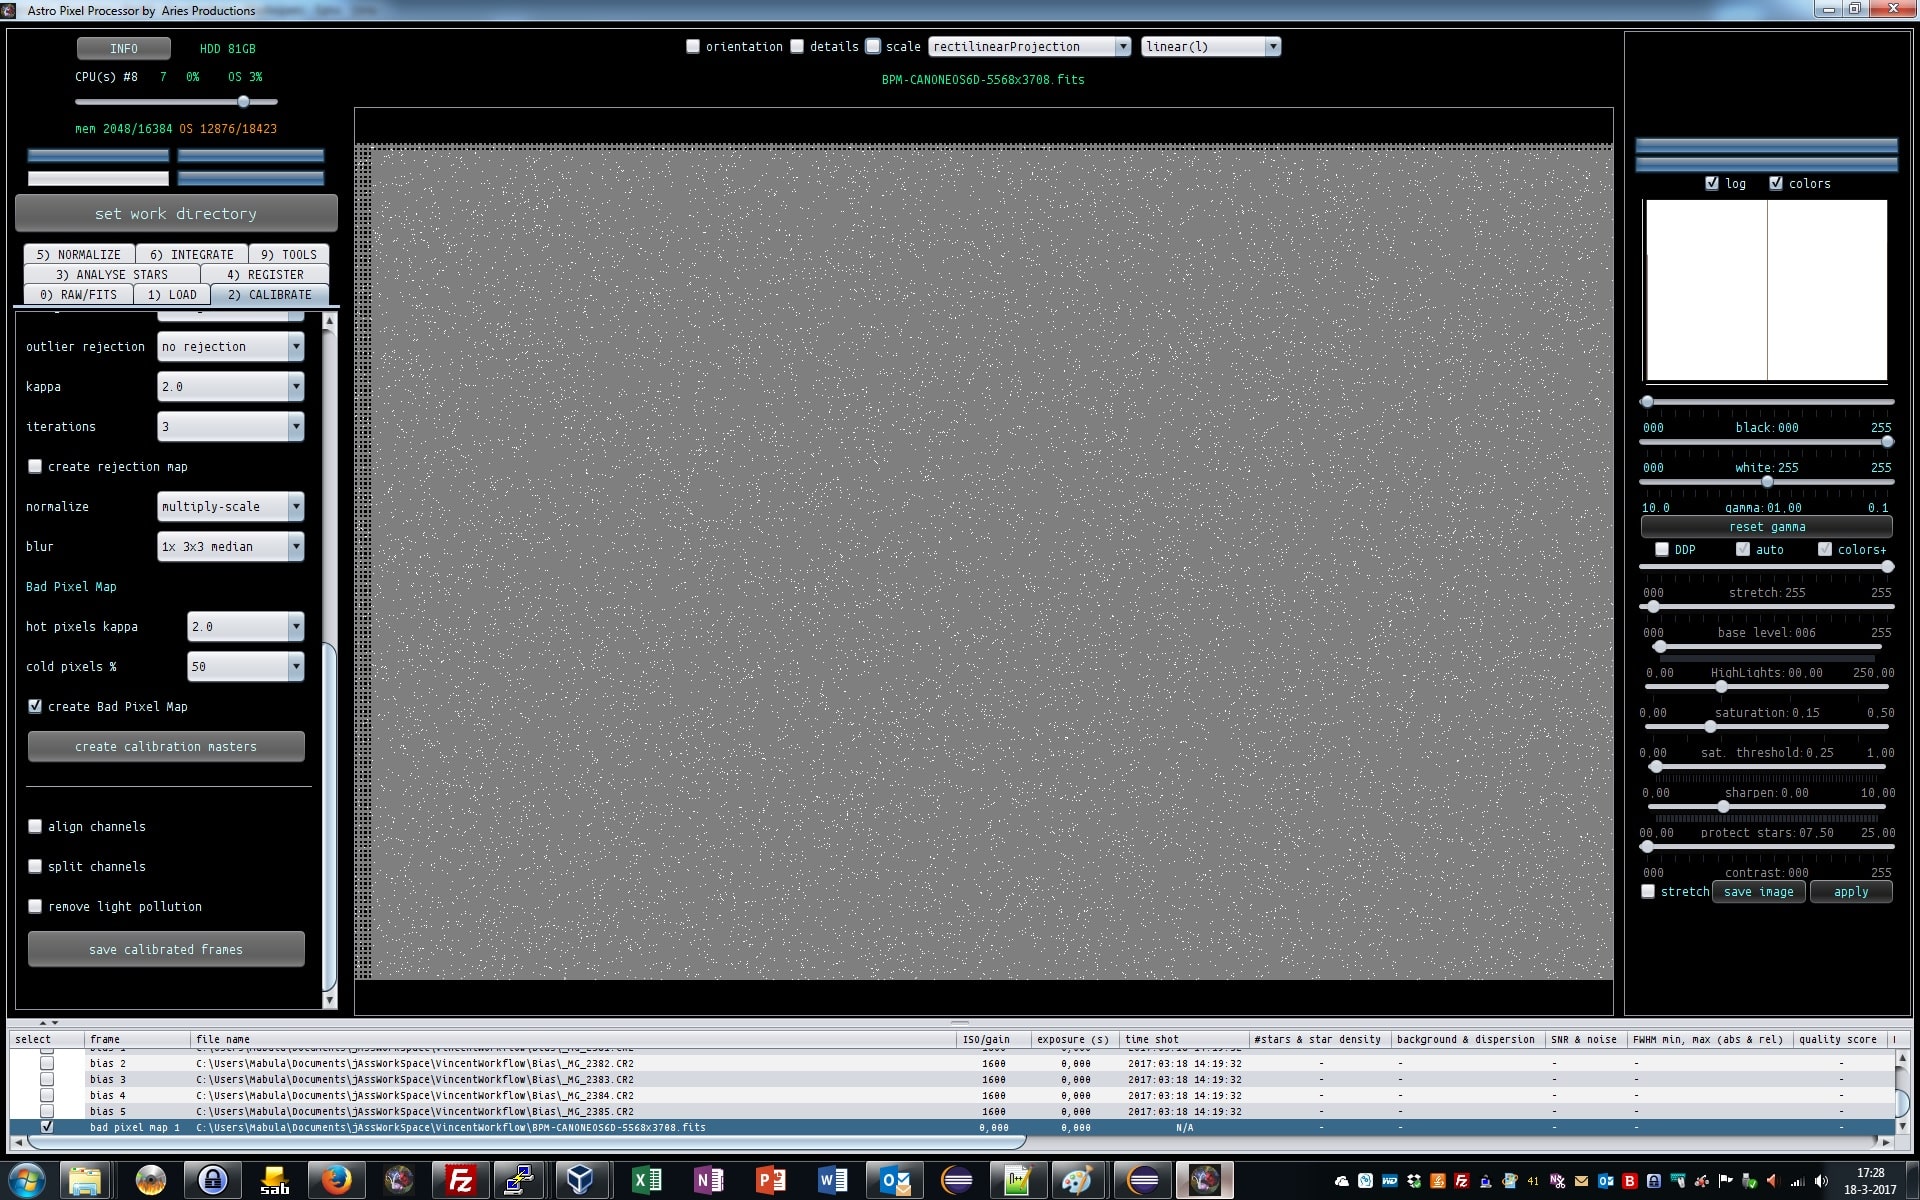
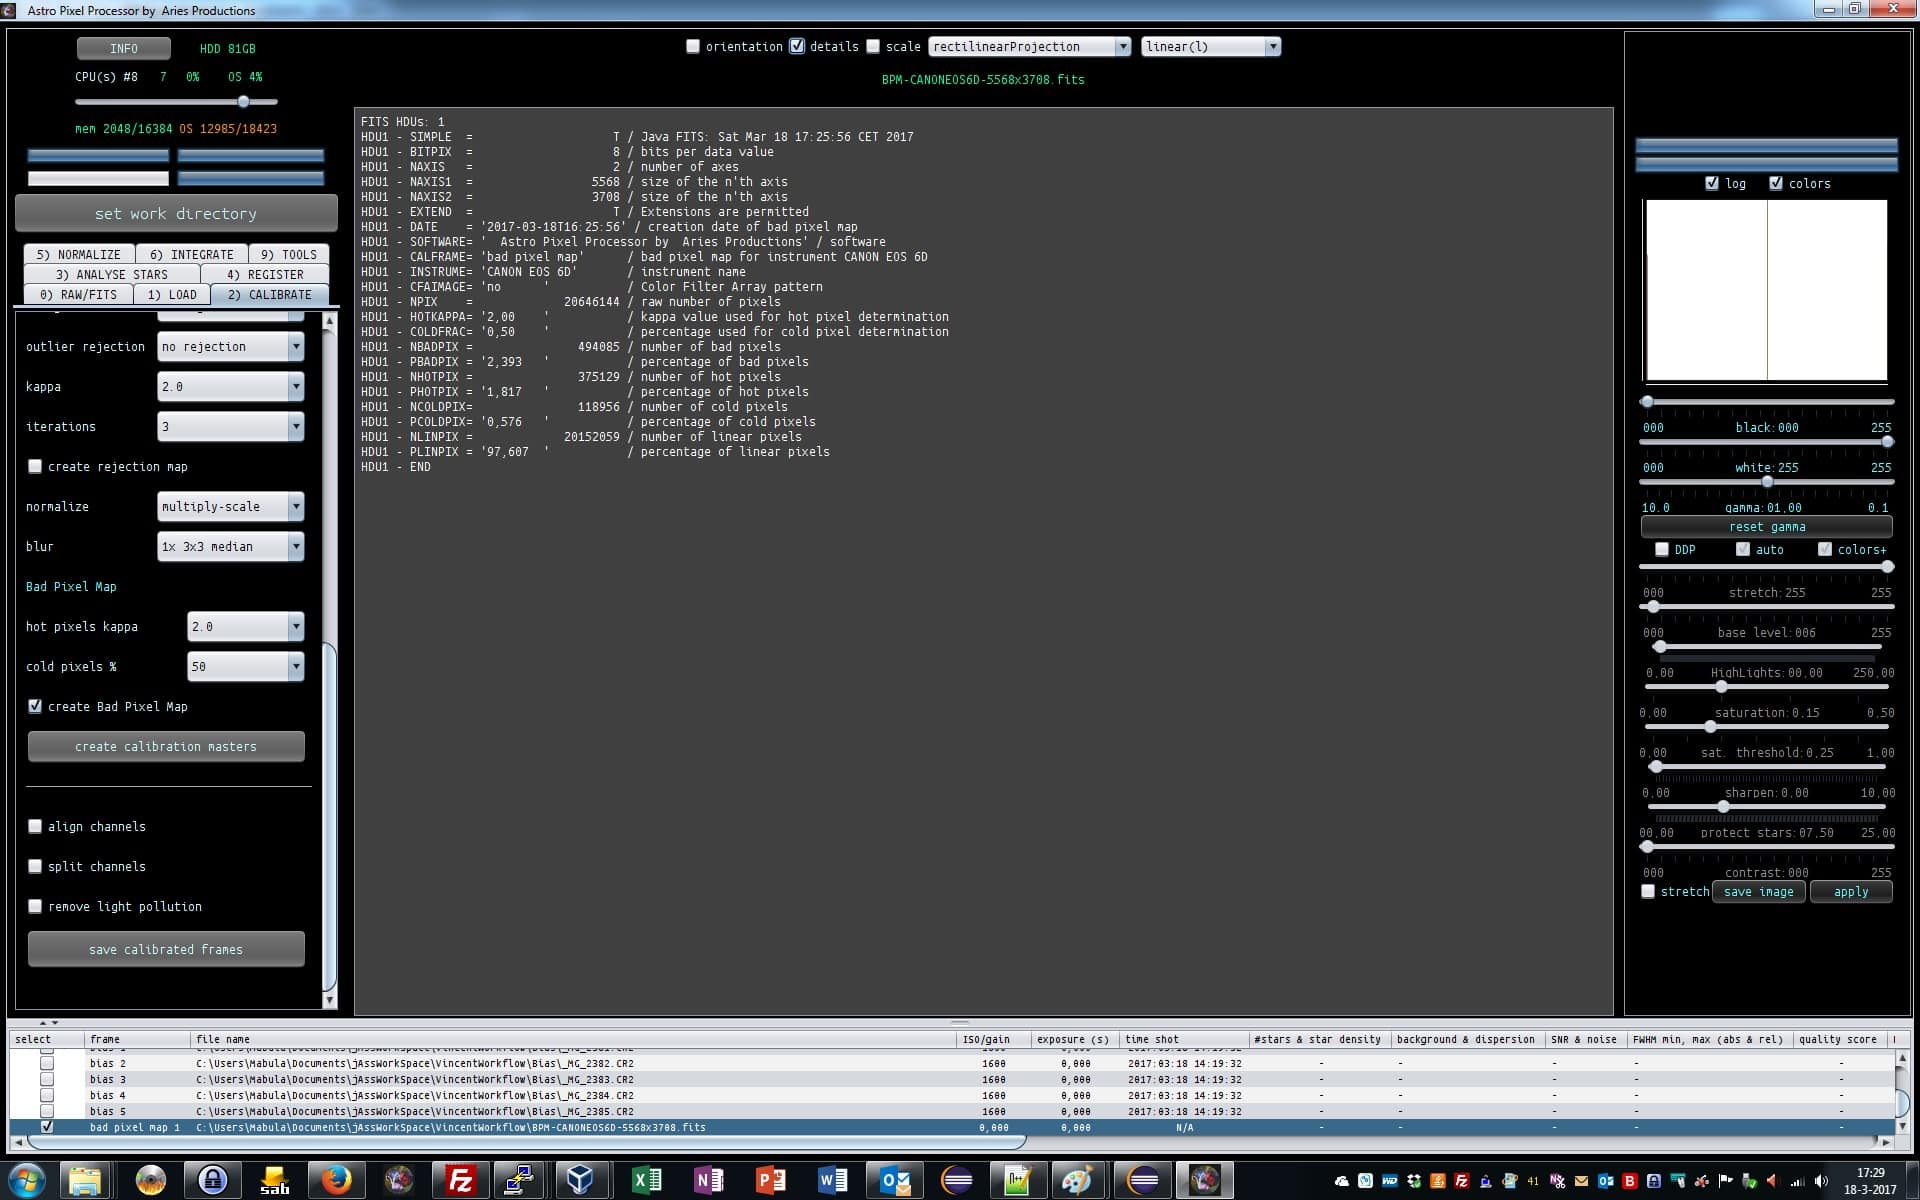
When the creation is finished, we get a Bad Pixel Map at the bottom of our list, see screenshot. Let’s select the bad pixel map to see how it looks.
A bad pixel map is unlike a light frame. Deselect DPP when viewing a Bad Pixel Map, to properly see the BPM
by clicking on details at the top of the application above the image viewer we can get some statistics.
 March 18, 2017 at 17:39 #12906HaverkampParticipant
About the BPM (Bad Pixel Map):
Gray pixels mean linear pixels
black pixels are cold pixel
white pixel are hot pixels.
We see a lot of pixels that seem to behave non-linear and can be considered a bit hot. But maybe we are seeing to many and our hot kappa value was too low.
We also see some cold pixels, these are pixels of the raw borders of the sensor. Which you normallys don’t see, but we see them now, since the bad pixel map is a map of the entire sensor.
The BPM image dimensions are different than the image dimensions of the lights. This is due to the fact that the lights of RAW images are always cropped to remove these RAW borders. Check the dimension column in the file list.
You’ll see that the dimensions of the BPM are : 5568×3708
Normal light frames are: 5472×3648
 March 18, 2017 at 17:51 #12910HaverkampParticipant
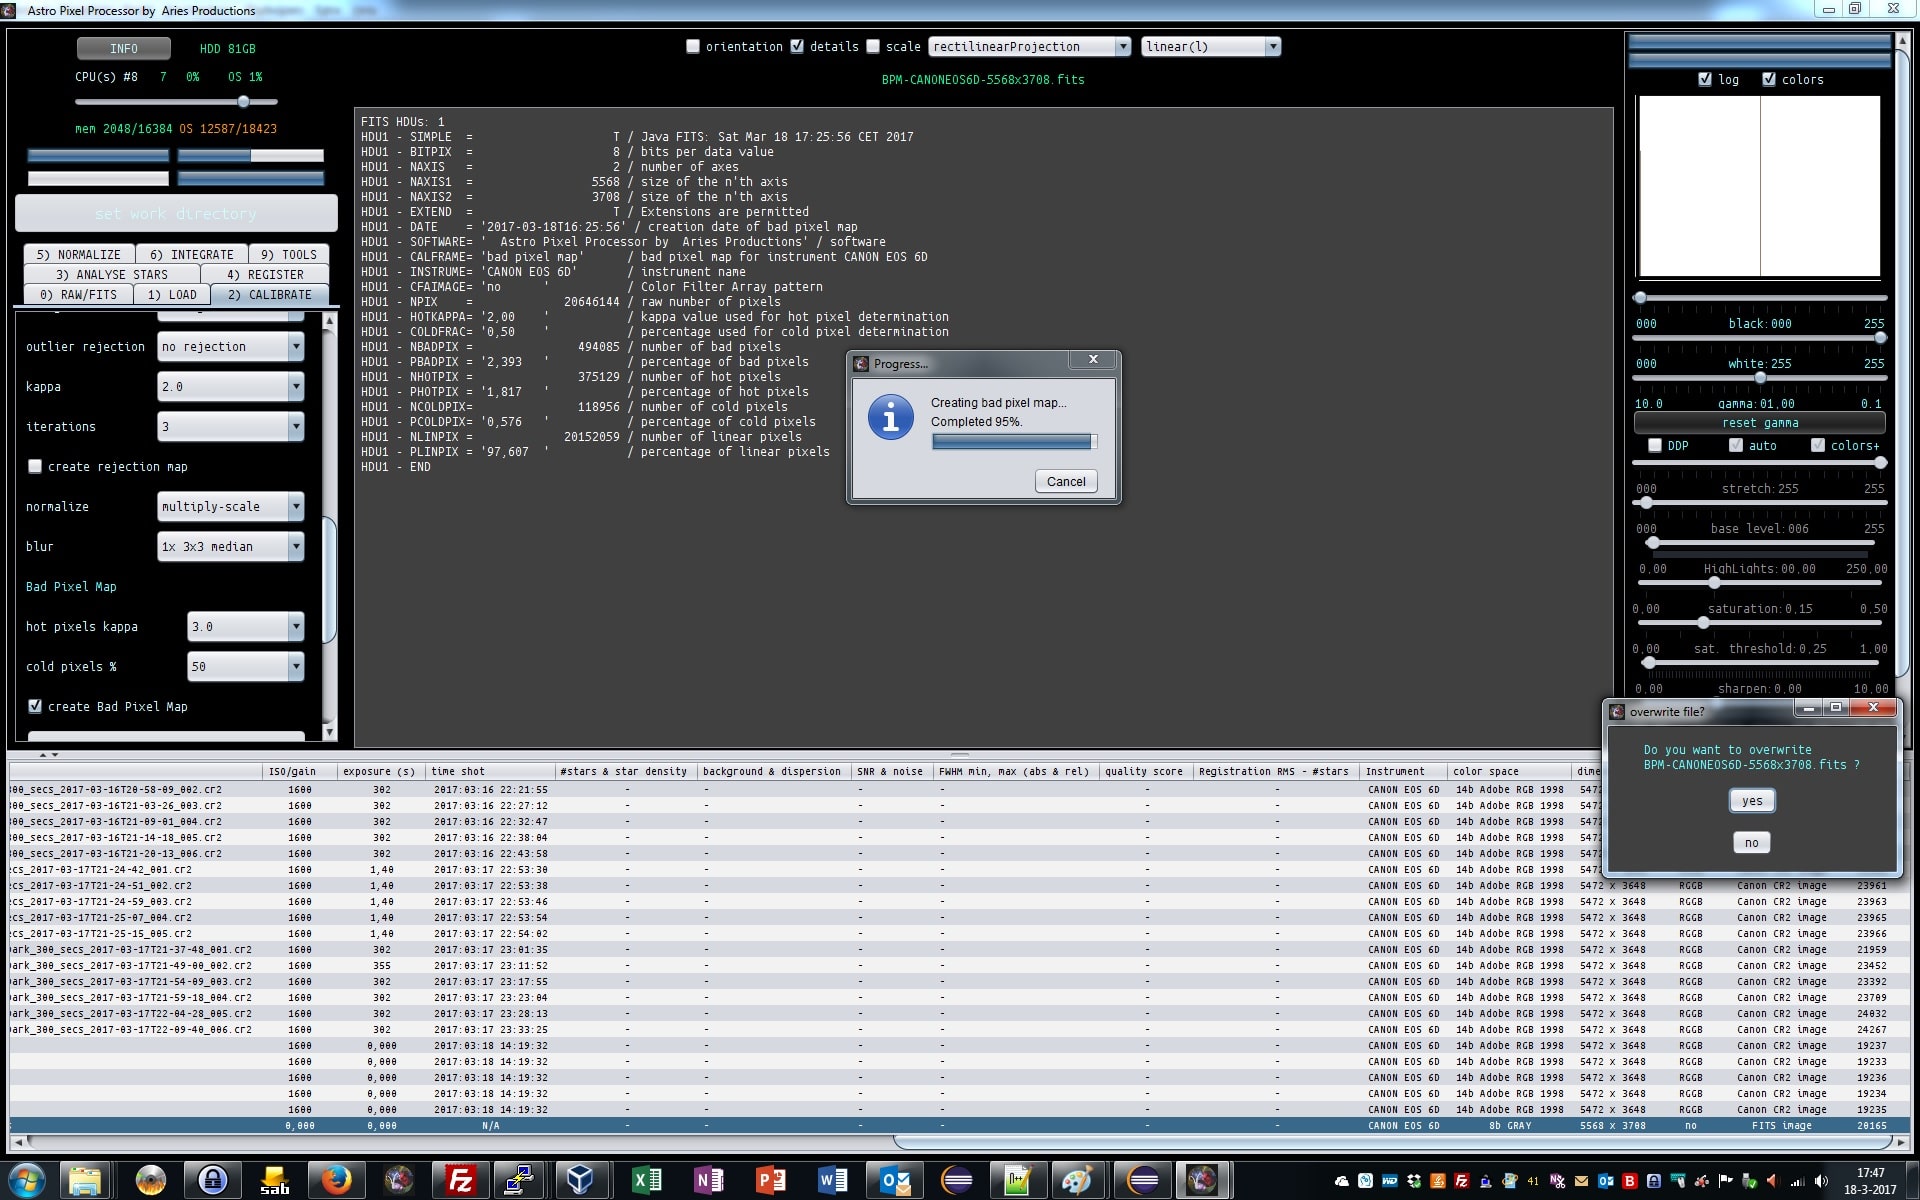
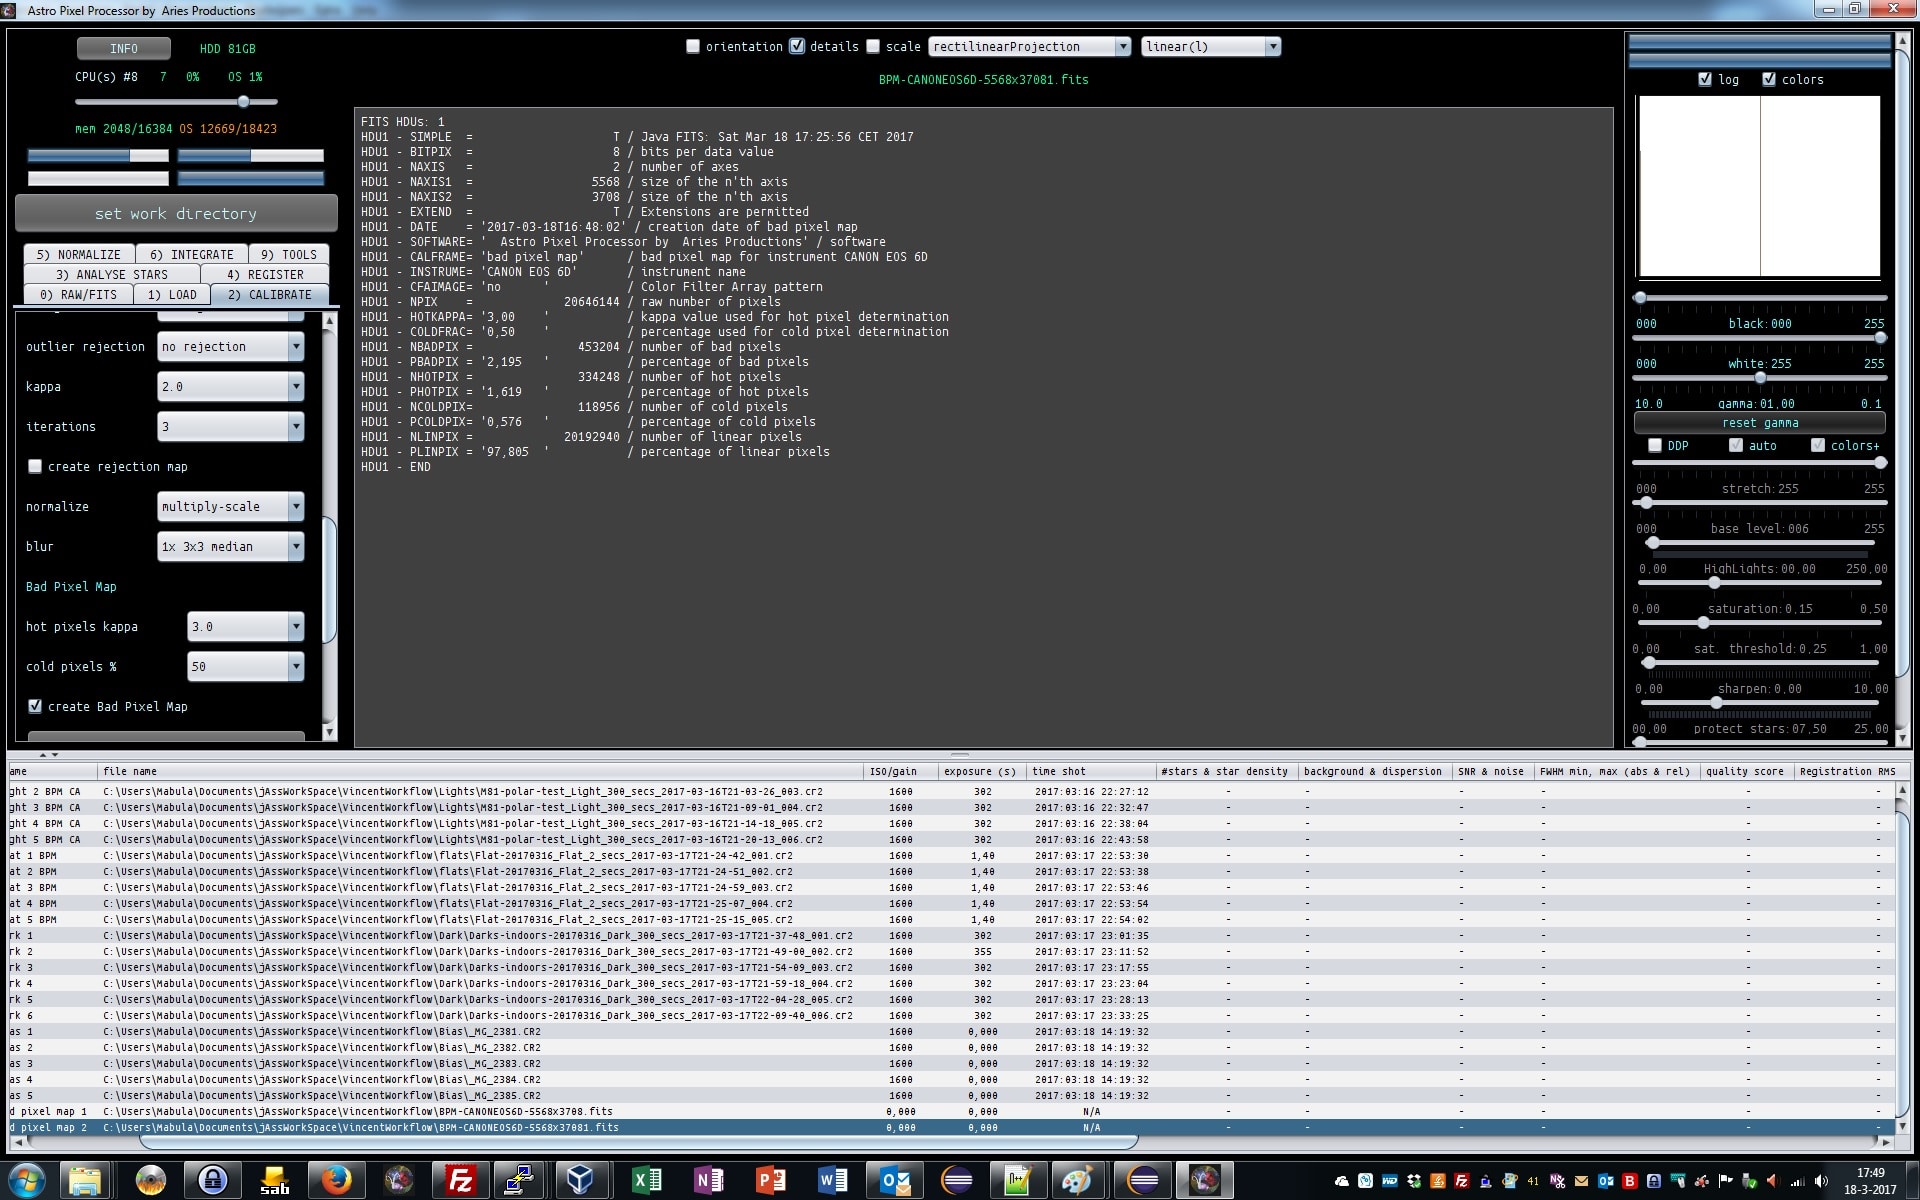
We see in the BPM statistics that APP detected almost 2% of hot pixels. This probably is too high.
I”ll be making another BPM with a bit higher hot kapps value. I’ll take 3 kappa.
Now the hot pixel % dropped to about 1.6% , which is still quite high. We will see what it does in the actual calibration of the lights later on.

 March 18, 2017 at 18:17 #12913HaverkampParticipant
Now we proceed to the creation of the master bias, master dark and master flat.
We need to stop and think about our calirbation routine now.
I want to calibrate the flats with the master bias, to properly remove the bias pedestal of the 6D camera of Vincent.
But I don’t want to calibrate the darks with the master bias. If I remove the bias from the darks, I’ll inject a bit of noise in the masterdark from the bias subtraction. Which will translate to slightly higher noise possibly in your calibrated lights. So I’ll choose to only calibrate the lights with a masterdark of darks which aren’t bias subtracted. The reason being: the bias is already in the darks ;-)
So first step is to make the master bias, we deselect the darks, flats, and lights and select the bias frames.
We set the master bias creation setttins at
2) CALIBRATE
Master bias
since I only work on 5 frames, i’ll do median combination without outlier rejection.
If you have plenty of bias, like 200-400 frames (which you should have to make a good master bias) select average and outlier rejection with 1 iteration with a kappa of 3.
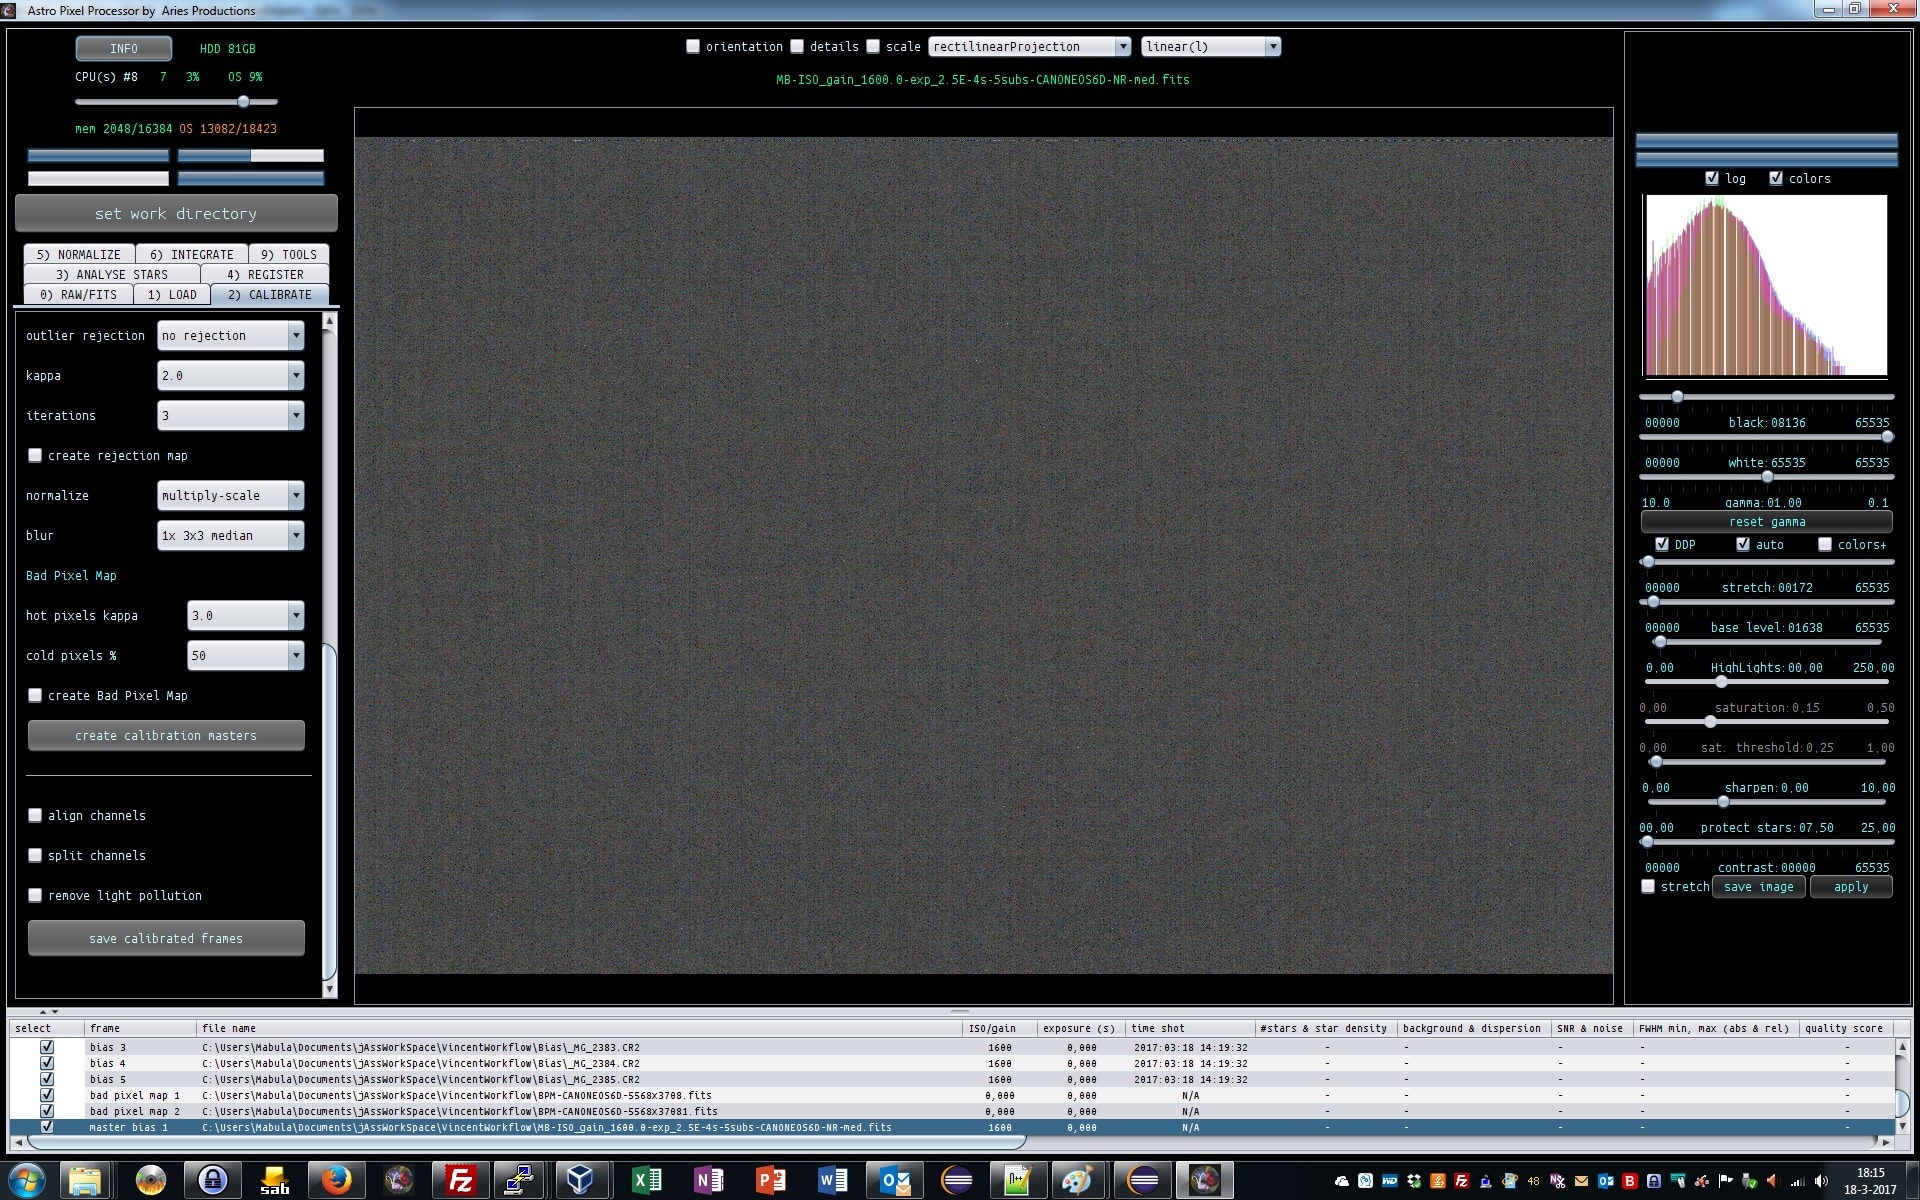
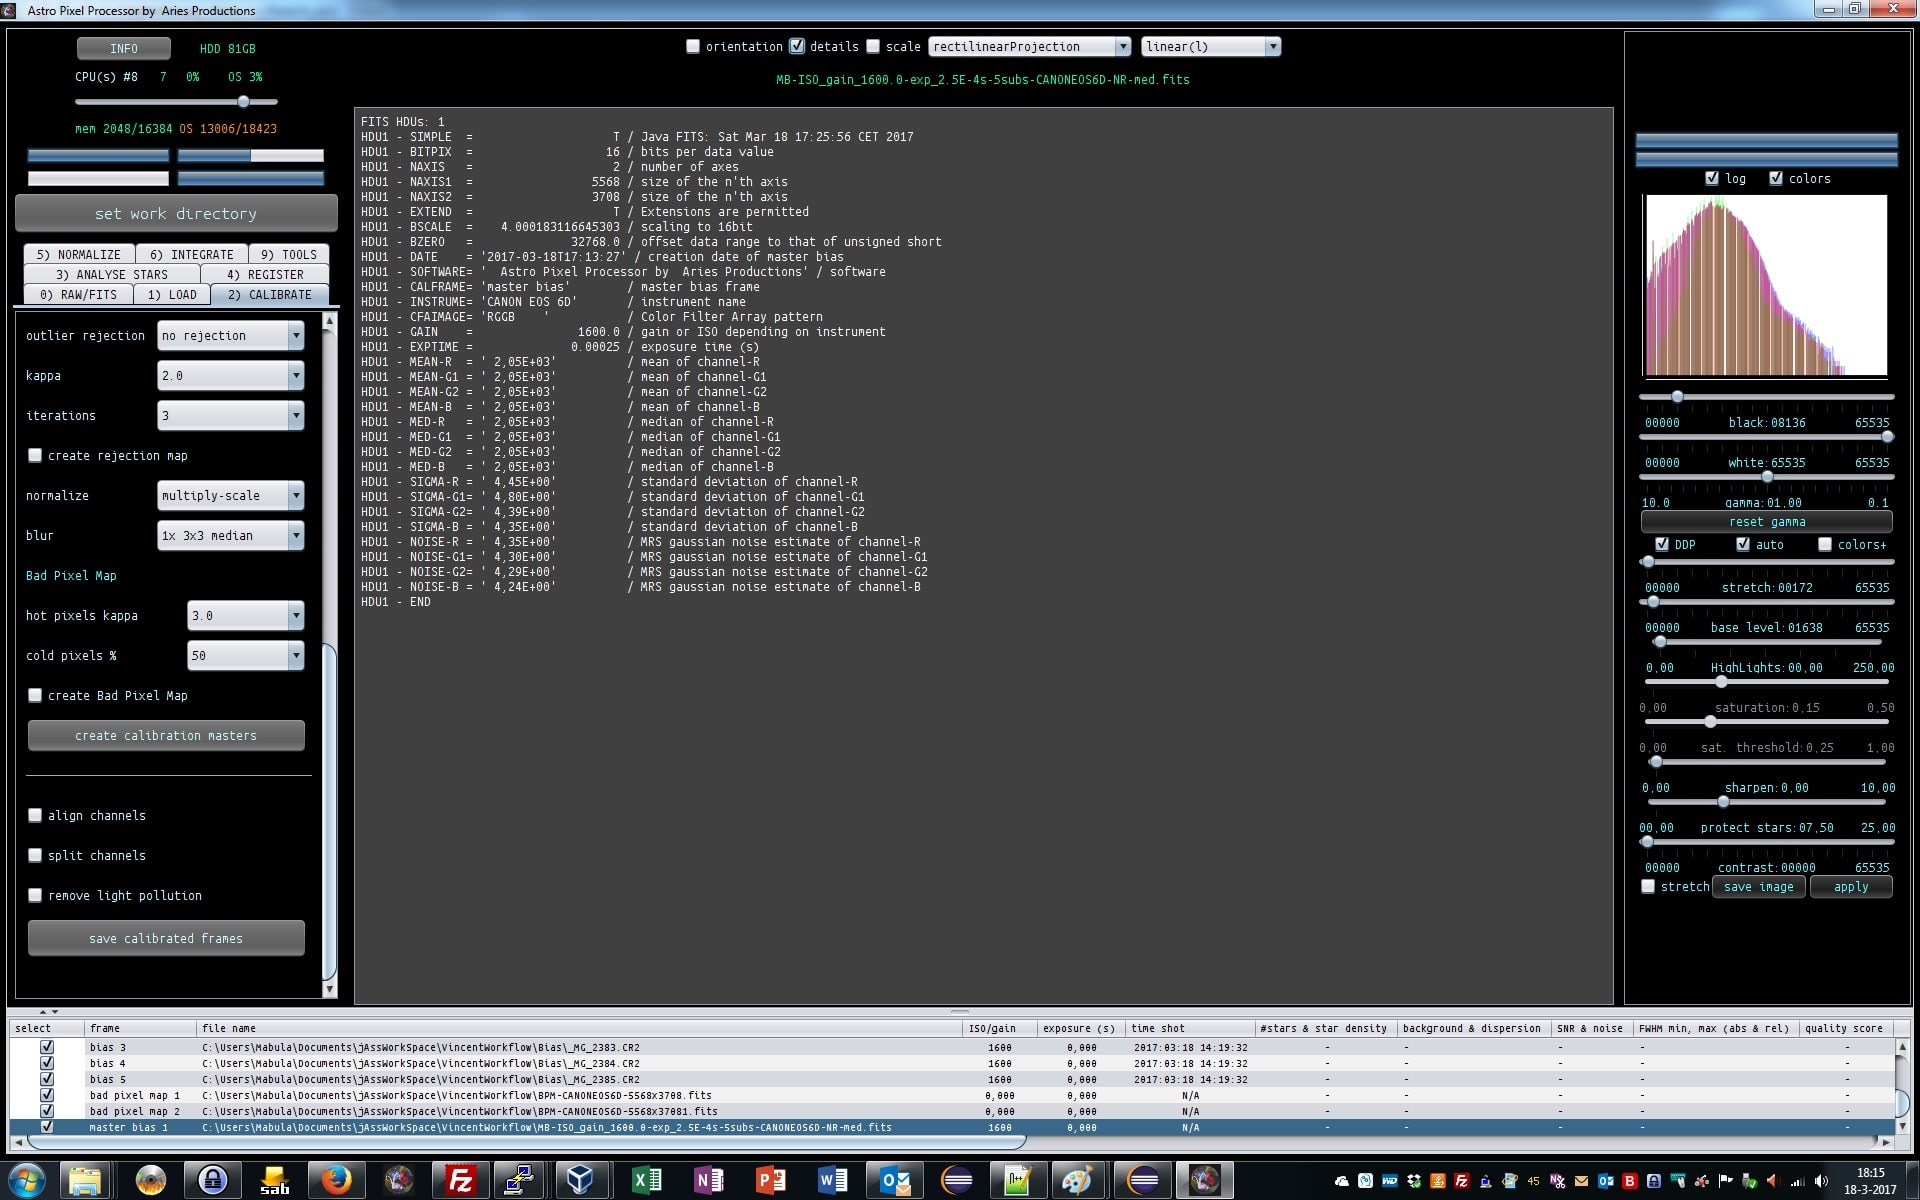
Click on create calibration masters, the master bias will be created now. In the FITS header we can see statistics of the master bias. A bias and dark (or their masters can be viewed with DDP on now).
You’ll see that APP analysis the master bias on the CFA channels and pixels seperately ;-)

 March 18, 2017 at 18:41 #12918HaverkampParticipant
Now we’ll create the master flat. We need to select the flats, the masterbias and the BPM will help as well to correct bad pixels in the flats.
I’ll remove the bias frames from the list by clicking all next to the bias button in 1) LOAD, this will deselect them and then press clean to the right of this button. Now the bias frames are removed.
The flats are selected by clicking on none next to the flats button (if they aren’t selected yet).
At the bottom, we need to check if the proper bad pixel map is selected. I’ll use the second one that we created. So I unselect the first. Otherwise the first BPM in the list is used.
And we make sure the master bias is selected as well.
At the master flat settings in 2) CALIRBATE
I use median combination again. If you have 20 flats or more, use average and outlier rejection.
set flat normalization to multipli-scale which is the default and recommended setting
Since I only work with 5 flats, and don’t want them to inject noise in the lights, I’ll choose to blur the flats to reduce possible noise injection. I’ll use 2x 3×3 median.
Click on create calirbation masters, our master flat will be created with the bias subtracted and the BPM and blurring in the flat will make a very smooth flat for flat calibration. Check the statistics again in the header of the masterflat.
From the statistics you’ll see that the green and blue channels are very weak ! Red is much stronger. But the green and blue channel are just enough illuminated it seams. the histogram peaks are fully visible in the histogram. Notice in the screenshot the preivew fitler slider settings to show the flat. DDP is off, and I manipulated the white value and gamma value.
In the statistics, you’ll also see RGB calirbation values, these are just to properly do flat calibration without upsetting the color balance in the original light frames. In APP, the flat calibration won’t affect the RGB ratios of your lights frames, unlike other programs where flat calibrated lights suddenly will have a totally different color.


 March 18, 2017 at 19:00 #12923HaverkampParticipant
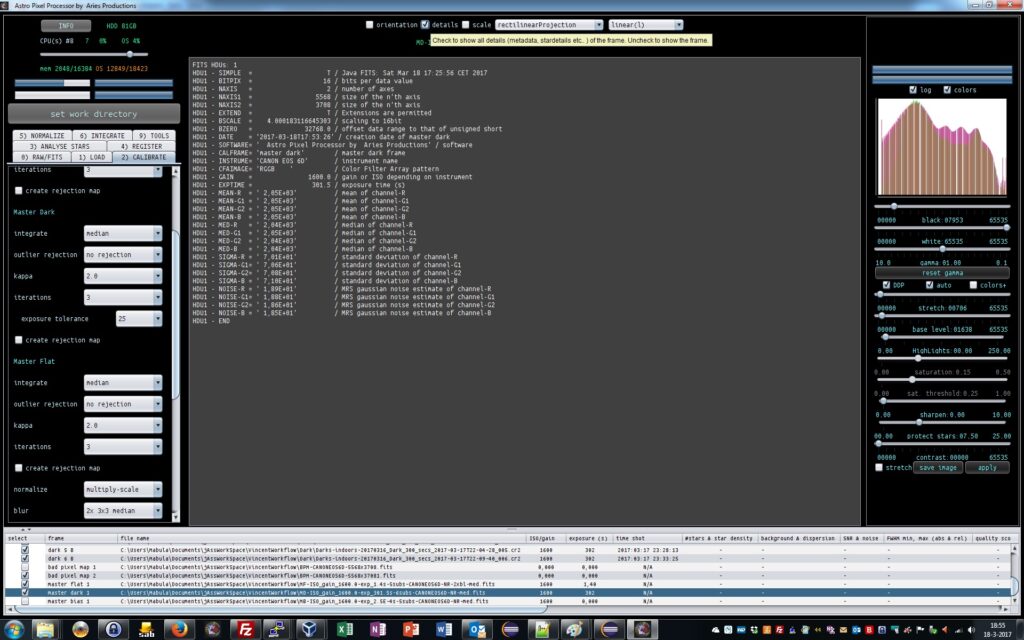
Finally let’s make the master dark, first remove the flats of the list and unselect the master bias, since we don’t want to subtract the master bias from the darks.
2) Calibrate master dark settings
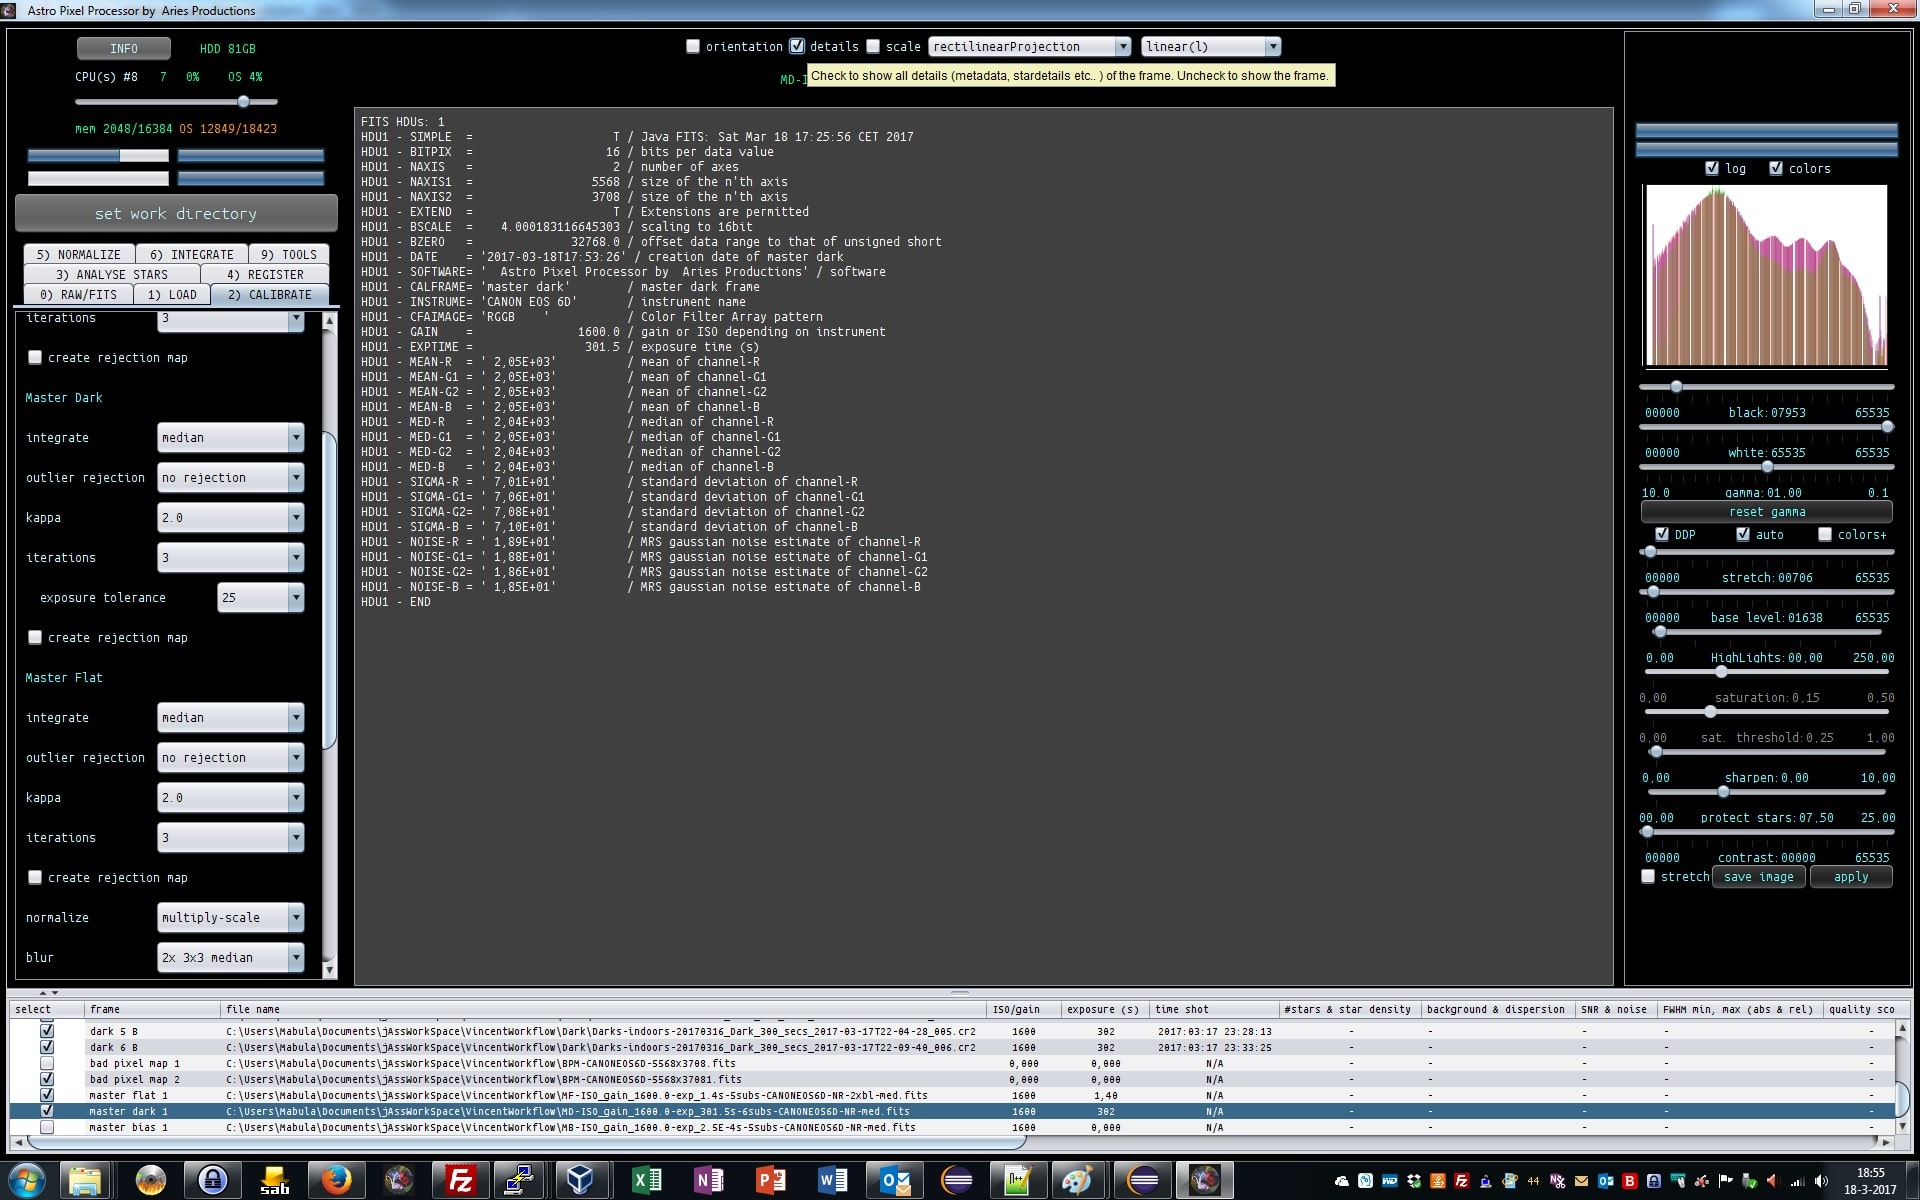
I’ll use median again. Again if you have more than 10-20 darks, use average and outlier rejection. Since one of the darks is 350 seconds and the others are 300 seconds, I’ll choose to include this 350s dark into the masterdark.
We can do this by changing the exposure tolerance to 25%. So all frames with exposure tims within 25% of each other will be considered the same for creation of the master dark. Al darks outside of this range would be otherwise used to create other masterdarks for other exposure times.
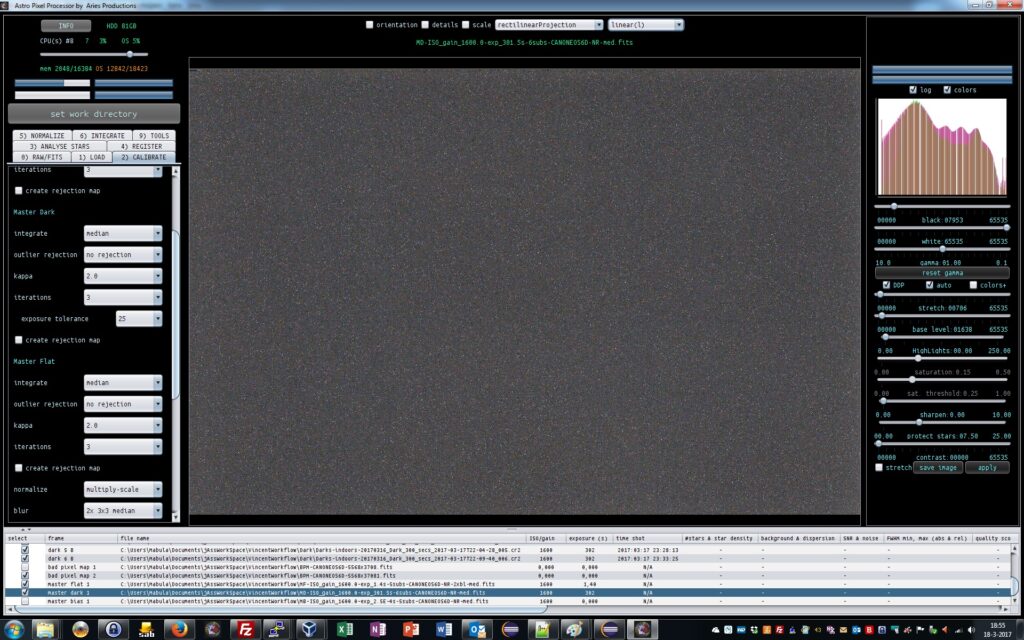
Again click on create calibration frames and check the statistics of your master dark.
The master dark can be shown nicely again with DDP on. Don’t forget to adjust the White and gamma sliders to default settings. See screenshot. Looking at the master dark, it’s quite obvious the sensor has a lot of bad pixels. So the high value in the Bad Pixel Map of hot pixels seems to be quite correct.
 March 18, 2017 at 19:11 #12925HaverkampParticipant
Now we have all master calibration files properly created for our light frames.
We have a Bad Pixel Map, a masterdark without bias subtraction and we have a smooth master flat of bias subtracted flats and BPM corrected as well.
We need to remove the flats from our list.
And we make sure only the (second )BPM, masterdark and masterflat is selected to calibrate our light frames.
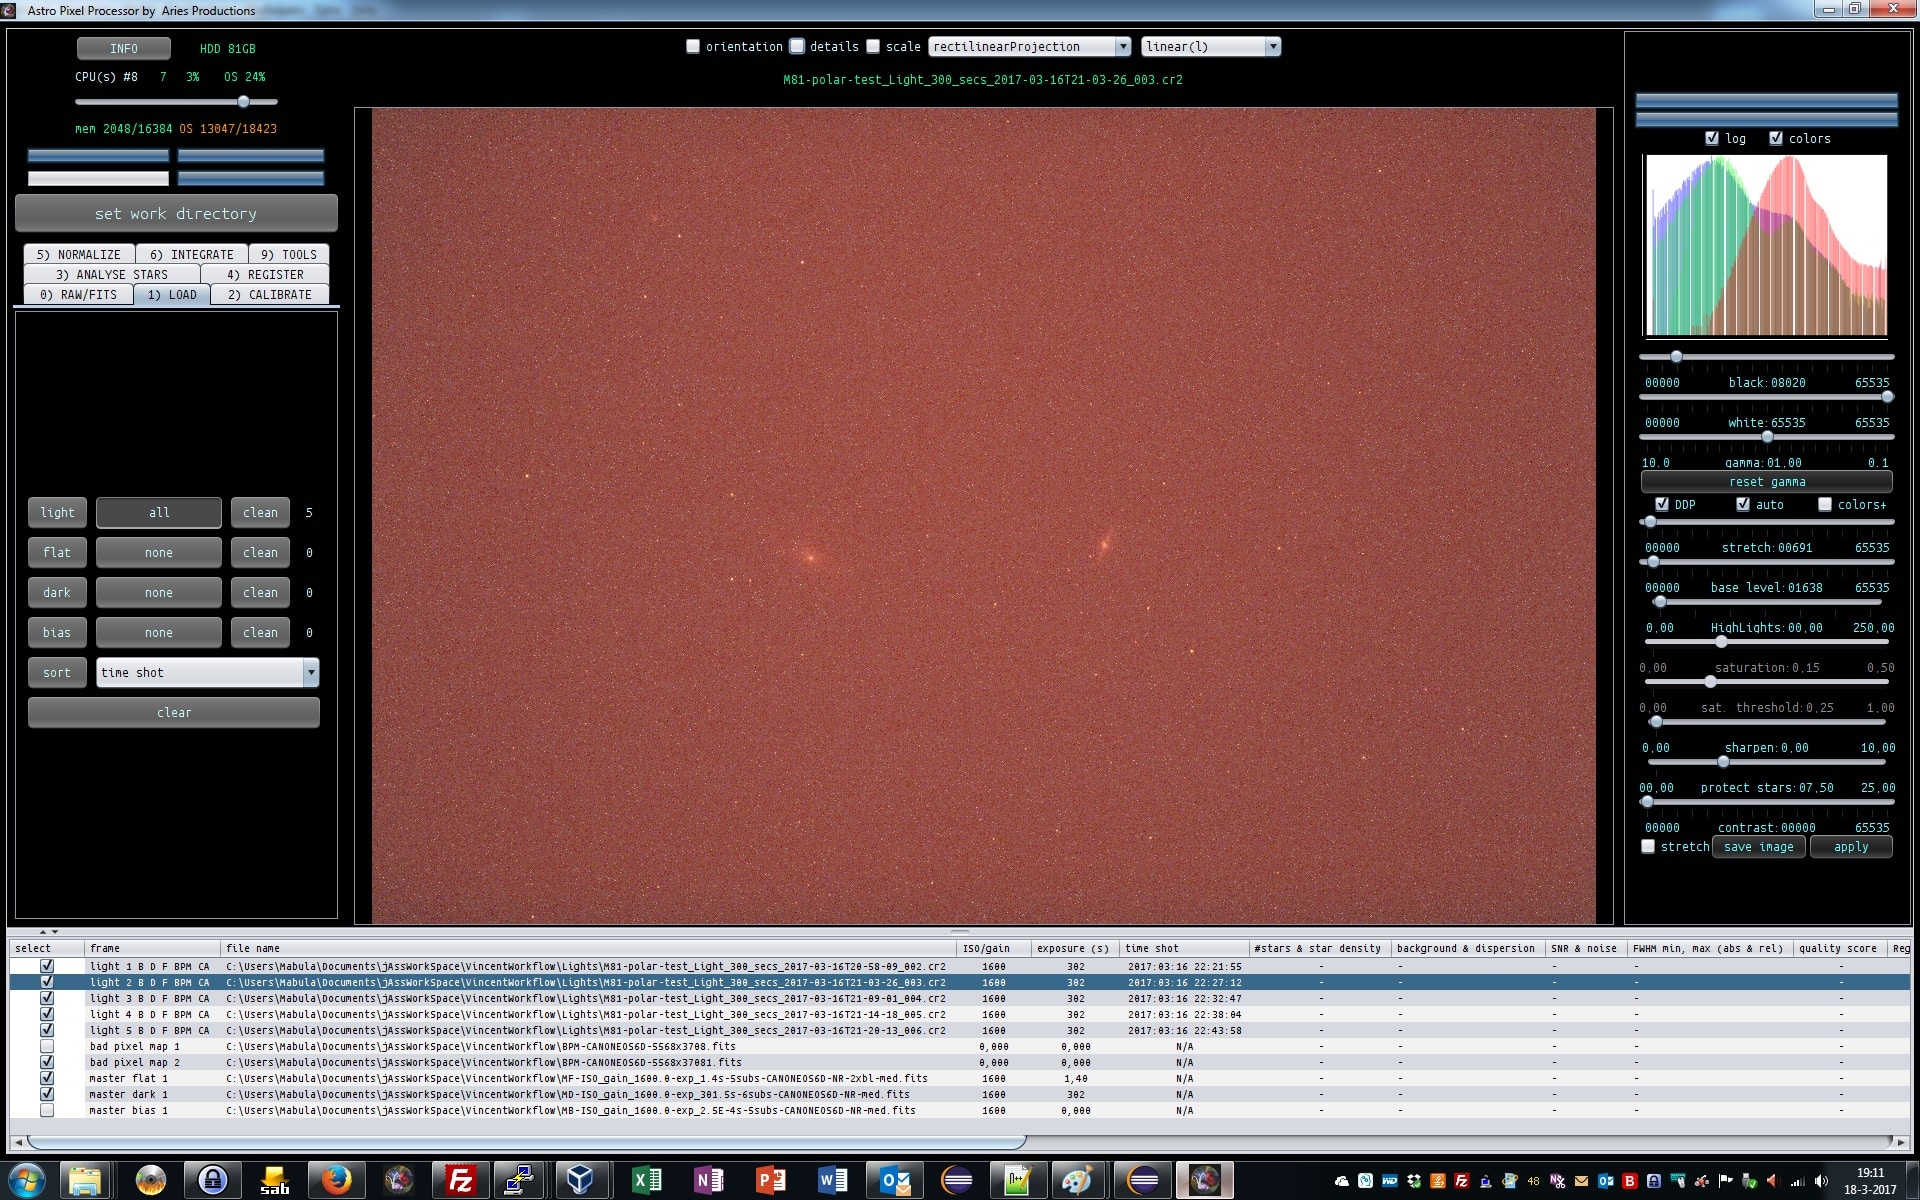
First let’s have a look at an uncalibrated light frame, please check the selection in the file list, so you can see that we have unselected the master bias:
 March 18, 2017 at 19:20 #12931HaverkampParticipant
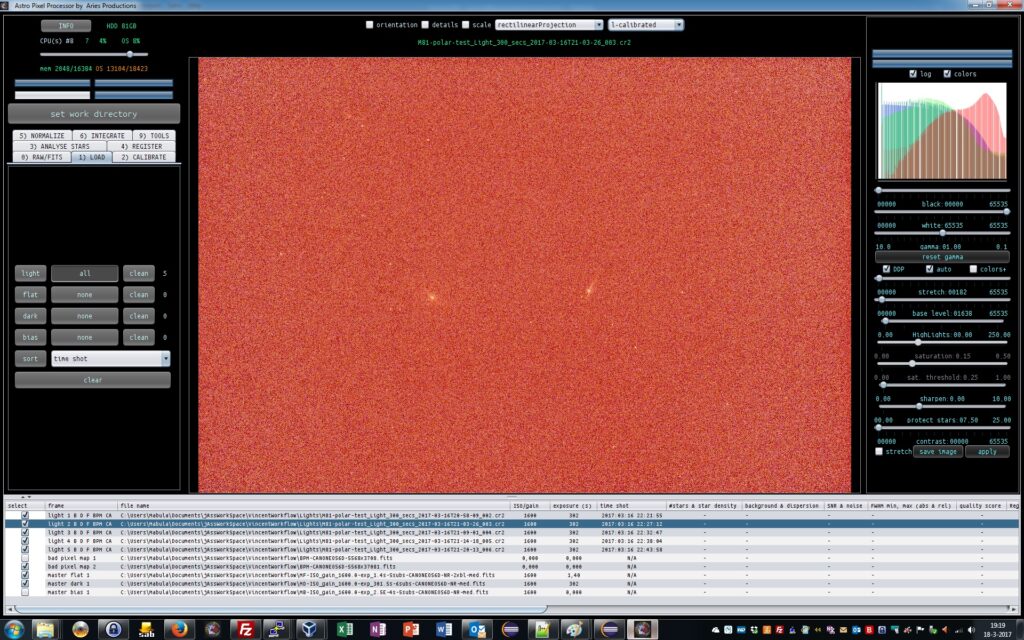
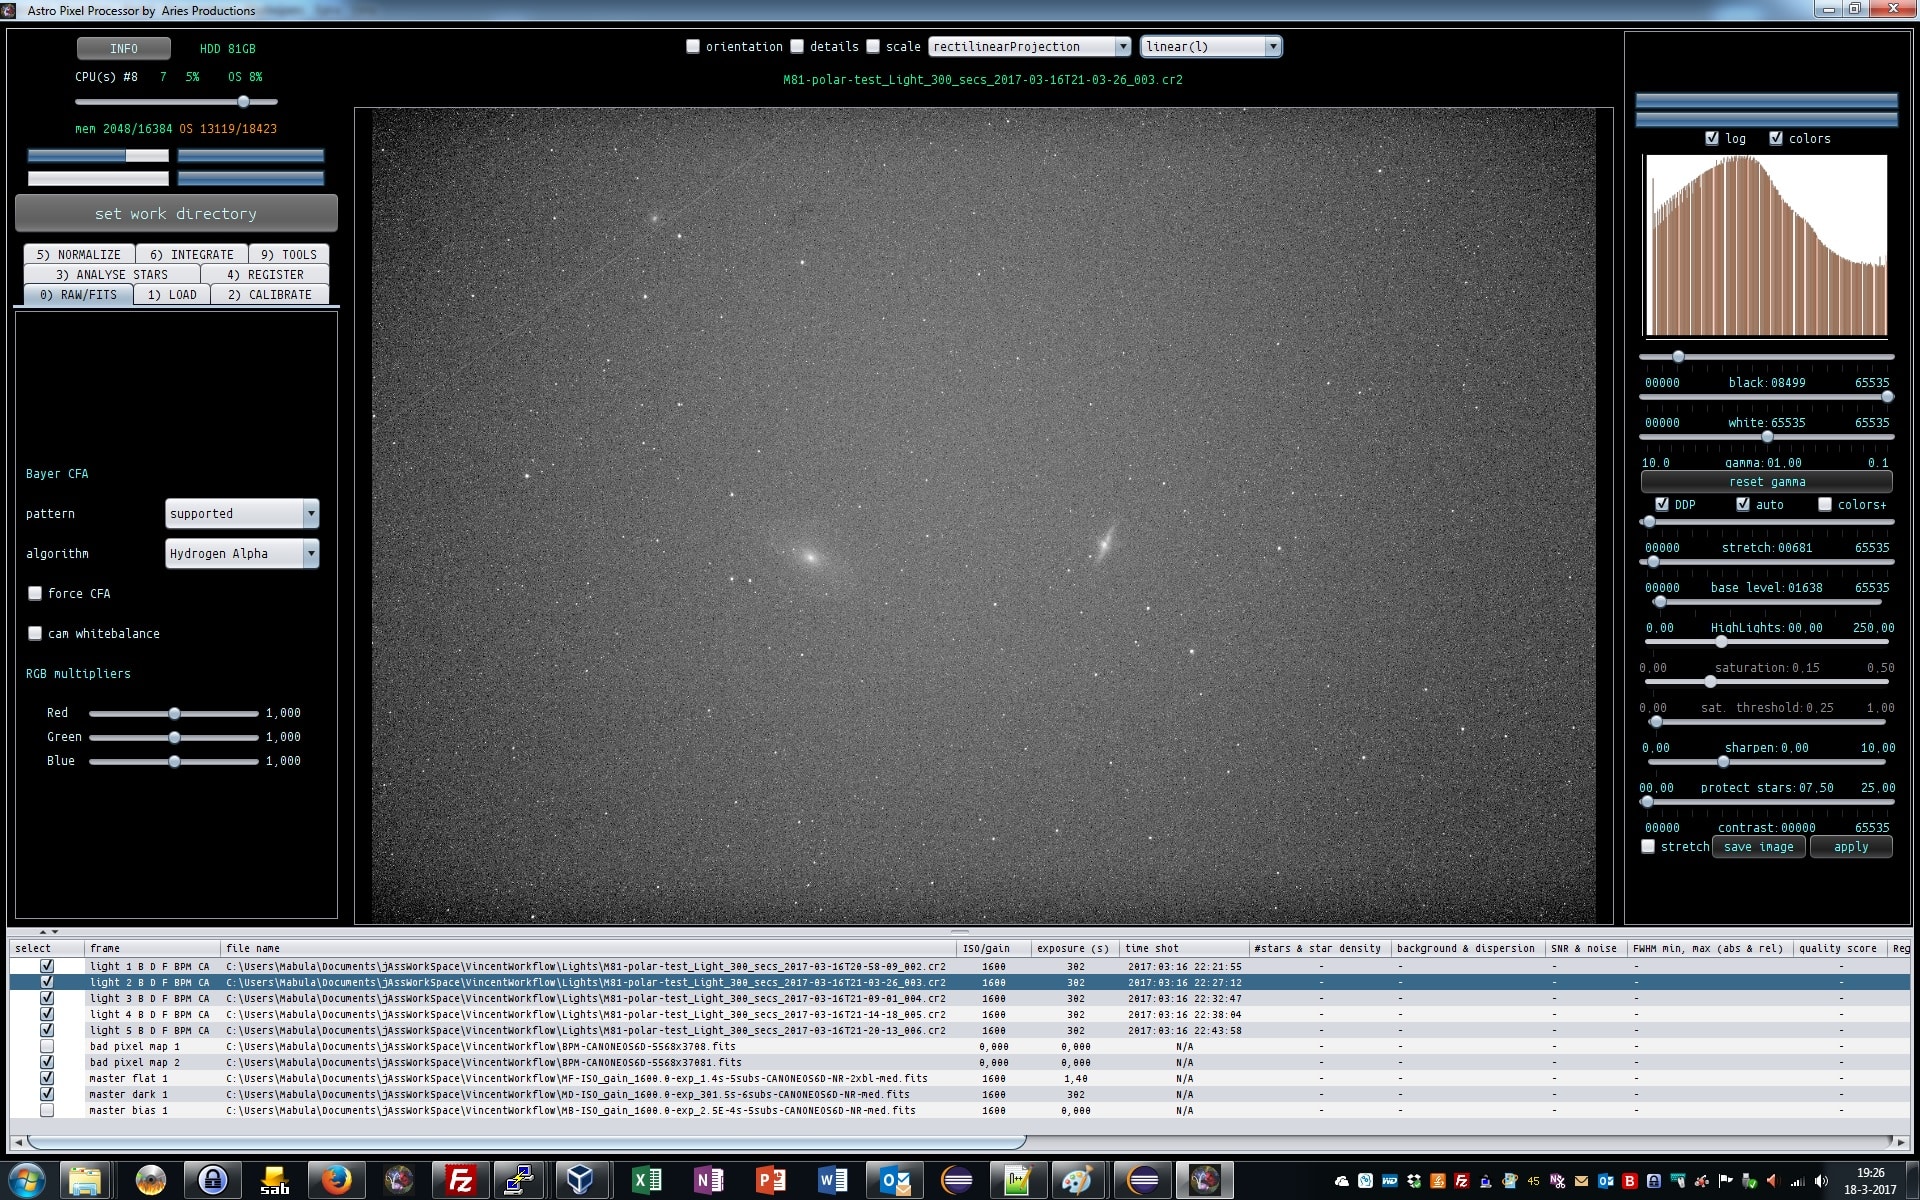
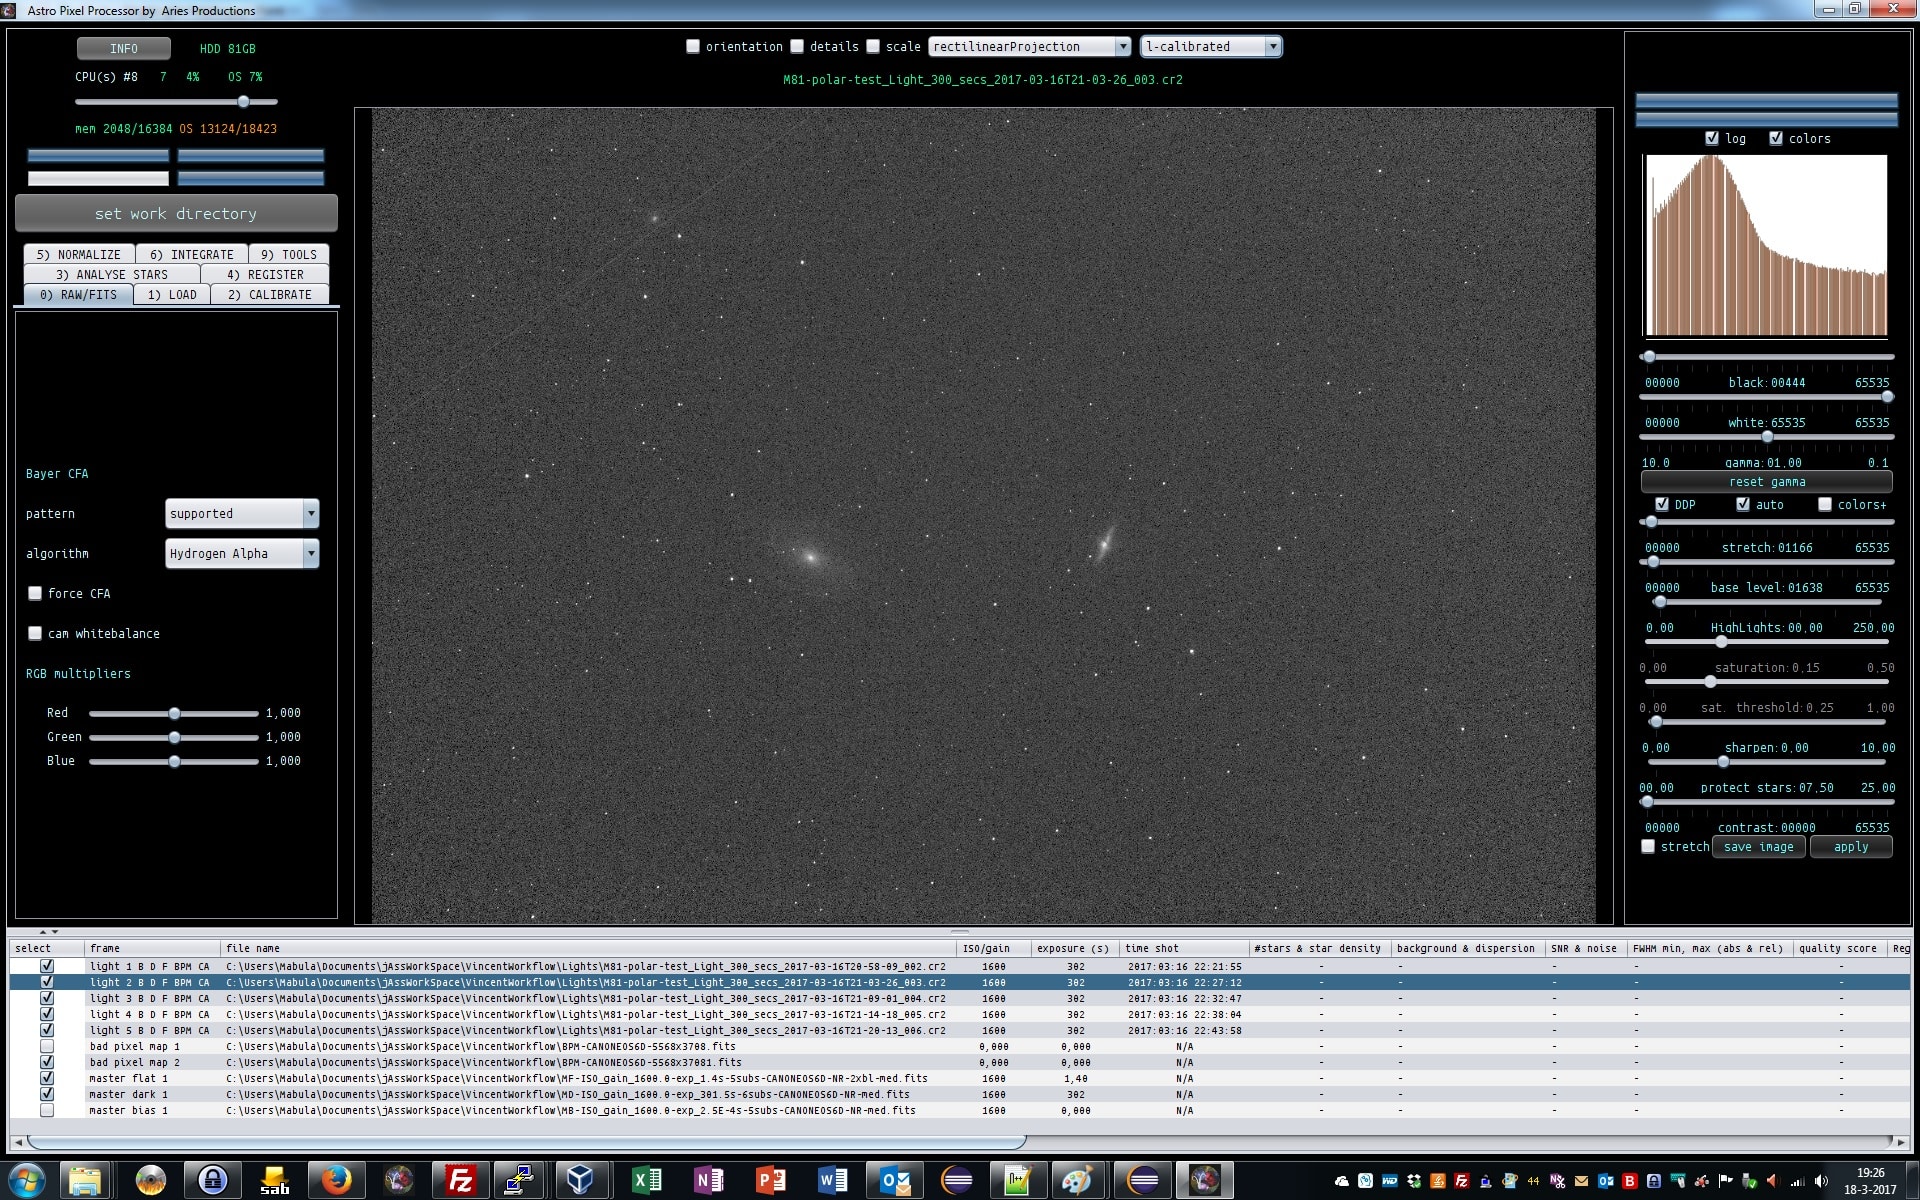
With APP we can now visually check the effect of the master calibration files on the light frame.
At the top of our application we have a dropdown box which is set at linear by default. This means: show the linear data ;-)
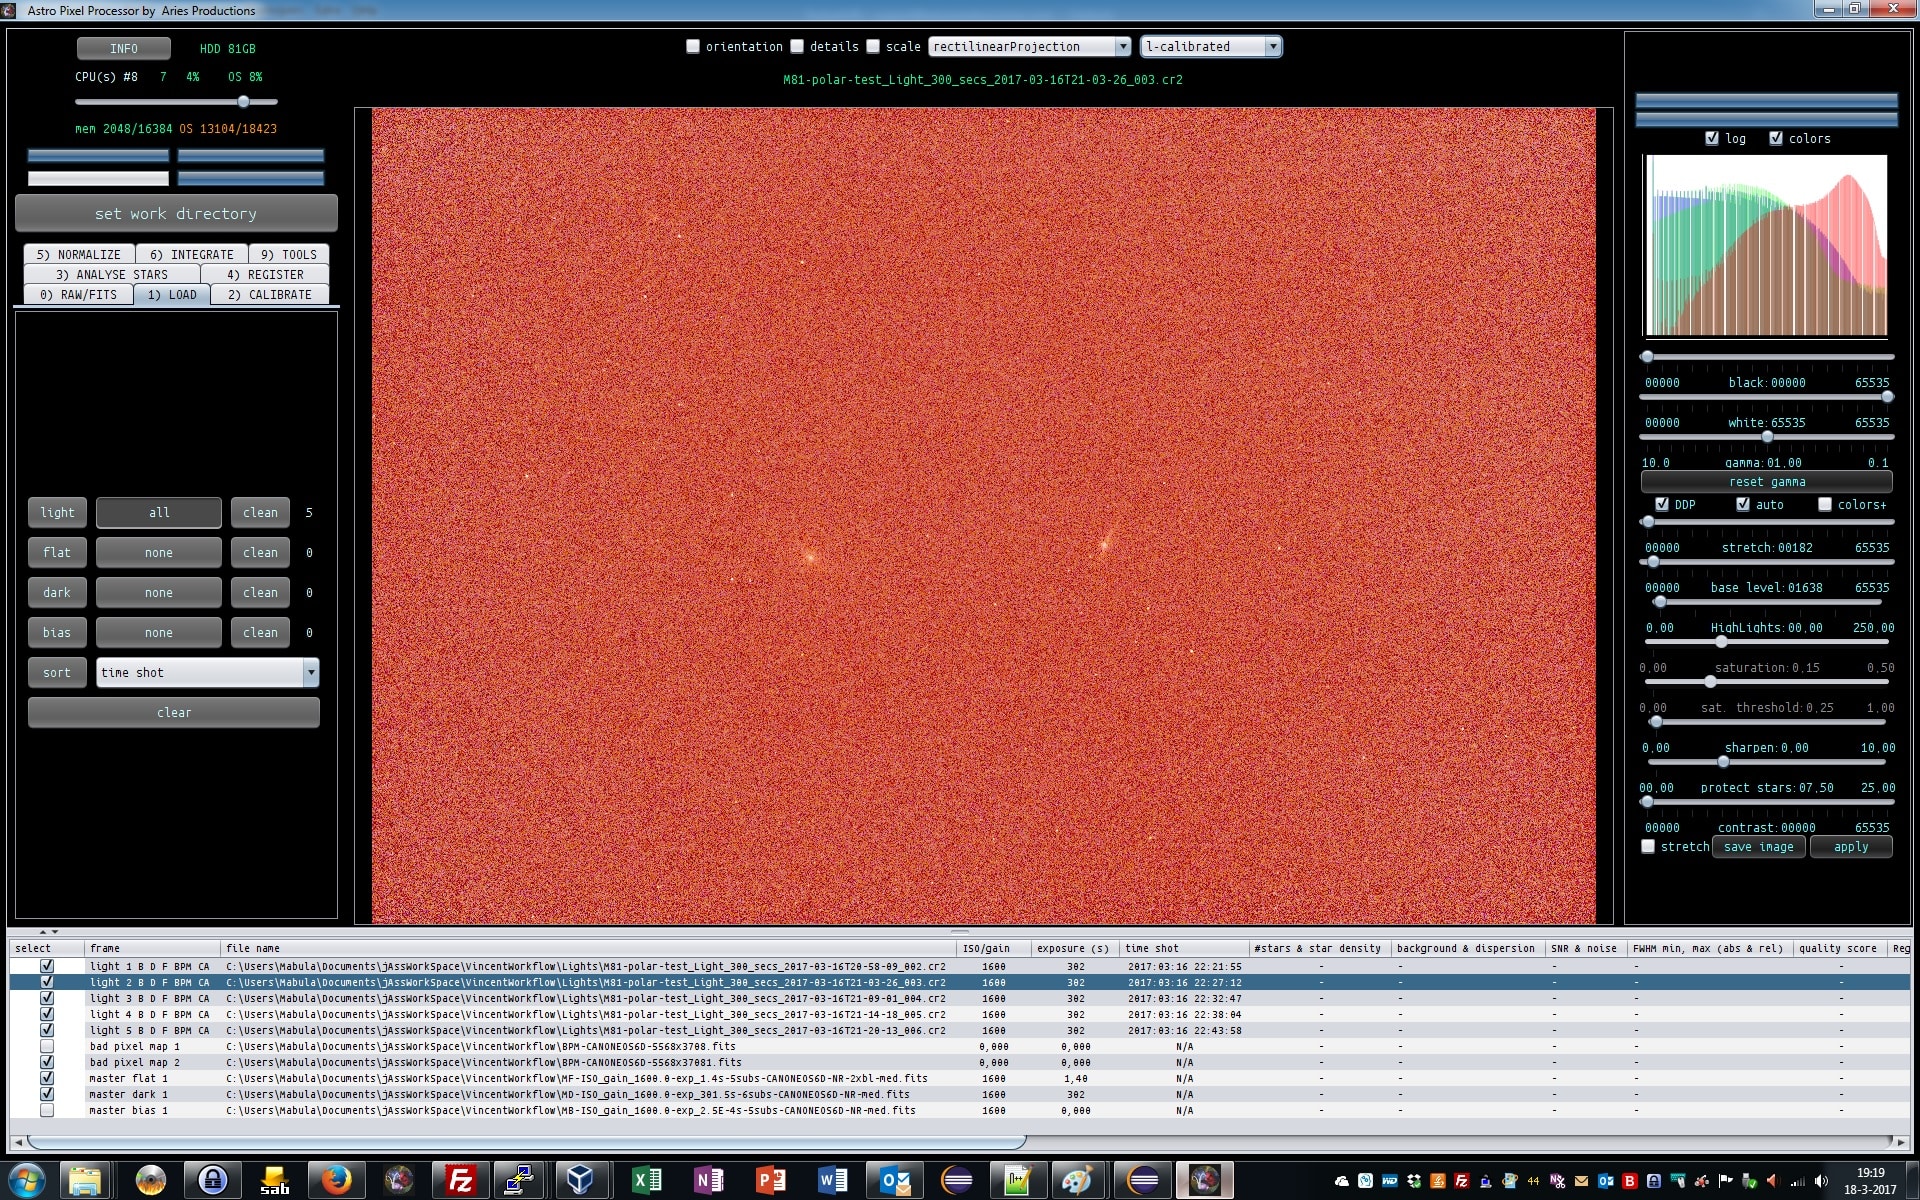
We can select now L-calibrated, this means: show the linear calirbated data. So you don’t need to actually apply the calirbation. APP can just do the calibration internally in the image loaders, to show you the calibrated data without actually applying or saving the calibrated data.
Lets put them together, first the light frame, and secondly, the calibrated light frame

 March 18, 2017 at 19:29 #12934HaverkampParticipant
This actually looks pretty bad, only signal in the red channel.
Luckily there is a very good explanation. This is H-alpha data shot with a H-alpha filter.
APP can deal with this immediately and properly. You don’t need to split the channels to work only with the red channel. You can just select the H-alpha debayer algorithm to immediately show the H-alpha monochrome data collected with the Canon 6D of Vincent.
I apply the H-alpha debayer algortihm in 0) RAW/FITS menu, by selecting Hydrogen-Alpha in the Bayer CFA algortihm dropdown box.
Again the single light, with H-alpha debayer, and next to it, the calirbated H-alpha data, everything is shown with the auto DDP function of APP, so you get automatically stretched preview data on your screen from your linear data. So all data stays linear.

 March 18, 2017 at 21:29 #12937
 GroenewoldParticipant
Damn Mabula, this is awesome! It really shows how to proceed and think about how to go about the workflow, which is quite different from what I did at first. It makes a lot of sense, great to learn it and thanks a bunch!
-
AuthorPosts


- You must be logged in to reply to this topic.