

@bula
active 4 years, 8 months ago
Astro Pixel Processor review by Sara Wager in
Sky at Night magazine, January 2018
Released today ;-) !
http://www.skyatnightmagazine.com/issue/january-2018 View
- Load More
Haverkamp replied to the topic Data calibration workflow and processing in APP in the forum Methoden en Technieken
Now we have all master calibration files properly created for our light frames.
We have a Bad Pixel Map, a masterdark without bias subtraction and we have a smooth master flat of bias subtracted flats and BPM corrected as well.
We need to remove the flats from our list.
And we make sure only the (second )BPM, masterdark and masterflat is selected to calibrate our light frames.
First let's have a look at an uncalibrated light frame, please check the selection in the file list, so you can see that we have unselected the master bias:SingleLight

Haverkamp replied to the topic Data calibration workflow and processing in APP in the forum Methoden en Technieken
Finally let's make the master dark, first remove the flats of the list and unselect the master bias, since we don't want to subtract the master bias from the darks.
2) Calibrate master dark settings
I'll use median again. Again if you have more than 10-20 darks, use average and outlier rejection. Since one of the darks is 350 seconds and the others are 300 seconds, I'll choose to include this 350s dark into the masterdark.
We can do this by changing the exposure tolerance to 25%. So all frames with exposure tims within 25% of each other will be considered the same for creation of the master dark. Al darks outside of this range would be otherwise used to create other masterdarks for other exposure times.
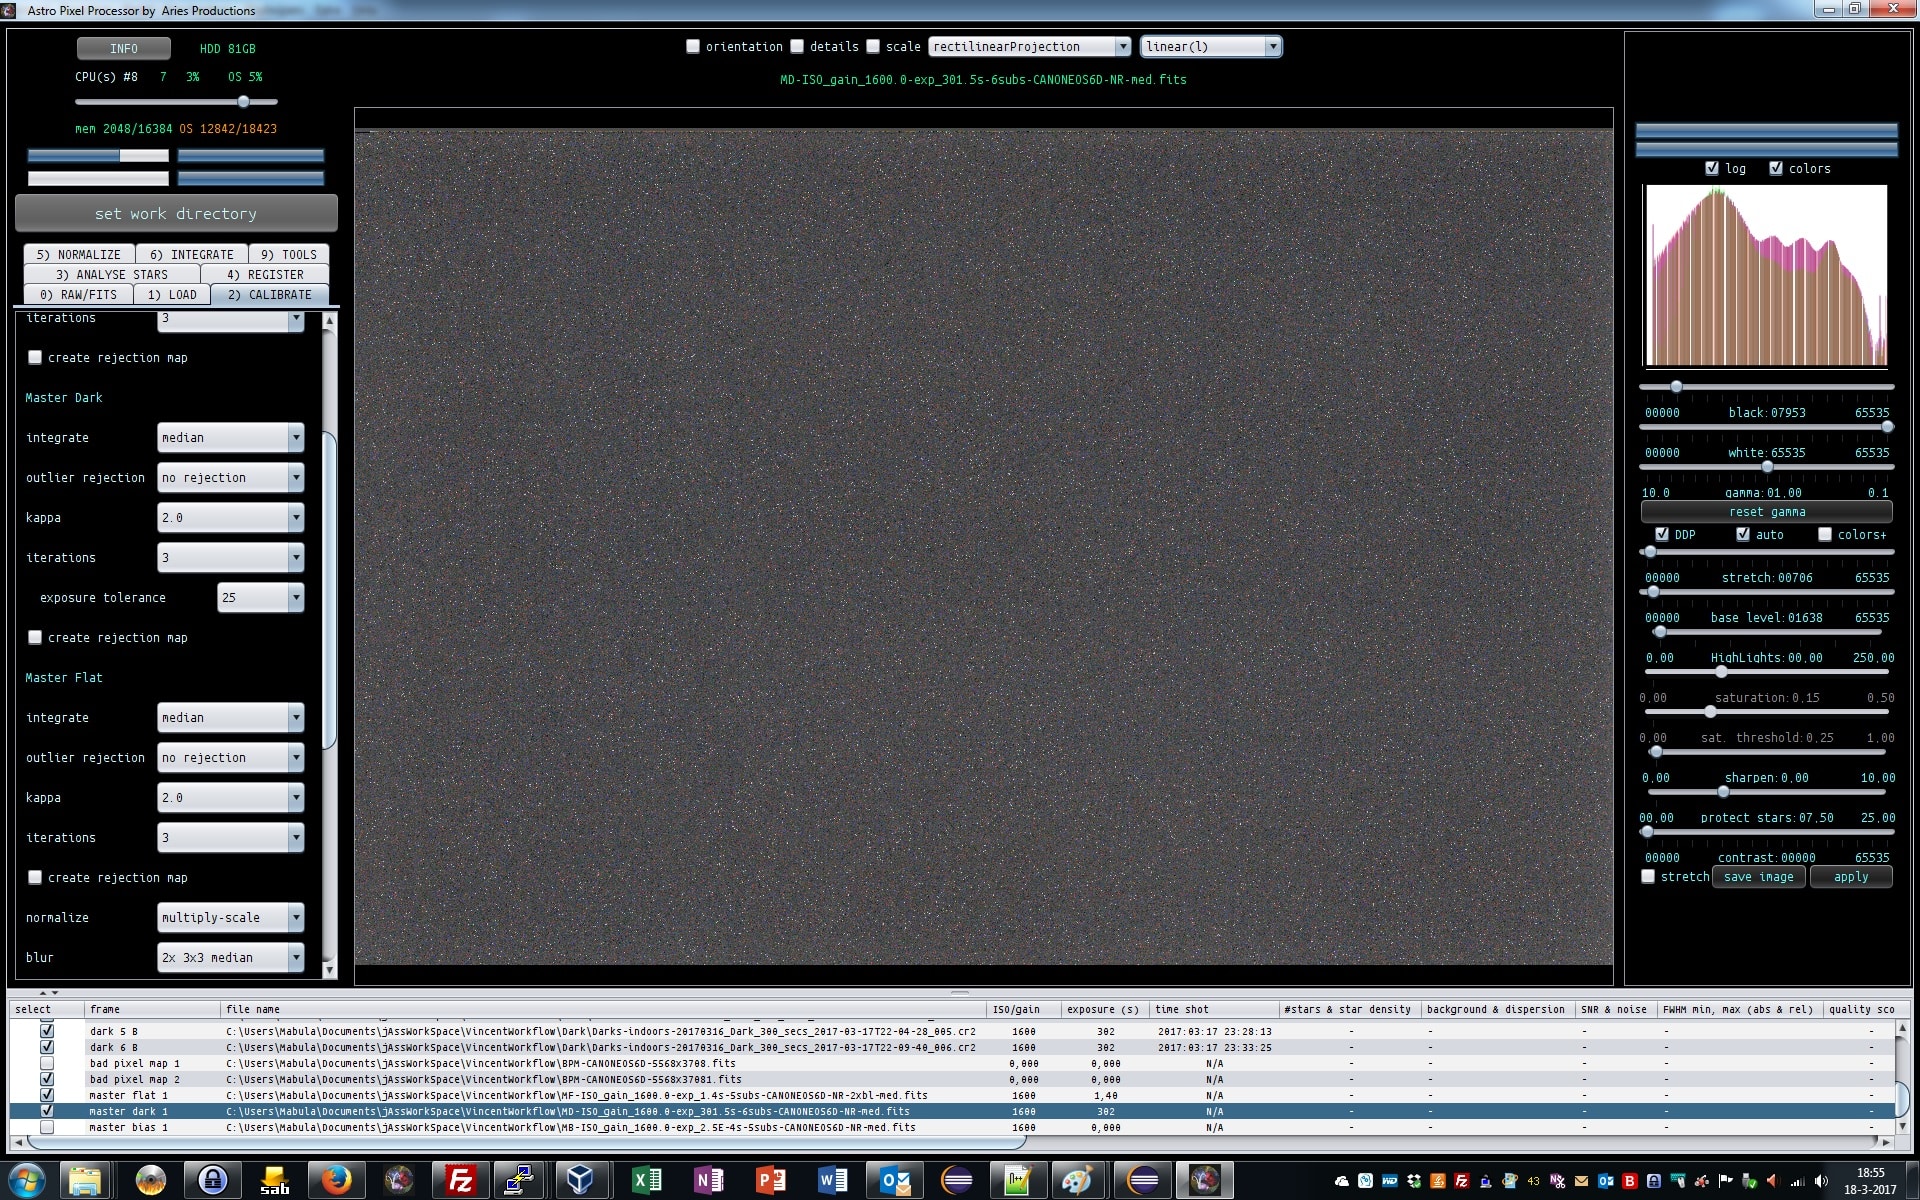
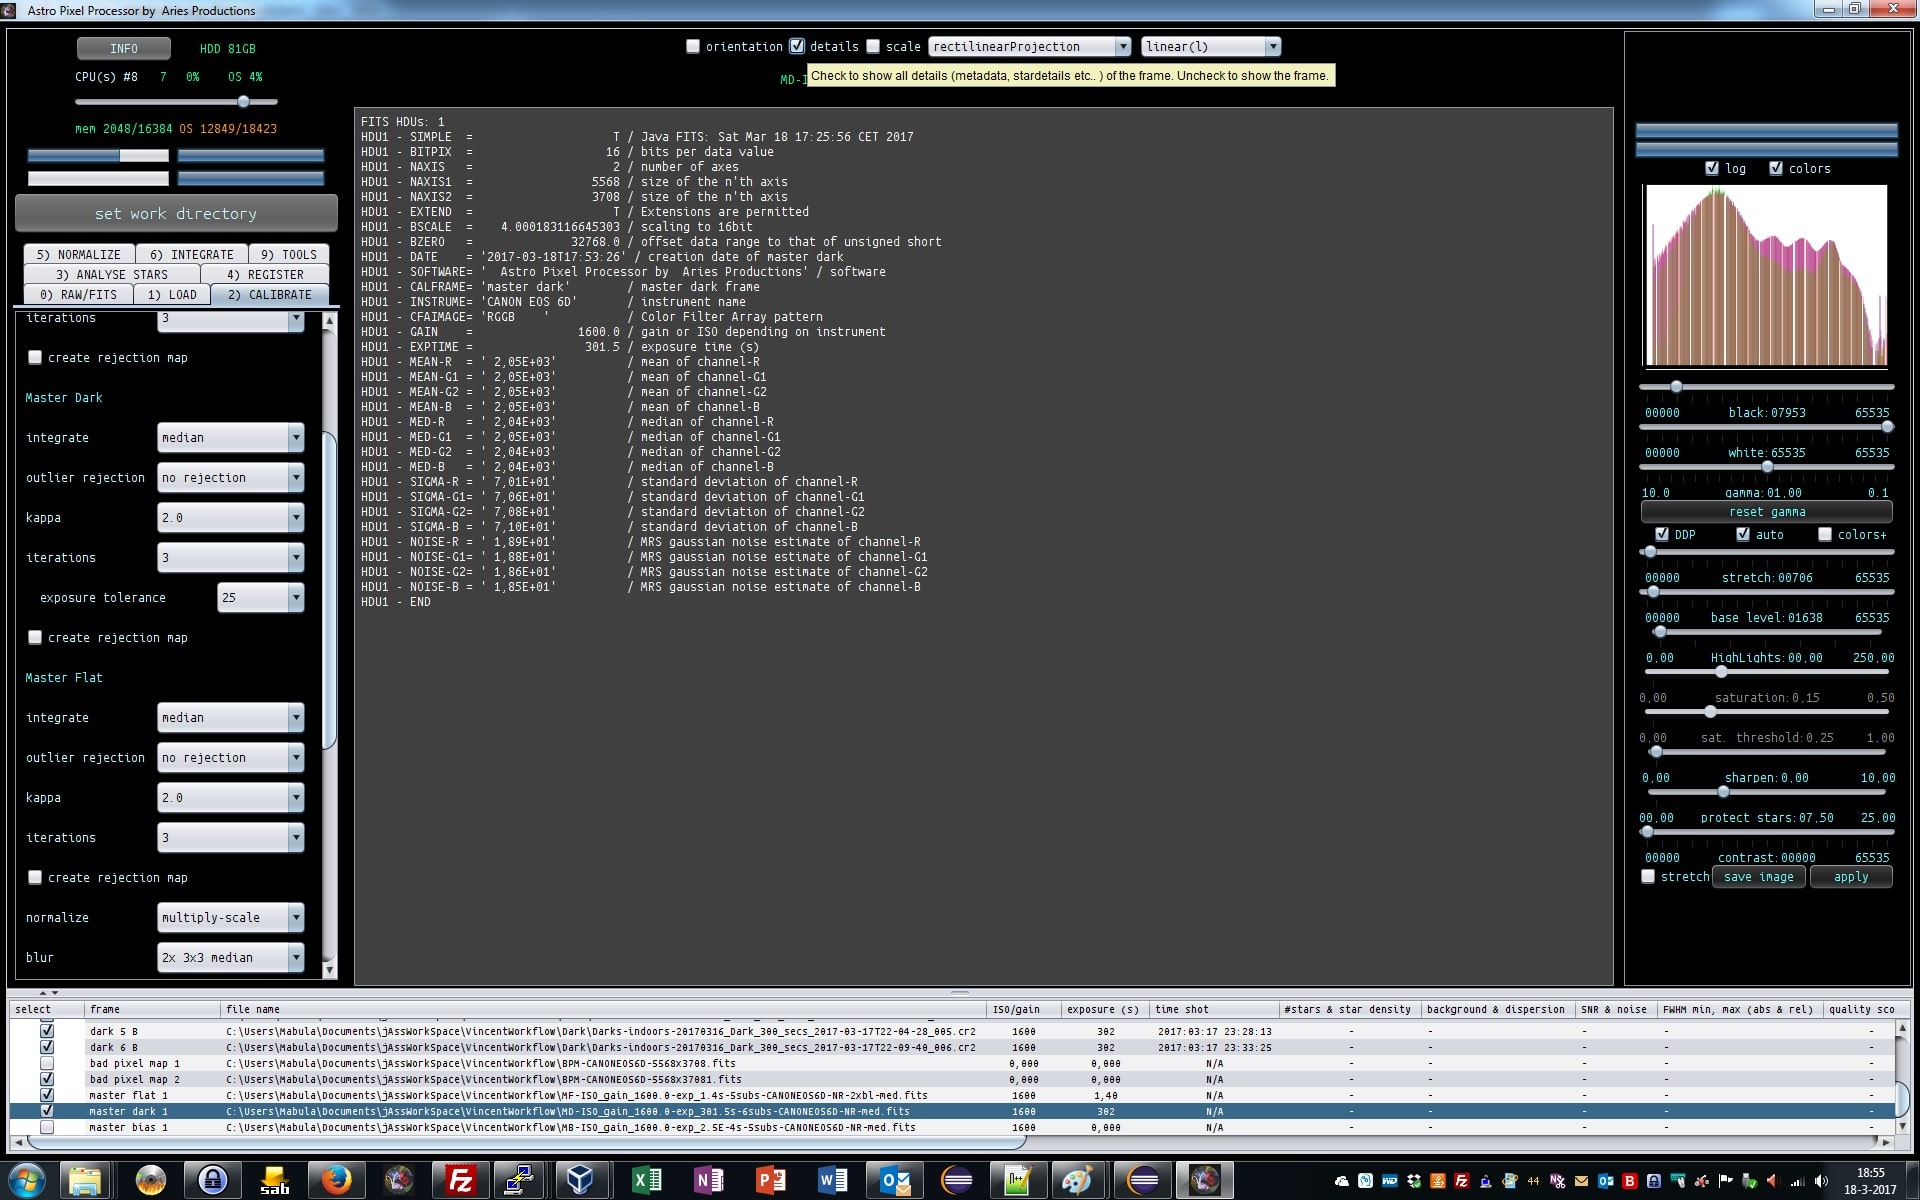
Again click on create calibration frames and check the statistics of your master dark.
The master dark can be shown nicely again with DDP on. Don't forget to adjust the White and gamma sliders to default settings. See screenshot. Looking at the master dark, it's quite obvious the sensor has a lot of bad pixels. So the high value in the Bad Pixel Map of hot pixels seems to be quite correct.masterdarkmasterdarkStats
Haverkamp replied to the topic Data calibration workflow and processing in APP in the forum Methoden en Technieken
Finally let's make the master dark, first remove the flats of the list and unselect the master bias, since we don't want to subtract the master bias from the darks.
2) Calibrate master dark settings
I'll use median again. Again if you have more than 10-20 darks, use average and outlier rejection. Since one of the darks is 350 seconds and the others are 300 seconds, I'll choose to include this 350s dark into the masterdark.
We can do this by changing the exposure tolerance to 25%. So all frames with exposure tims within 25% of each other will be considered the same for creation of the master dark. Al darks outside of this range would be otherwise used to create other masterdarks for other exposure times.
Again click on create calibration frames and check the statistics of your master dark.
The master dark can be shown nicely again with DDP on. Don't forget to adjust the White and gamma sliders to default settings. See screenshot. Looking at the master dark, it's quite obvious the sensor has a lot of bad pixels. So the high value in the Bad Pixel Map of hot pixels seems to be quite correct.masterdarkmasterdarkStats
Haverkamp replied to the topic Data calibration workflow and processing in APP in the forum Methoden en Technieken
Now we'll create the master flat. We need to select the flats, the masterbias and the BPM will help as well to correct bad pixels in the flats.
I'll remove the bias frames from the list by clicking all next to the bias button in 1) LOAD, this will deselect them and then press clean to the right of this button. Now the bias frames are removed.
The flats are selected by clicking on none next to the flats button (if they aren't selected yet).
At the bottom, we need to check if the proper bad pixel map is selected. I'll use the second one that we created. So I unselect the first. Otherwise the first BPM in the list is used.
And we make sure the master bias is selected as well.
At the master flat settings in 2) CALIRBATE
I use median combination again. If you have 20 flats or more, use average and outlier rejection.
set flat normalization to multipli-scale which is the default and recommended setting
Since I only work with 5 flats, and don't want them to inject noise in the lights, I'll choose to blur the flats to reduce possible noise injection. I'll use 2x 3x3 median.
Click on create calirbation masters, our master flat will be created with the bias subtracted and the BPM and blurring in the flat will make a very smooth flat for flat calibration. Check the statistics again in the header of the masterflat.
From the statistics you'll see that the green and blue channels are very weak ! Red is much stronger. But the green and blue channel are just enough illuminated it seams. the histogram peaks are fully visible in the histogram. Notice in the screenshot the preivew fitler slider settings to show the flat. DDP is off, and I manipulated the white value and gamma value.
In the statistics, you'll also see RGB calirbation values, these are just to properly do flat calibration without upsetting the color balance in the original light frames. In APP, the flat calibration won't affect the RGB ratios of your lights frames, unlike other programs where flat calibrated lights suddenly will have a totally different color.MasterflatSettingsmasterflatmasterflatStats


Haverkamp replied to the topic Data calibration workflow and processing in APP in the forum Methoden en Technieken
Now we'll create the master flat. We need to select the flats, the masterbias and the BPM will help as well to correct bad pixels in the flats.
I'll remove the bias frames from the list by clicking all next to the bias button in 1) LOAD, this will deselect them and then press clean to the right of this button. Now the bias frames are removed.
The flats are selected by clicking on none next to the flats button (if they aren't selected yet).
At the bottom, we need to check if the proper bad pixel map is selected. I'll use the second one that we created. So I unselect the first. Otherwise the first BPM in the list is used.
And we make sure the master bias is selected as well.
At the master flat settings in 2) CALIRBATE
I use median combination again. If you have 20 flats or more, use average and outlier rejection.
set flat normalization to multipli-scale which is the default and recommended setting
Since I only work with 5 flats, and don't want them to inject noise in the lights, I'll choose to blur the flats to reduce possible noise injection. I'll use 2x 3x3 median.
Click on create calirbation masters, our master flat will be created with the bias subtracted and the BPM and blurring in the flat will make a very smooth flat for flat calibration. Check the statistics again in the header of the masterflat.
From the statistics you'll see that the green and blue channels are very weak ! Red is much stronger. But the green and blue channel are just enough illuminated it seams. the histogram peaks are fully visible in the histogram. Notice in the screenshot the preivew fitler slider settings to show the flat. DDP is off, and I manipulated the white value and gamma value.
In the statistics, you'll also see RGB calirbation values, these are just to properly do flat calibration without upsetting the color balance in the original light frames. In APP, the flat calibration won't affect the RGB ratios of your lights frames, unlike other programs where flat calibrated lights suddenly will have a totally different color.MasterflatSettingsmasterflatmasterflatStats
Haverkamp replied to the topic Data calibration workflow and processing in APP in the forum Methoden en Technieken
Now we'll create the master flat. We need to select the flats, the masterbias and the BPM will help as well to correct bad pixels in the flats.
I'll remove the bias frames from the list by clicking all next to the bias button in 1) LOAD, this will deselect them and then press clean to the right of this button. Now the bias frames are removed.
The flats are selected by clicking on none next to the flats button (if they aren't selected yet).
At the bottom, we need to check if the proper bad pixel map is selected. I'll use the second one that we created. So I unselect the first. Otherwise the first BPM in the list is used.
And we make sure the master bias is selected as well.
At the master flat settings in 2) CALIRBATE
I use median combination again. If you have 20 flats or more, use average and outlier rejection.
set flat normalization to multipli-scale which is the default and recommended setting
Since I only work with 5 flats, and don't want them to inject noise in the lights, I'll choose to blur the flats to reduce possible noise injection. I'll use 2x 3x3 median.
Click on create calirbation masters, our master flat will be created with the bias subtracted and the BPM and blurring in the flat will make a very smooth flat for flat calibration. Check the statistics again in the header of the masterflat.
From the statistics you'll see that the green and blue channels are very weak ! Red is much stronger. But the green and blue channel are just enough illuminated it seams. the histogram peaks are fully visible in the histogram. Notice in the screenshot the preivew fitler slider settings to show the flat. DDP is off, and I manipulated the white value and gamma value.
In the statistics, you'll also see RGB calirbation values, these are just to properly do flat calibration without upsetting the color balance in the original light frames. In APP, the flat calibration won't affect the RGB ratios of your lights frames, unlike other programs where flat calibrated lights suddenly will have a totally different color.MasterflatSettingsmasterflatmasterflatStats
Haverkamp replied to the topic Data calibration workflow and processing in APP in the forum Methoden en Technieken
Now we proceed to the creation of the master bias, master dark and master flat.
We need to stop and think about our calirbation routine now.
I want to calibrate the flats with the master bias, to properly remove the bias pedestal of the 6D camera of Vincent.
But I don't want to calibrate the darks with the master bias. If I remove the bias from the darks, I'll inject a bit of noise in the masterdark from the bias subtraction. Which will translate to slightly higher noise possibly in your calibrated lights. So I'll choose to only calibrate the lights with a masterdark of darks which aren't bias subtracted. The reason being: the bias is already in the darks ;-)
So first step is to make the master bias, we deselect the darks, flats, and lights and select the bias frames.
We set the master bias creation setttins at
2) CALIBRATE
Master bias
since I only work on 5 frames, i'll do median combination without outlier rejection.
If you have plenty of bias, like 200-400 frames (which you should have to make a good master bias) select average and outlier rejection with 1 iteration with a kappa of 3.
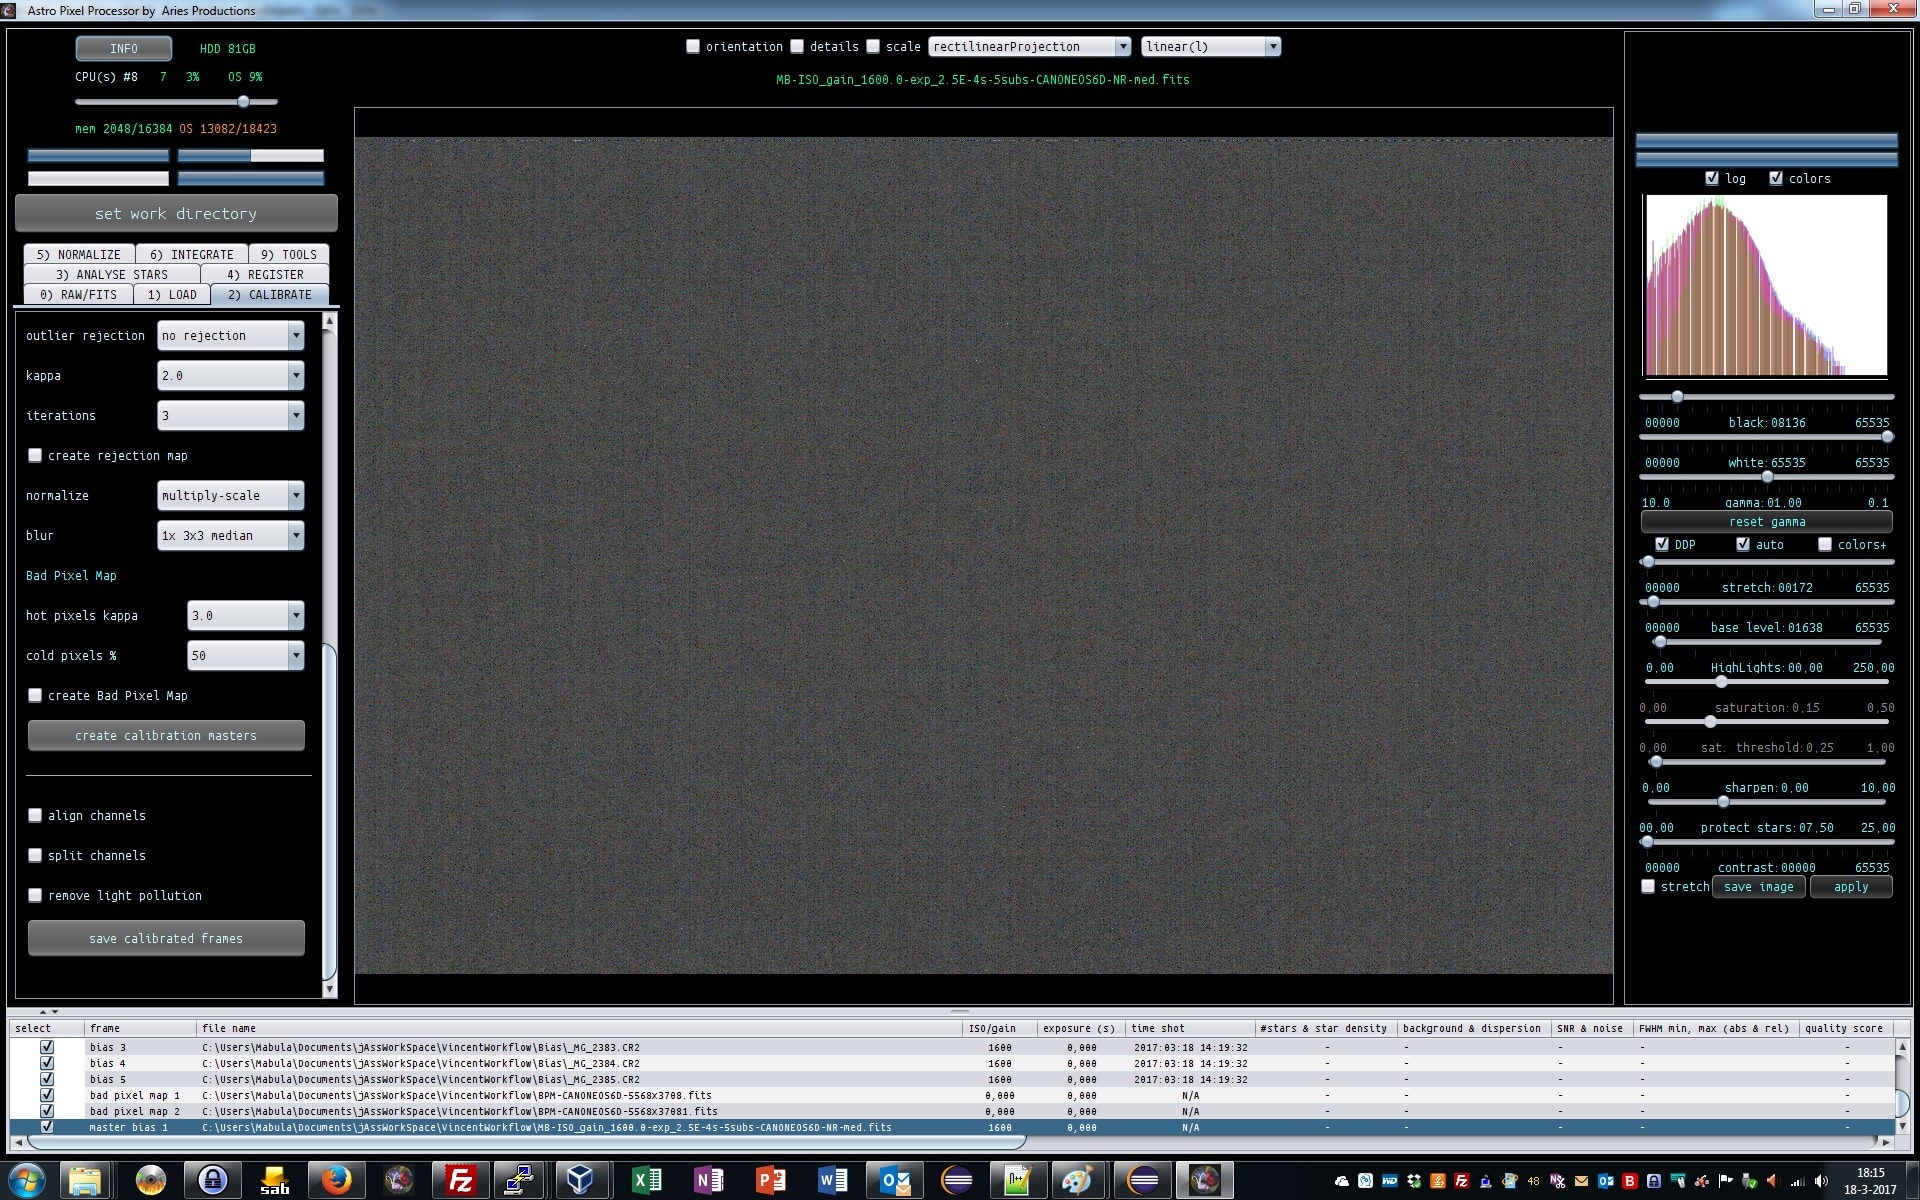
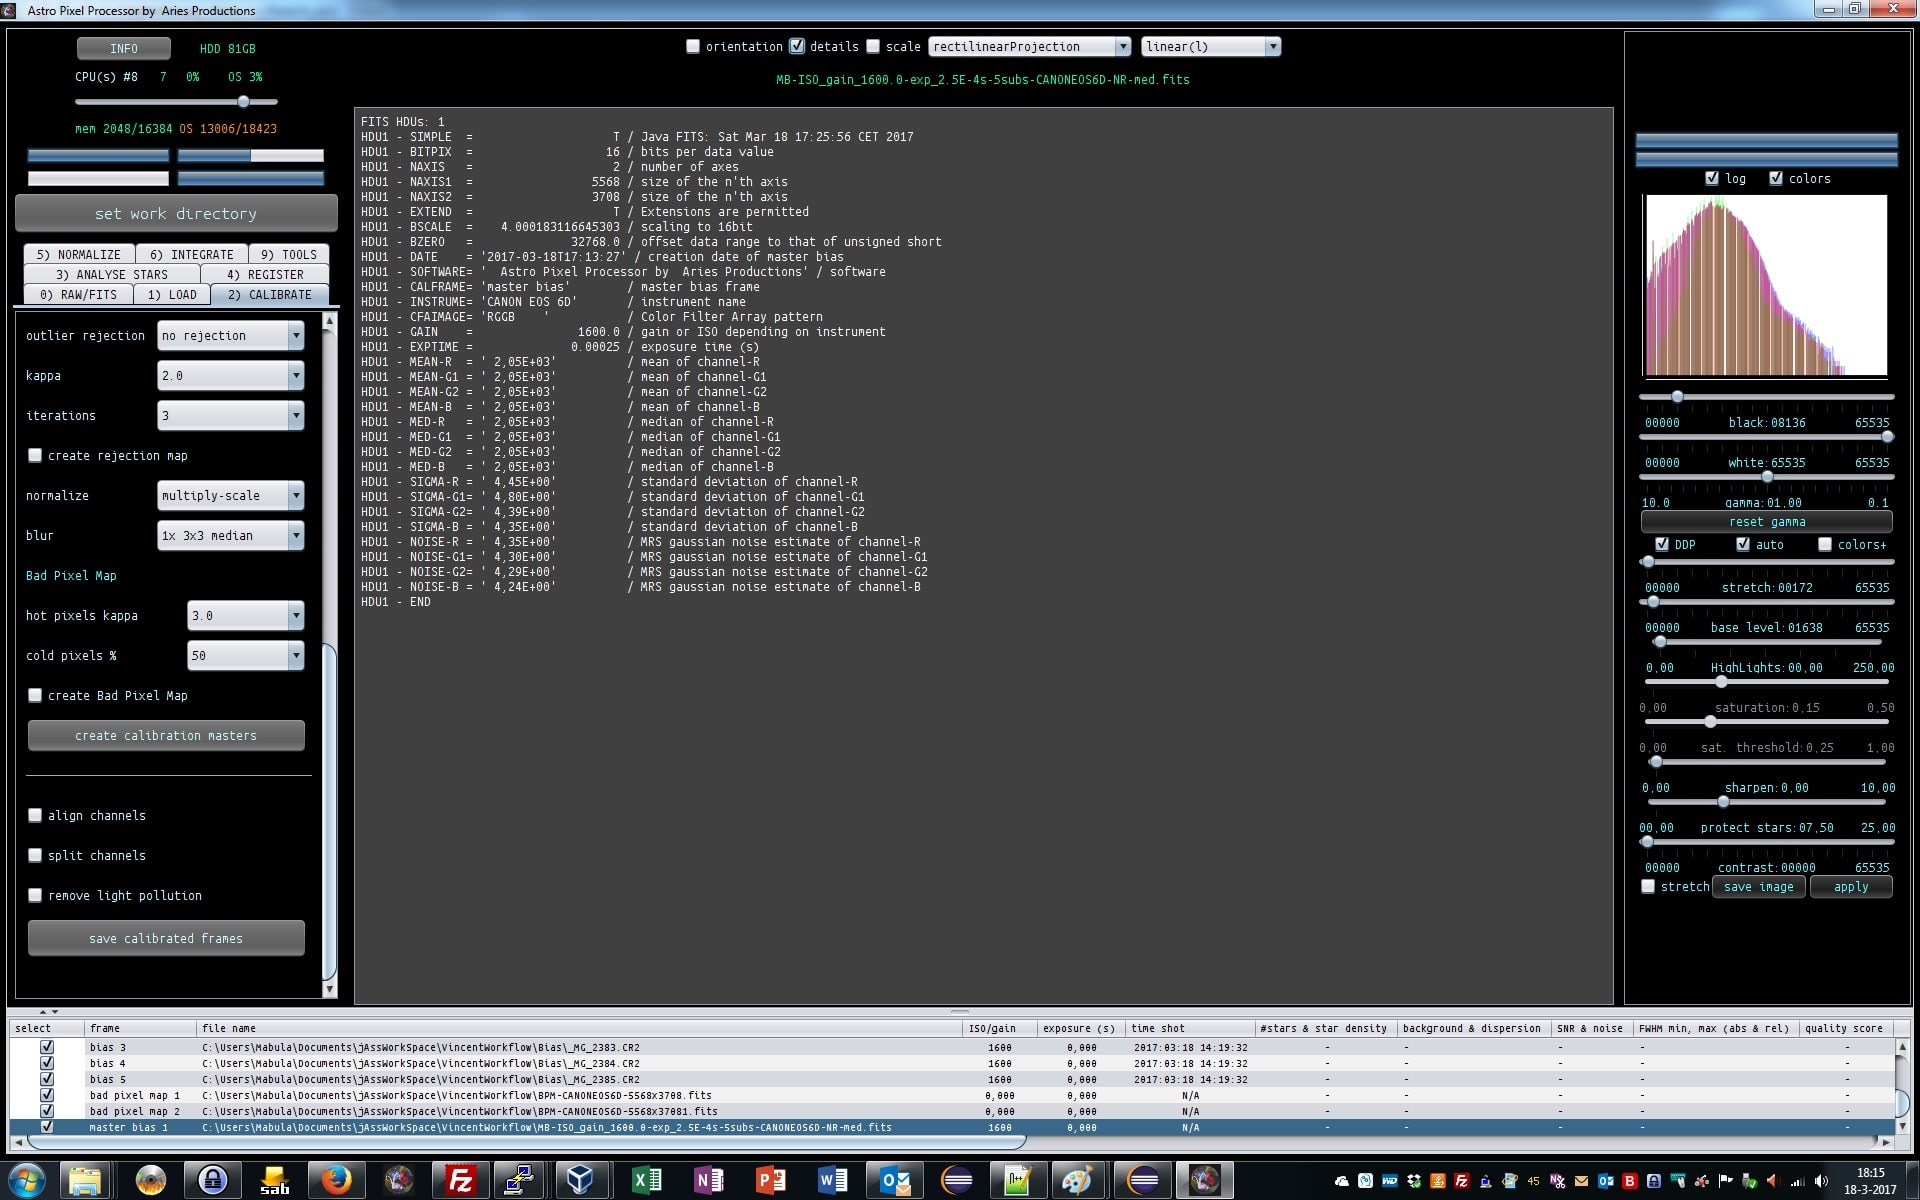
Click on create calibration masters, the master bias will be created now. In the FITS header we can see statistics of the master bias. A bias and dark (or their masters can be viewed with DDP on now).
You'll see that APP analysis the master bias on the CFA channels and pixels seperately ;-)masterbiasmasterbiasStats
Haverkamp replied to the topic Data calibration workflow and processing in APP in the forum Methoden en Technieken
Now we proceed to the creation of the master bias, master dark and master flat.
We need to stop and think about our calirbation routine now.
I want to calibrate the flats with the master bias, to properly remove the bias pedestal of the 6D camera of Vincent.
But I don't want to calibrate the darks with the master bias. If I remove the bias from the darks, I'll inject a bit of noise in the masterdark from the bias subtraction. Which will translate to slightly higher noise possibly in your calibrated lights. So I'll choose to only calibrate the lights with a masterdark of darks which aren't bias subtracted. The reason being: the bias is already in the darks ;-)
So first step is to make the master bias, we deselect the darks, flats, and lights and select the bias frames.
We set the master bias creation setttins at
2) CALIBRATE
Master bias
since I only work on 5 frames, i'll do median combination without outlier rejection.
If you have plenty of bias, like 200-400 frames (which you should have to make a good master bias) select average and outlier rejection with 1 iteration with a kappa of 3.
Click on create calibration masters, the master bias will be created now. In the FITS header we can see statistics of the master bias. A bias and dark (or their masters can be viewed with DDP on now).
You'll see that APP analysis the master bias on the CFA channels and pixels seperately ;-)masterbiasmasterbiasStats
Haverkamp replied to the topic Data calibration workflow and processing in APP in the forum Methoden en Technieken
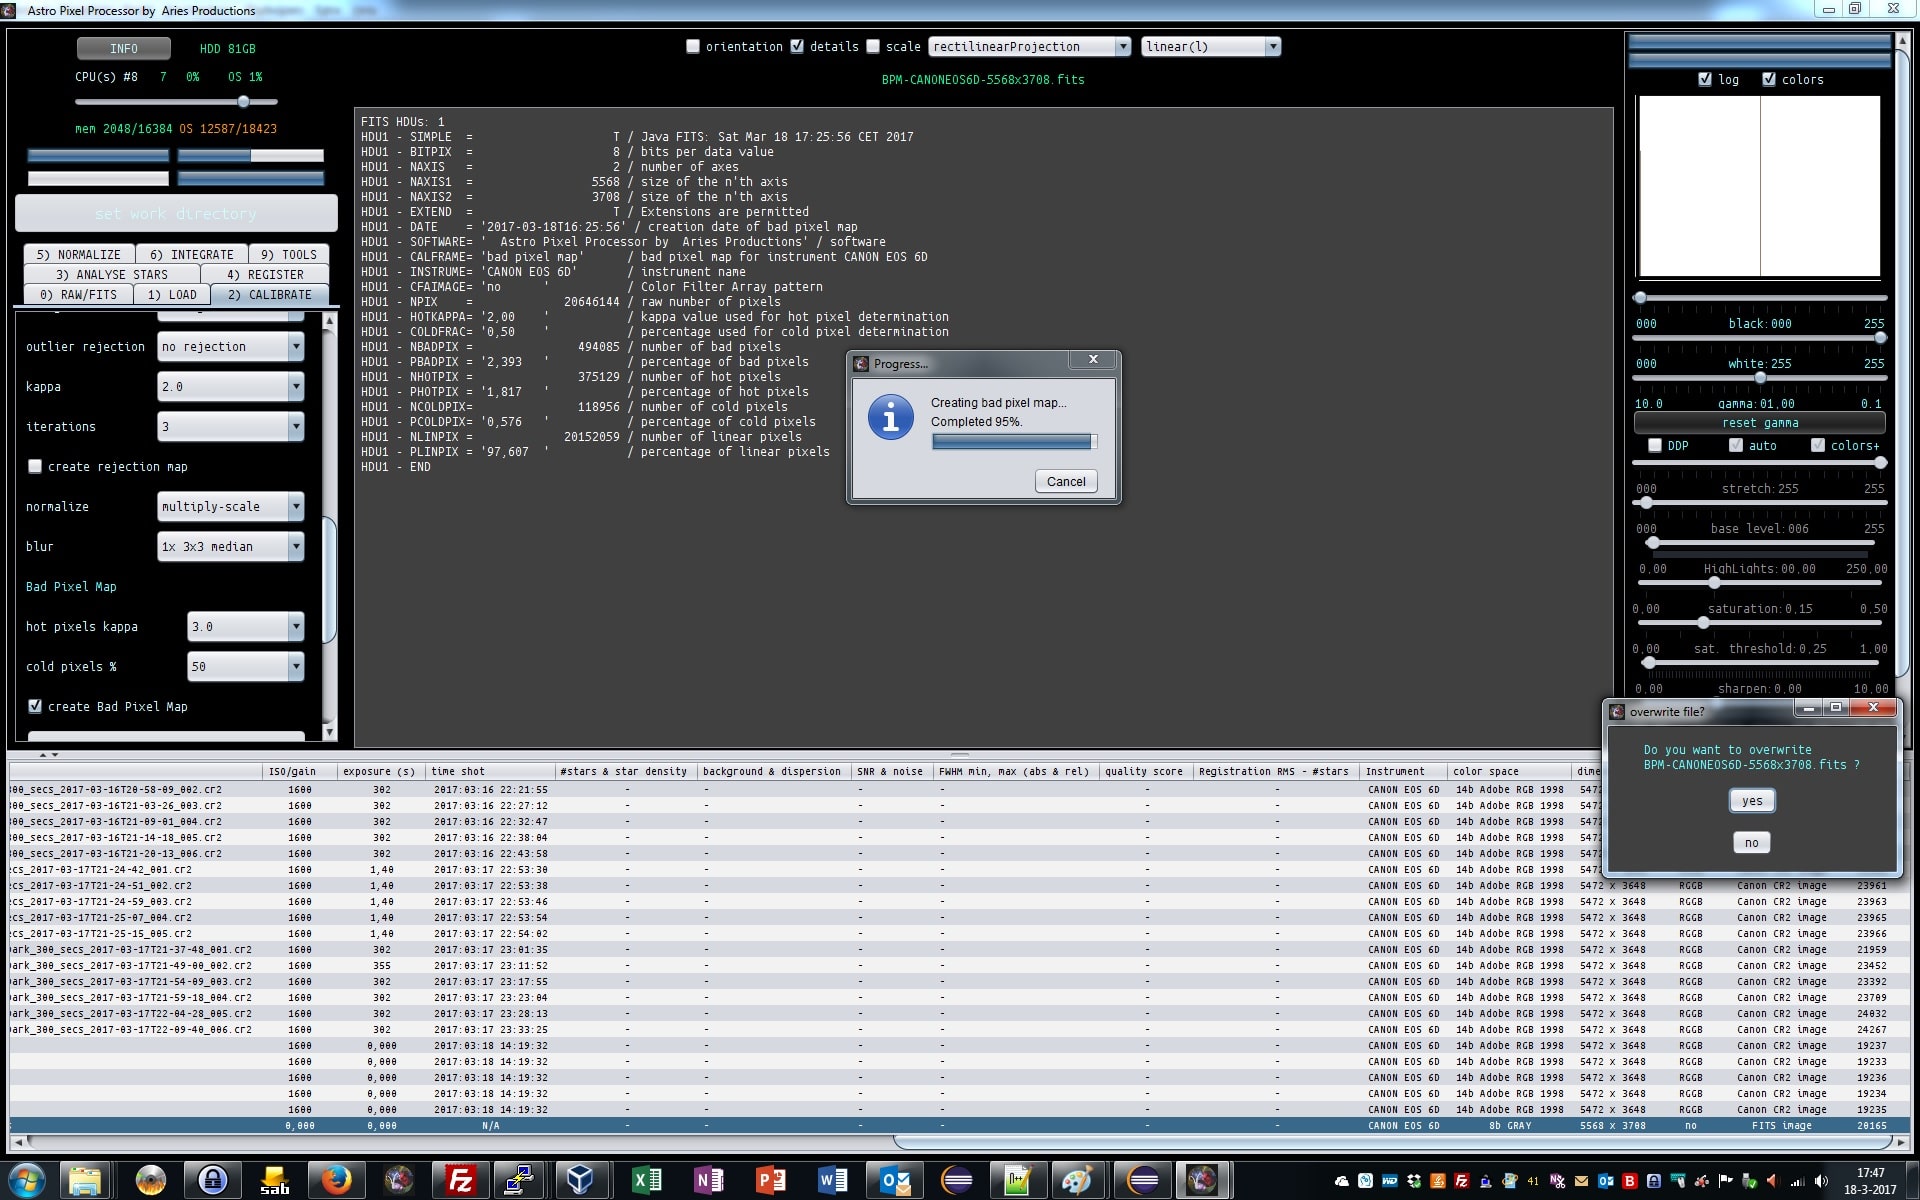
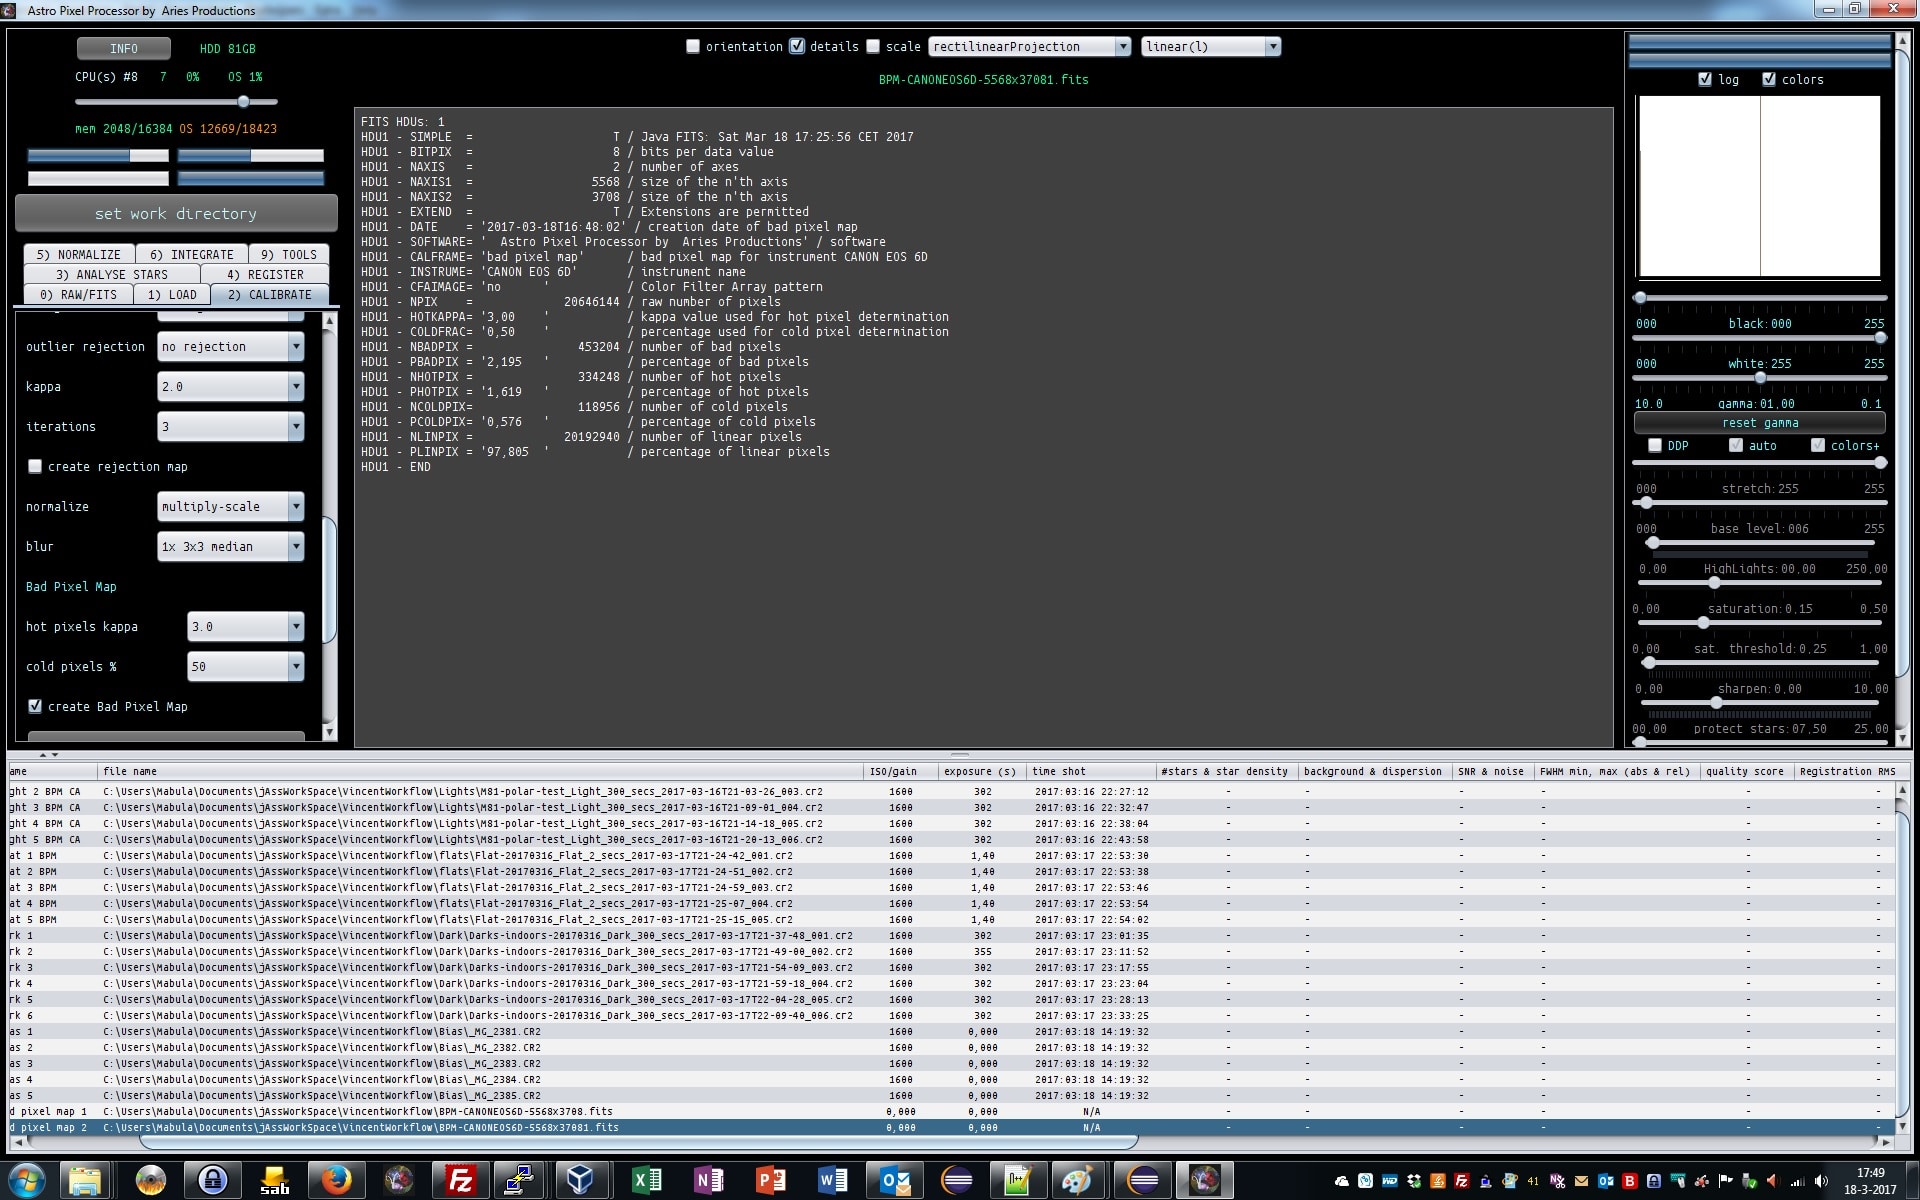
We see in the BPM statistics that APP detected almost 2% of hot pixels. This probably is too high.
I''ll be making another BPM with a bit higher hot kapps value. I'll take 3 kappa.
Now the hot pixel % dropped to about 1.6% , which is still quite high. We will see what it does in the actual calibration of the lights later on.NewBPMNewBPMStats
Haverkamp replied to the topic Data calibration workflow and processing in APP in the forum Methoden en Technieken
We see in the BPM statistics that APP detected almost 2% of hot pixels. This probably is too high.
I''ll be making another BPM with a bit higher hot kapps value. I'll take 3 kappa.
Now the hot pixel % dropped to about 1.6% , which is still quite high. We will see what it does in the actual calibration of the lights later on.NewBPMNewBPMStats
Haverkamp replied to the topic Data calibration workflow and processing in APP in the forum Methoden en Technieken
About the BPM (Bad Pixel Map):
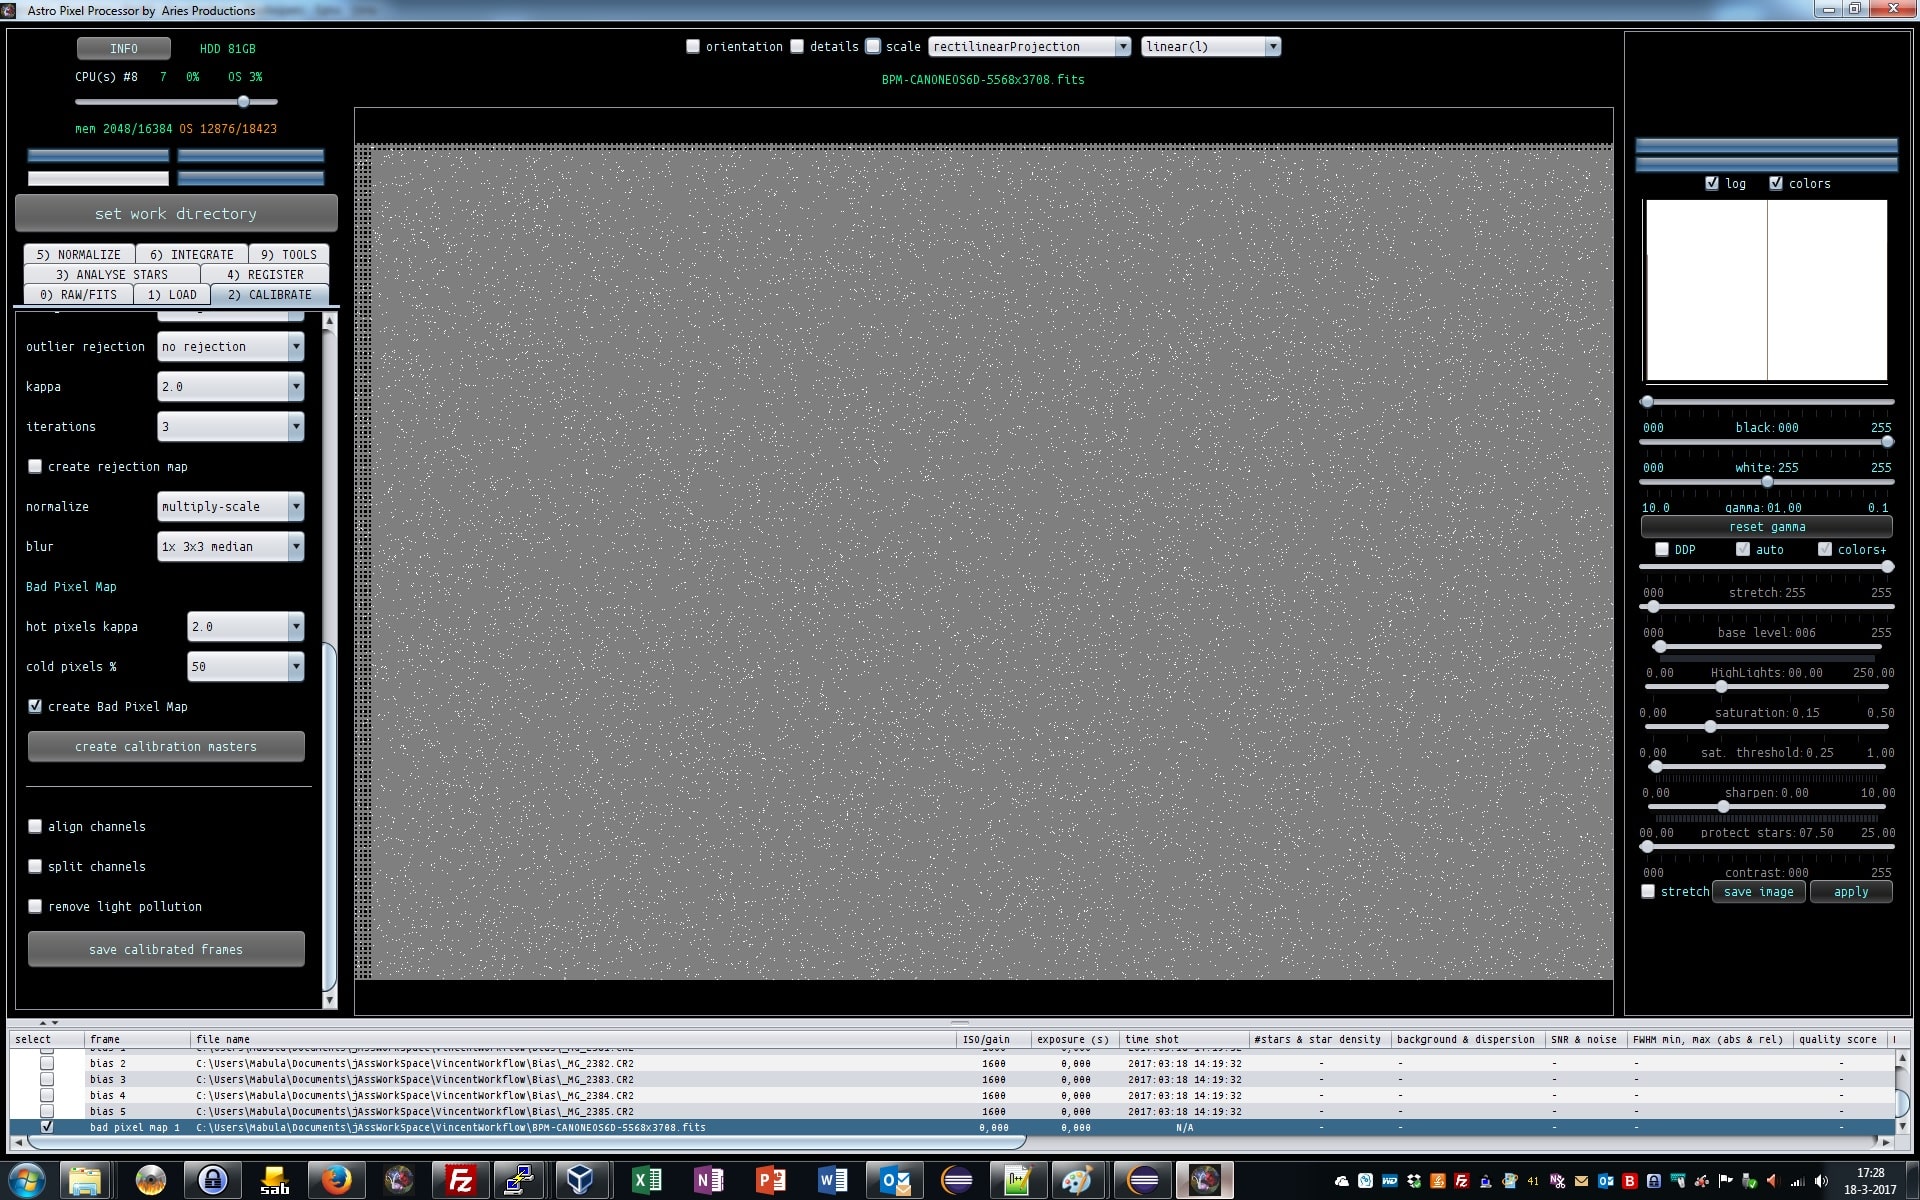
Gray pixels mean linear pixels
black pixels are cold pixel
white pixel are hot pixels.
We see a lot of pixels that seem to behave non-linear and can be considered a bit hot. But maybe we are seeing to many and our hot kappa value was too low.
We also see some cold pixels, these are pixels of the raw borders of the sensor. Which you normallys don't see, but we see them now, since the bad pixel map is a map of the entire sensor.
The BPM image dimensions are different than the image dimensions of the lights. This is due to the fact that the lights of RAW images are always cropped to remove these RAW borders. Check the dimension column in the file list.
You'll see that the dimensions of the BPM are : 5568x3708
Normal light frames are: 5472x3648BPMDimensions

Haverkamp replied to the topic Data calibration workflow and processing in APP in the forum Methoden en Technieken
The Bad pixel map uses darks for hot pixel detection, en flats for cold pixel detection.
Hot pixel kappa setting : default is 2 kappa.
Cold pixel % : default is 50%.
The darks and flats are combined to a masterdark and masterflat internally.
Then the masterdark is locally analysed. All pixels that deviate more than the
PixelValue > LocalMedian + (HotPixelKappa* StandardDeviation) means hot !
are considered hot pixels and will be marked like that in the bad pixel map.
The masterflat is analysed globally. All pixels that are less than cold pixel % from the median of the masterflat are consideres cold pixels.
PixelValue < ColdPixel% * GlobalMedian means cold !
If you have very strong vignetting, you possibly need to lower this value. Otherwise 50% is fine in most cases.
We leave the settings at their default and click on create calibration frames. Since we selected create Bad Pixel Map. Only a BPM will be created. No Master dark or Master Flat will be created yet.
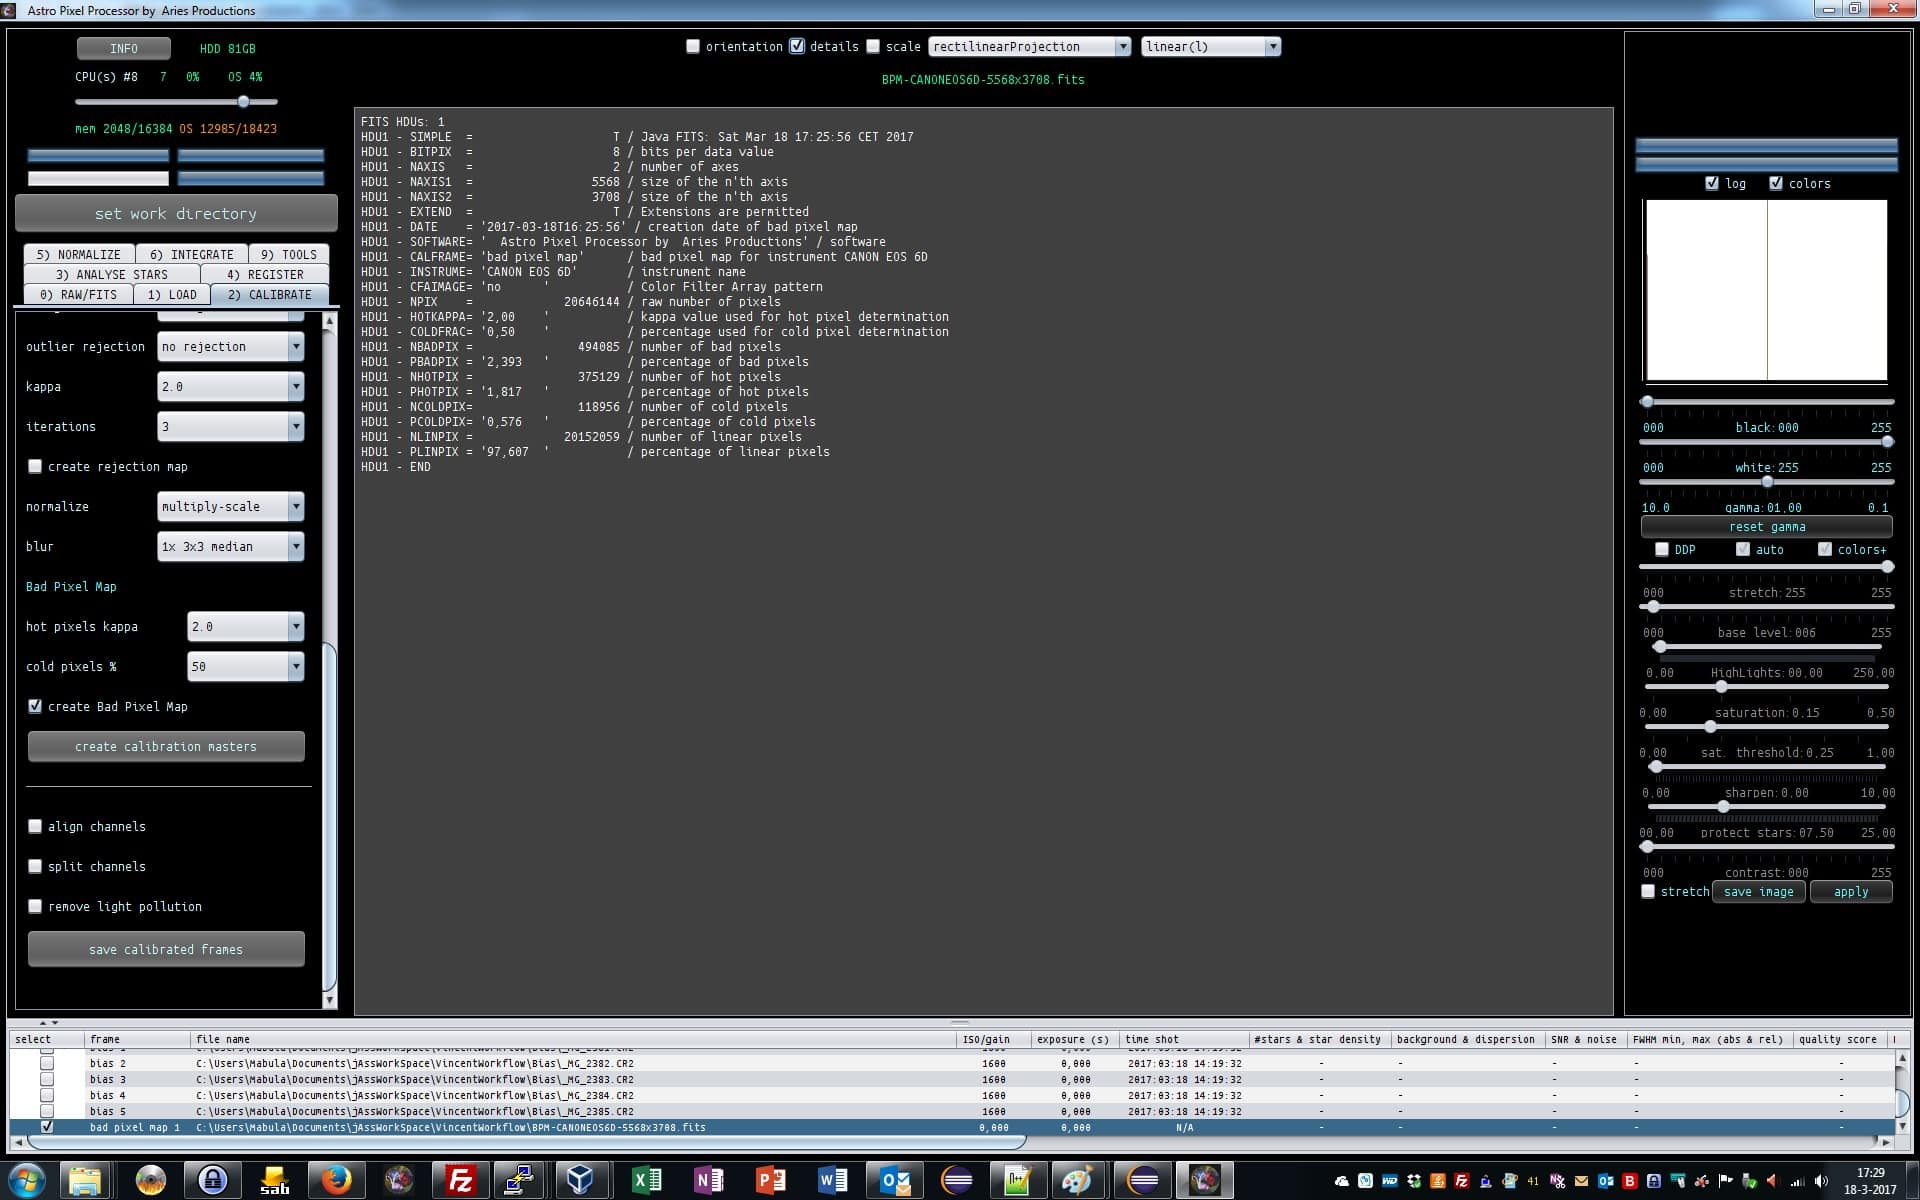
When the creation is finished, we get a Bad Pixel Map at the bottom of our list, see screenshot. Let's select the bad pixel map to see how it looks.
A bad pixel map is unlike a light frame. Deselect DPP when viewing a Bad Pixel Map, to properly see the BPM
by clicking on details at the top of the application above the image viewer we can get some statistics.BPMBPMdetailss
Haverkamp replied to the topic Data calibration workflow and processing in APP in the forum Methoden en Technieken
The Bad pixel map uses darks for hot pixel detection, en flats for cold pixel detection.
Hot pixel kappa setting : default is 2 kappa.
Cold pixel % : default is 50%.
The darks and flats are combined to a masterdark and masterflat internally.
Then the masterdark is locally analysed. All pixels that deviate more than the
PixelValue > LocalMedian + (HotPixelKappa* StandardDeviation) means hot !
are considered hot pixels and will be marked like that in the bad pixel map.
The masterflat is analysed globally. All pixels that are less than cold pixel % from the median of the masterflat are consideres cold pixels.
PixelValue < ColdPixel% * GlobalMedian means cold !
If you have very strong vignetting, you possibly need to lower this value. Otherwise 50% is fine in most cases.
We leave the settings at their default and click on create calibration frames. Since we selected create Bad Pixel Map. Only a BPM will be created. No Master dark or Master Flat will be created yet.
When the creation is finished, we get a Bad Pixel Map at the bottom of our list, see screenshot. Let's select the bad pixel map to see how it looks.
A bad pixel map is unlike a light frame. Deselect DPP when viewing a Bad Pixel Map, to properly see the BPM
by clicking on details at the top of the application above the image viewer we can get some statistics.BPMBPMdetailss
Haverkamp replied to the topic Data calibration workflow and processing in APP in the forum Methoden en Technieken
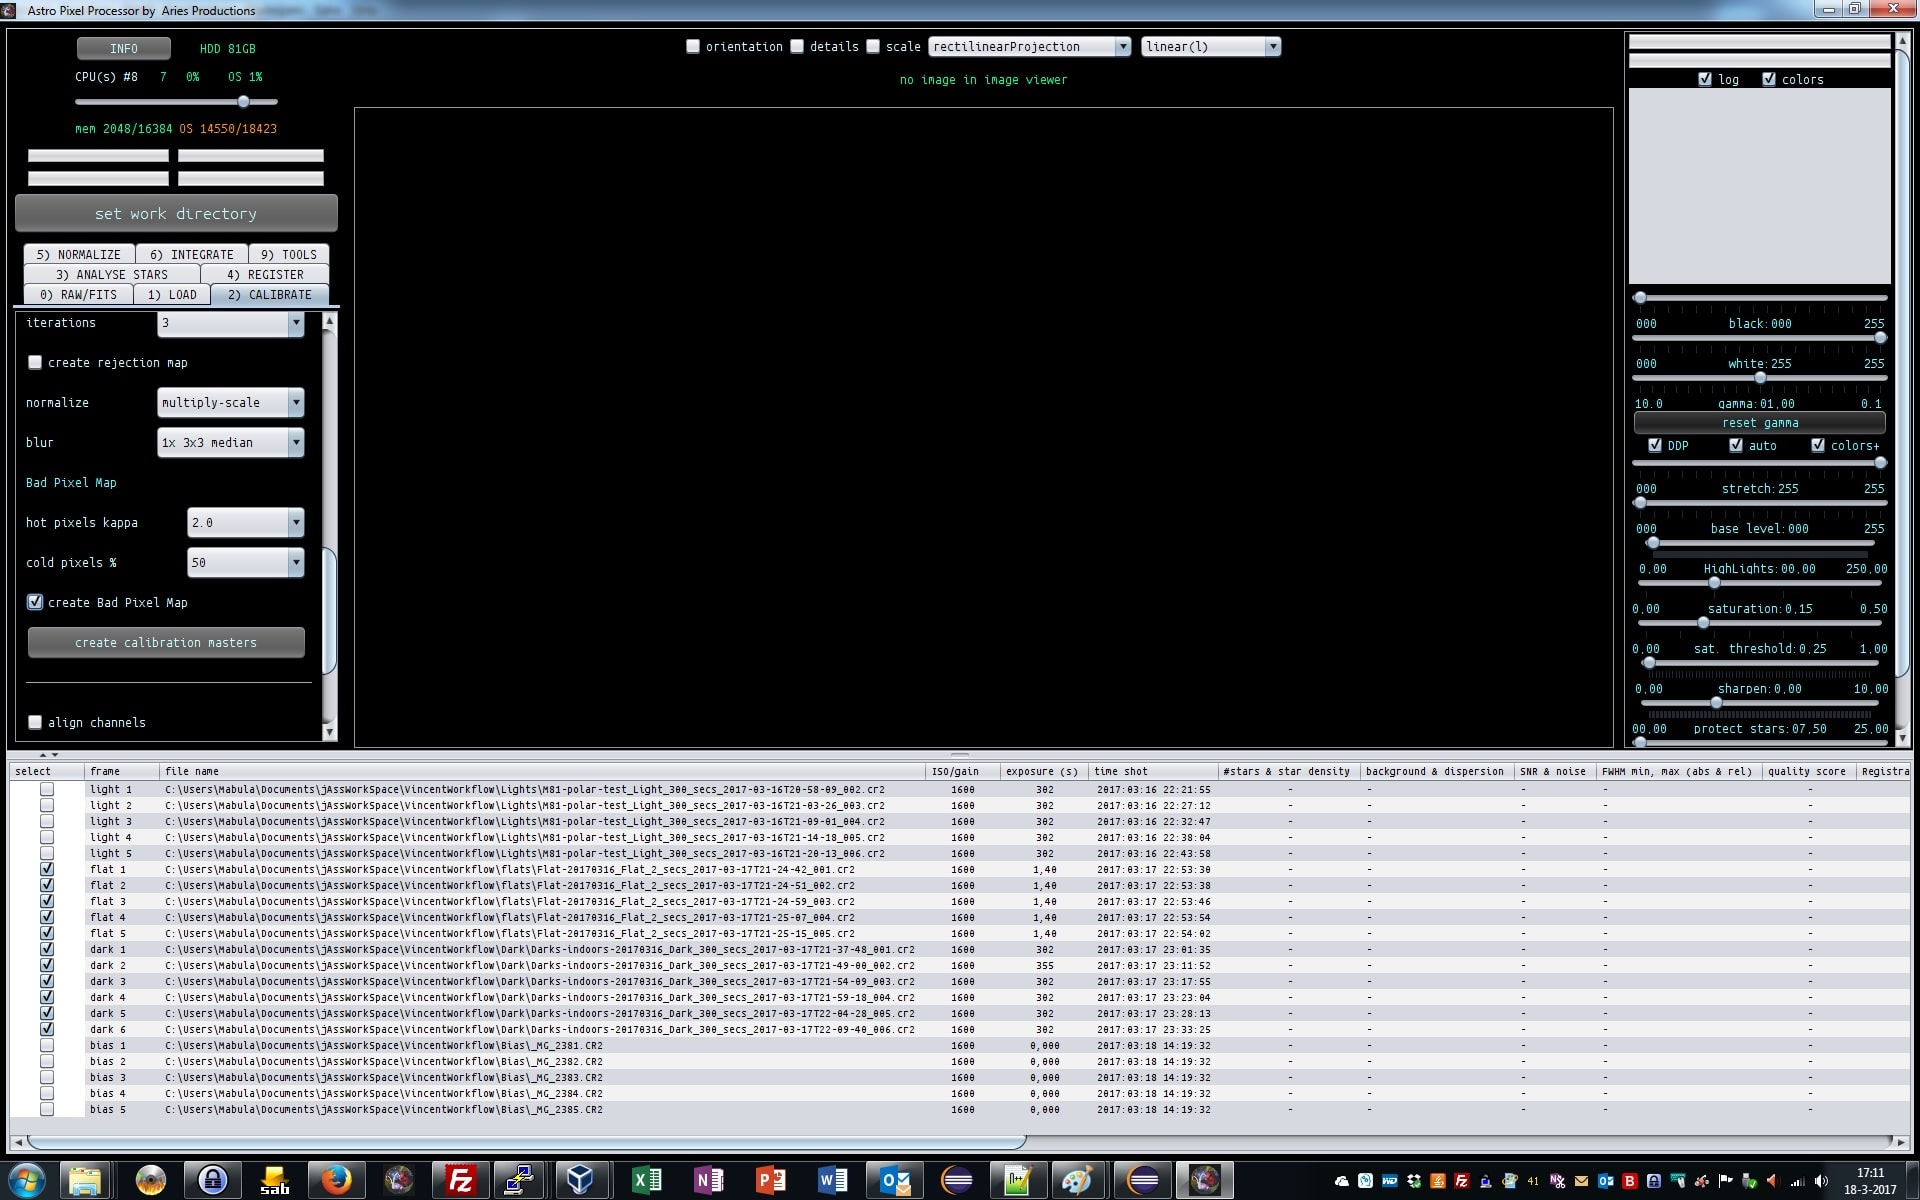
2) CALIBRATE
we scroll down to the Bad Pixel Map options and select create bad pixel map.
If you create a good Bad Pixel Map, you will be able to use this for a very long time with high efficiency.
The bad pixel map will be created using only the darks and flats.
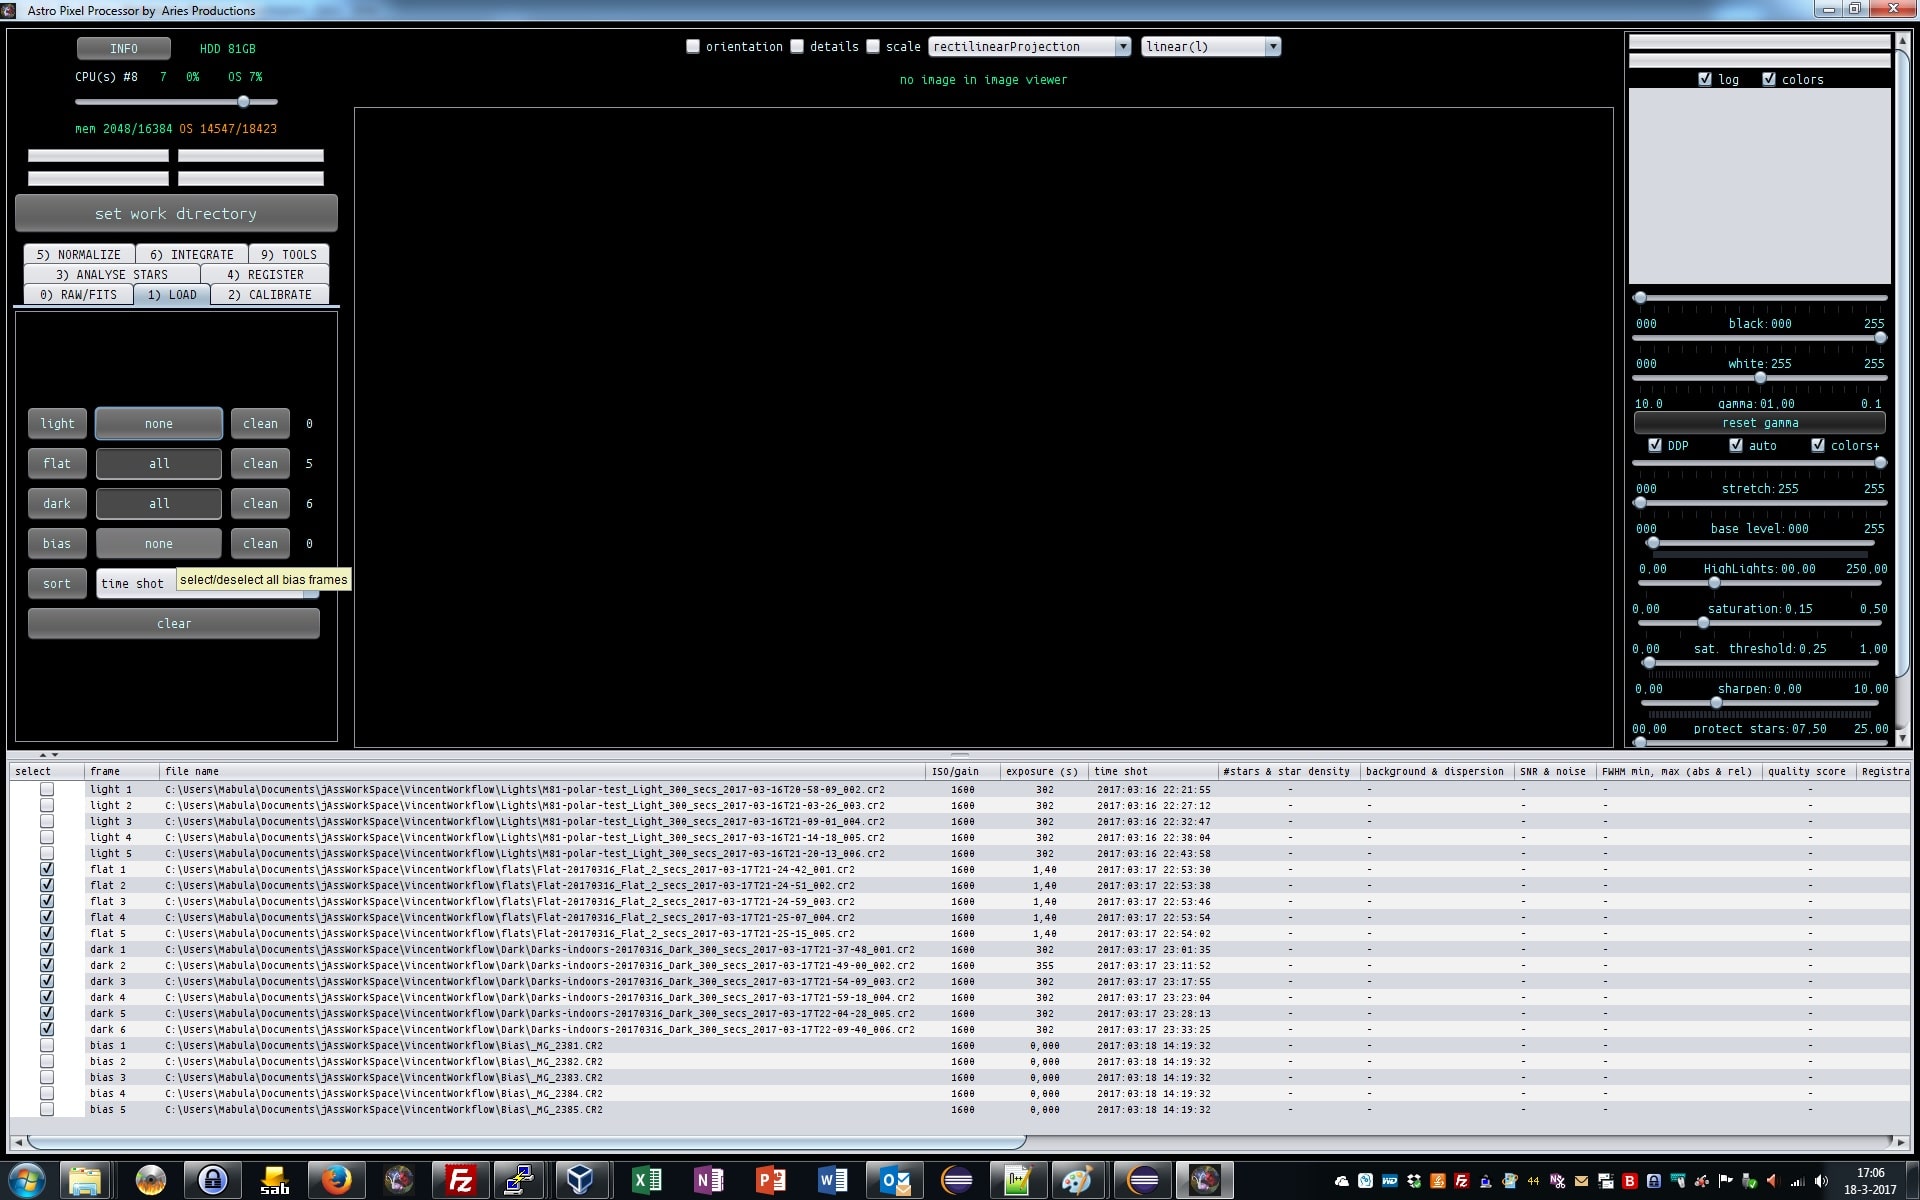
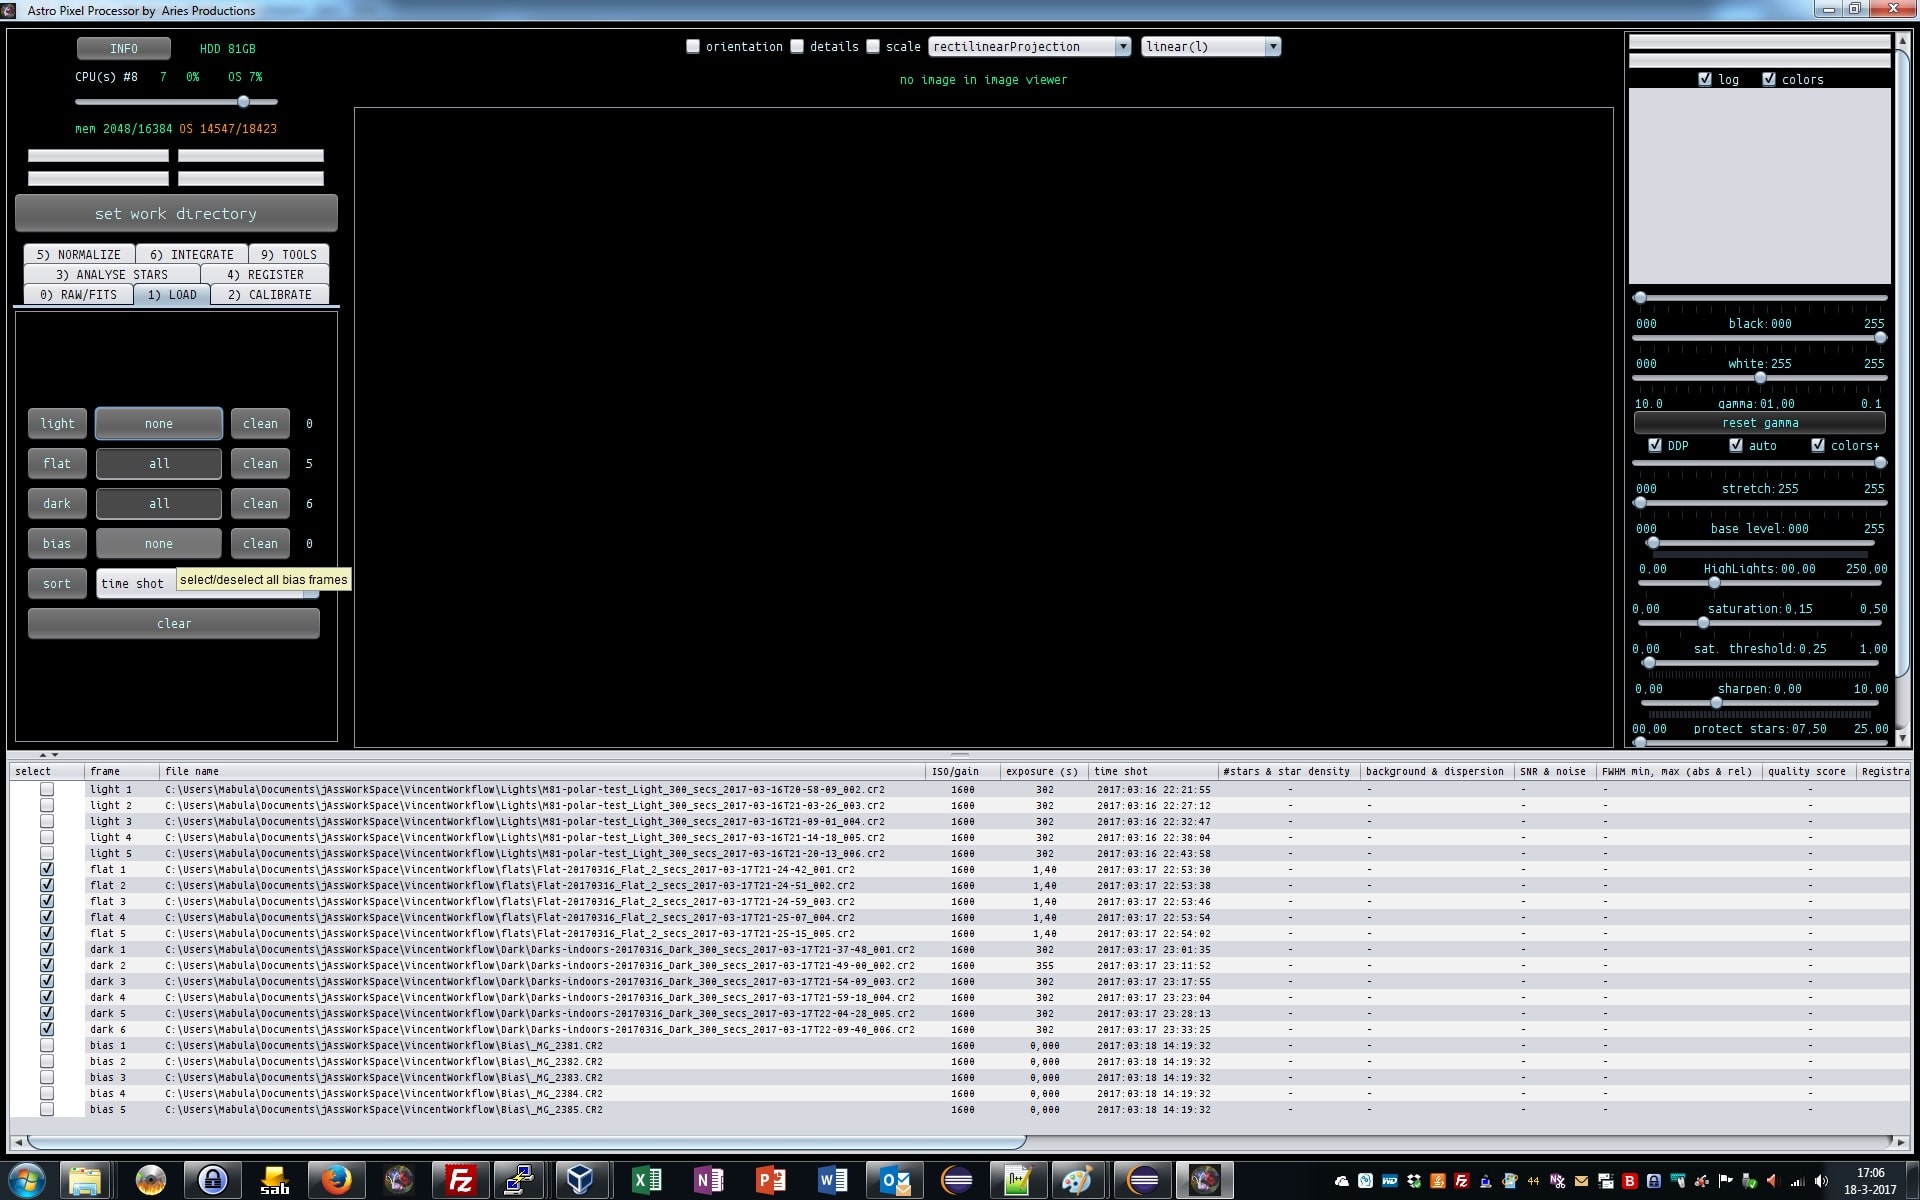
First we deselect the lights and bias, by clicking on the all button next to the lights and bias buttons in 1) LOADBPMOptionsdeselectLightsBias
Haverkamp replied to the topic Data calibration workflow and processing in APP in the forum Methoden en Technieken
2) CALIBRATE
we scroll down to the Bad Pixel Map options and select create bad pixel map.
If you create a good Bad Pixel Map, you will be able to use this for a very long time with high efficiency.
The bad pixel map will be created using only the darks and flats.
First we deselect the lights and bias, by clicking on the all button next to the lights and bias buttons in 1) LOADBPMOptionsdeselectLightsBias
Haverkamp replied to the topic Data calibration workflow and processing in APP in the forum Methoden en Technieken
2) CALIBRATE
we scroll down to the Bad Pixel Map options and select create bad pixel map.
If you create a good Bad Pixel Map, you will be able to use this for a very long time with high efficiency.
The bad pixel map will be created using only the darks and flats.
First we deselect the lights and bias, by clicking on the all button next to the lights and bias buttons in 1) LOADBPMOptionsdeselectLightsBias
Haverkamp replied to the topic Data calibration workflow and processing in APP in the forum Methoden en Technieken
We load all data:
light frames by pusing the light button, darks by pushing the dark button, flats by pushing the flats button etc..
Notice how the files in the filelist show their type.
And in the 1) LOAD panel, we see a counter for the number of frames we have just loaded.LOADData

Haverkamp replied to the topic Data calibration workflow and processing in APP in the forum Methoden en Technieken
We start APP and select our Working Directory.
This Work Directory will be used for temporary files during stacking and the results will be saved here. Try to use a hard disk partition with enough free space and possibly the fastest drive you have on your computer. This will speed things up.
We choose the folder with our project data, with separate folders for lights, bias, darks, flatsWorkDirectory
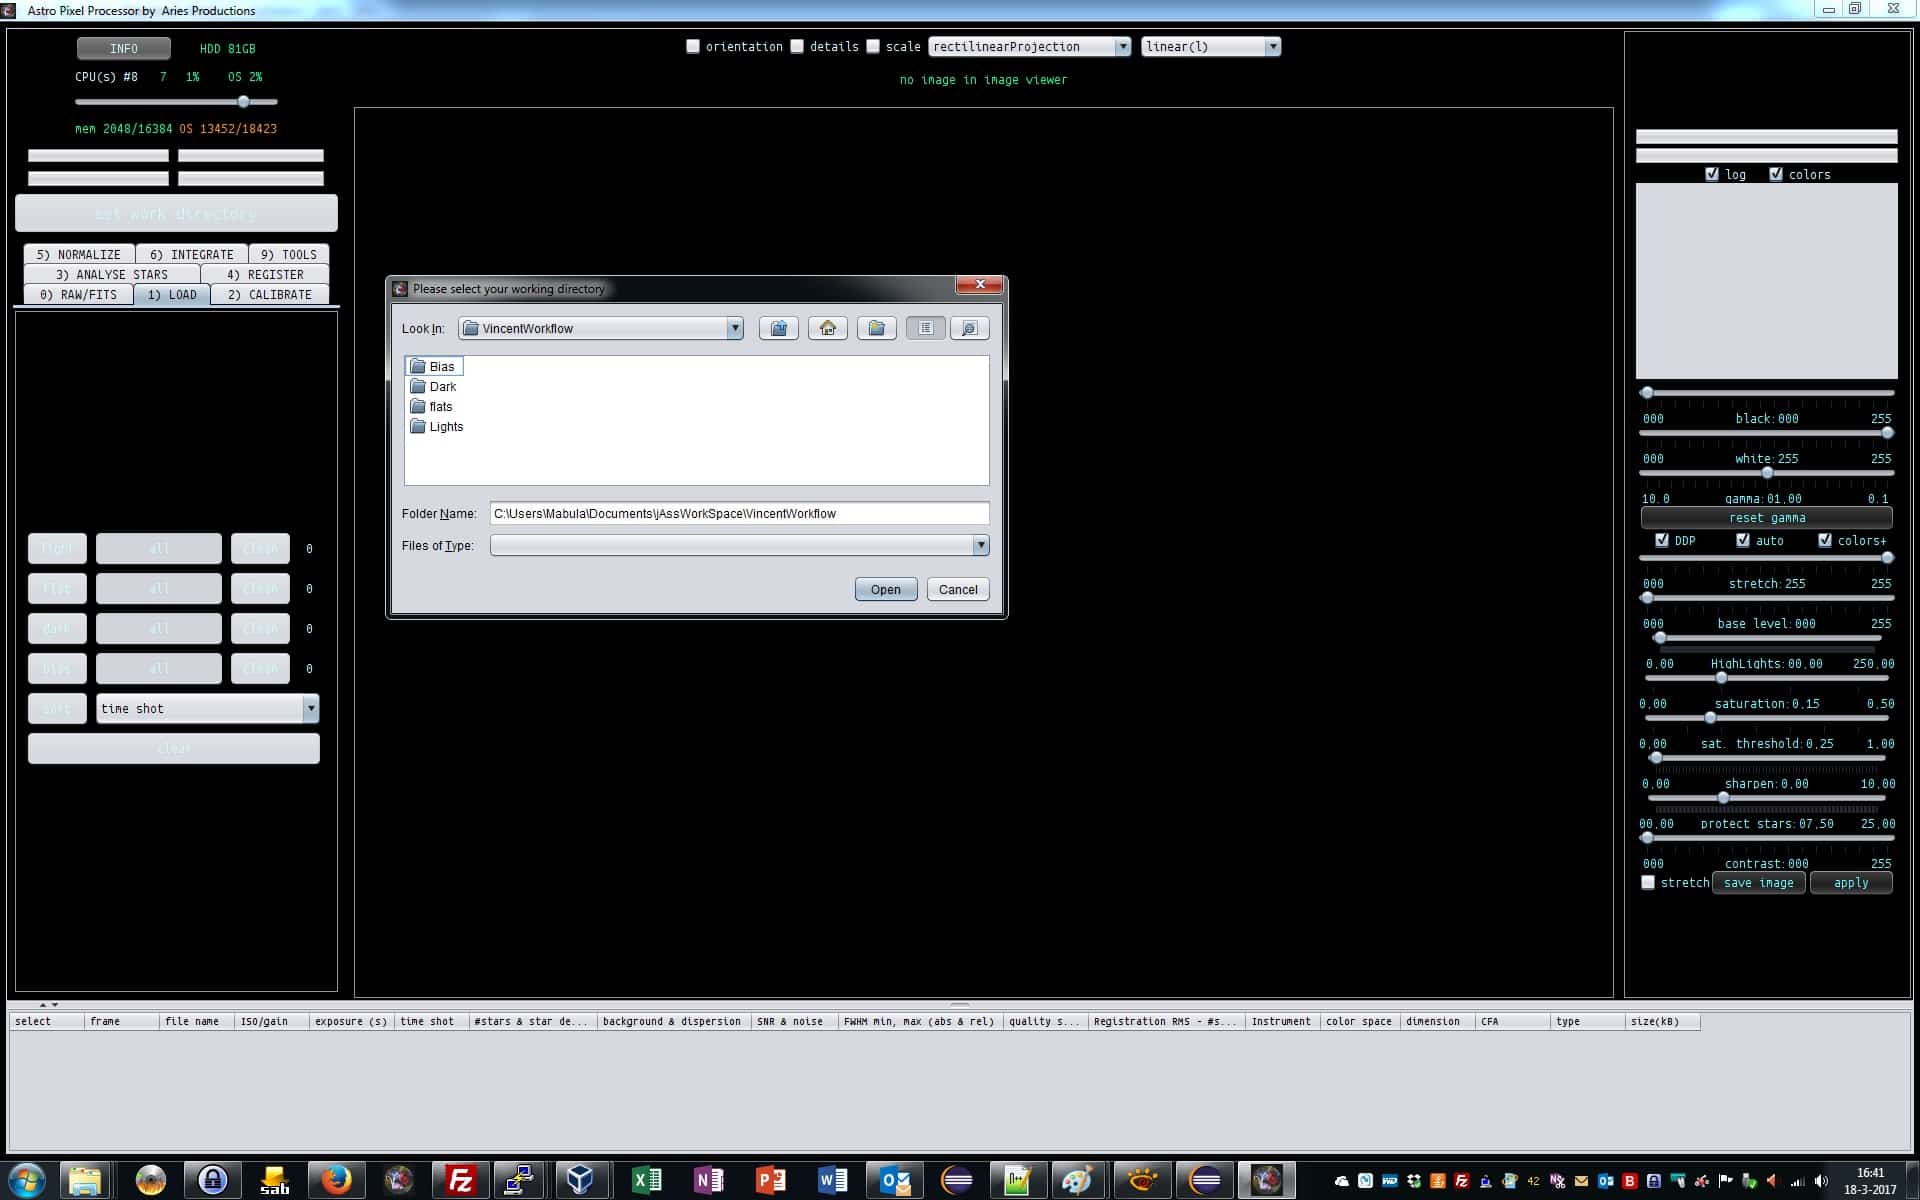
Haverkamp replied to the topic APP crashes stacking 3 lights (Linux DEB) in the forum Astro Pixel Processor
Hi @KeesScherer,
I have been running APP on linux Mint and sofar it just works perfectly over here.. ;-(
I have loaded CR2 files af a Canon 6D. See screenshot of the APP
I do notice that the CR2loader seems to take a large memory heap on Linux, so maybe I shoud investigate that further...
In the mean time all try to make a linux build on Linux Mint, to see if that changes the behaviour on your Mint system.
Mabula
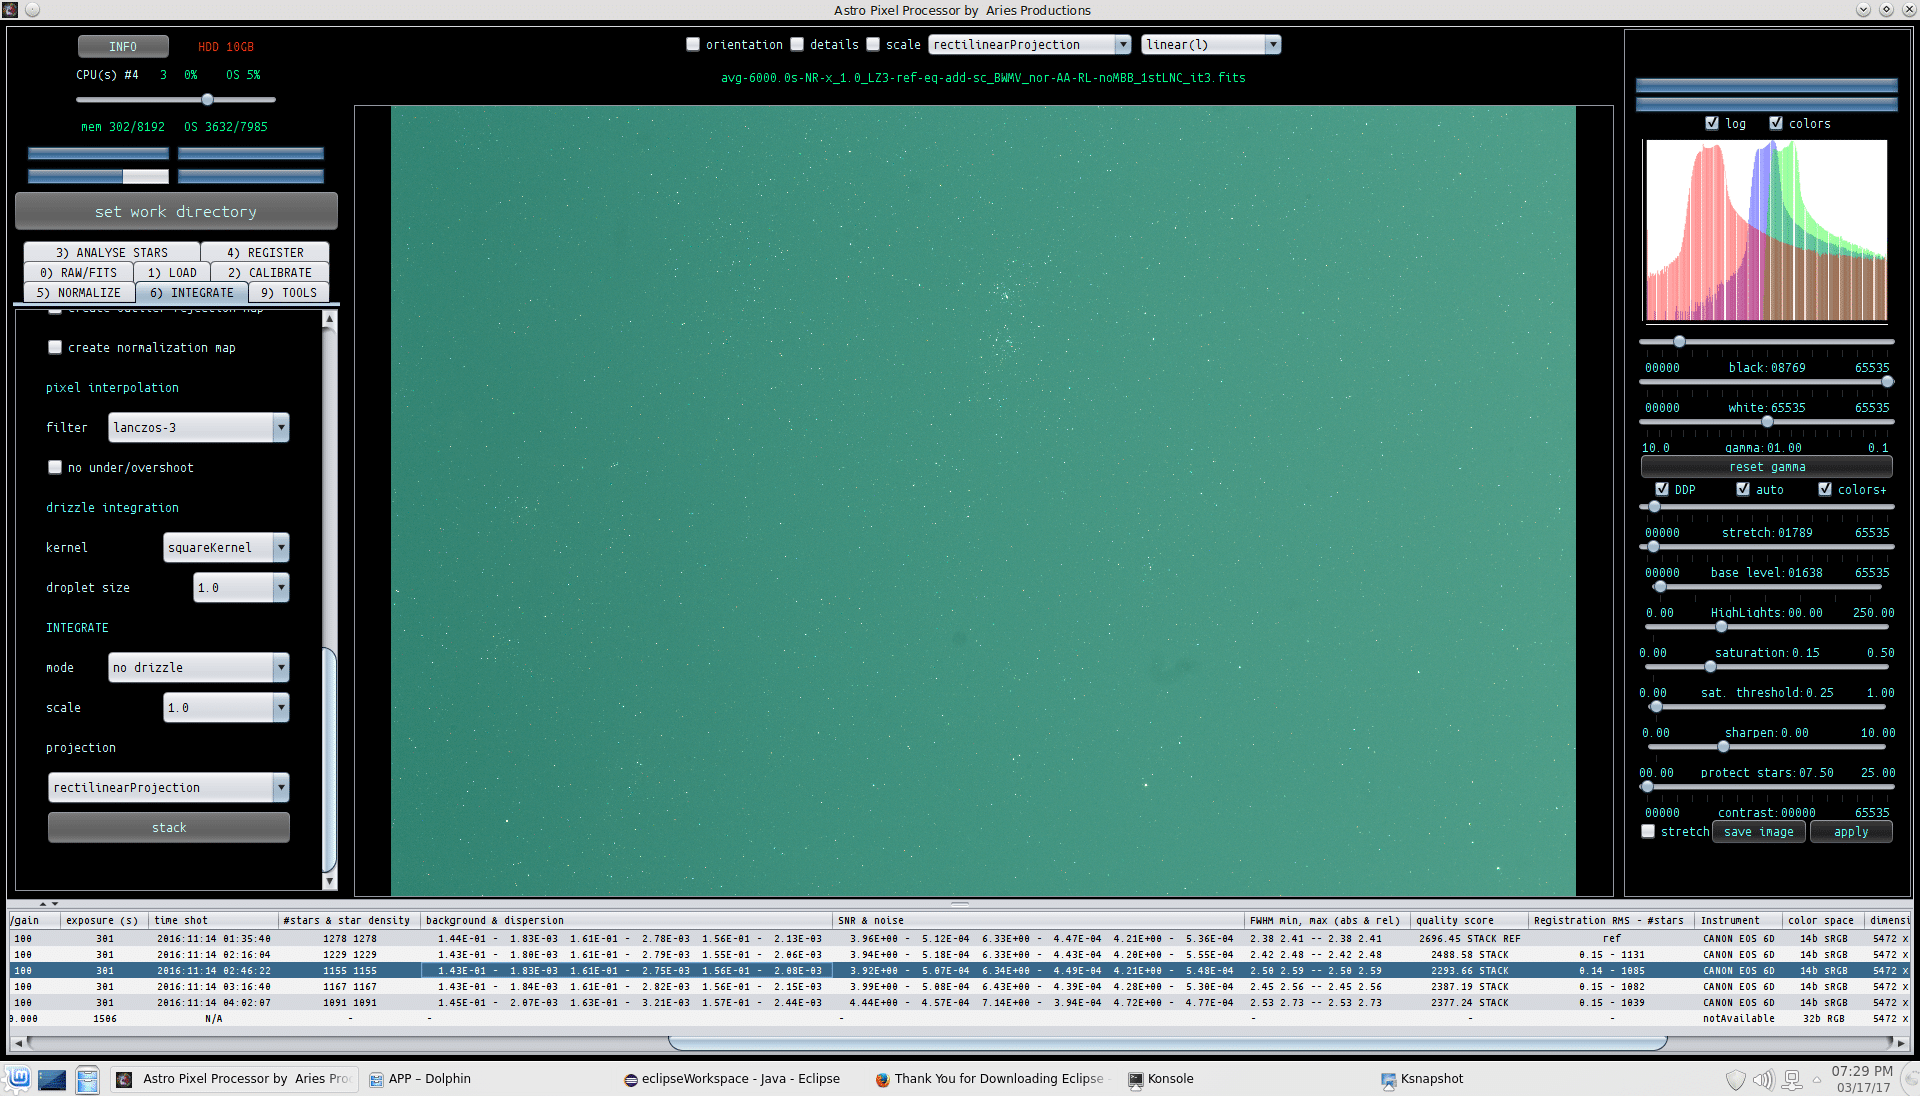
Haverkamp replied to the topic APP crashes stacking 3 lights (Linux DEB) in the forum Astro Pixel Processor Beta
Hi @KeesScherer,
I just performed this on a Ubuntu virtual machine with 4GB memory en the 8GB Deb package, no crash and stacking was no problem.
The first step would be to analyse the stars, so I guess it crashed when it started with that task?
MabulaUbuntuIntegrate
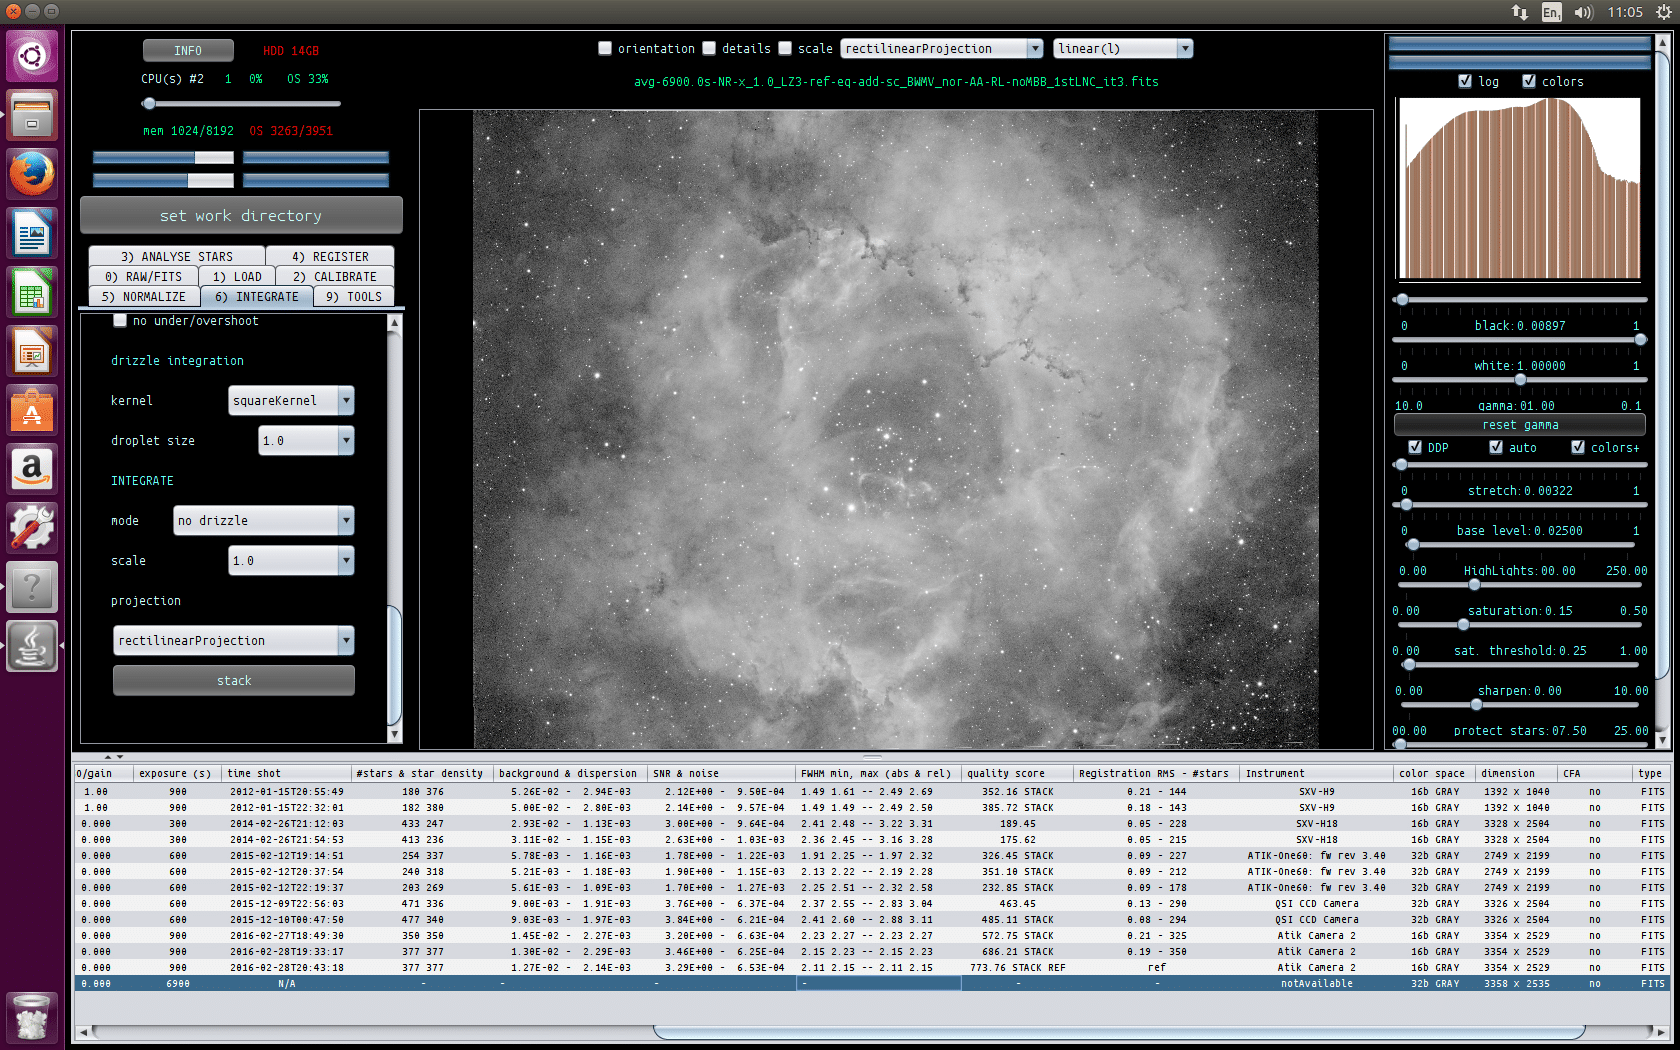
Hi Rob,
In Tab 1) LOAD
click on light, a file chooser should pop-upAPPFileChooser
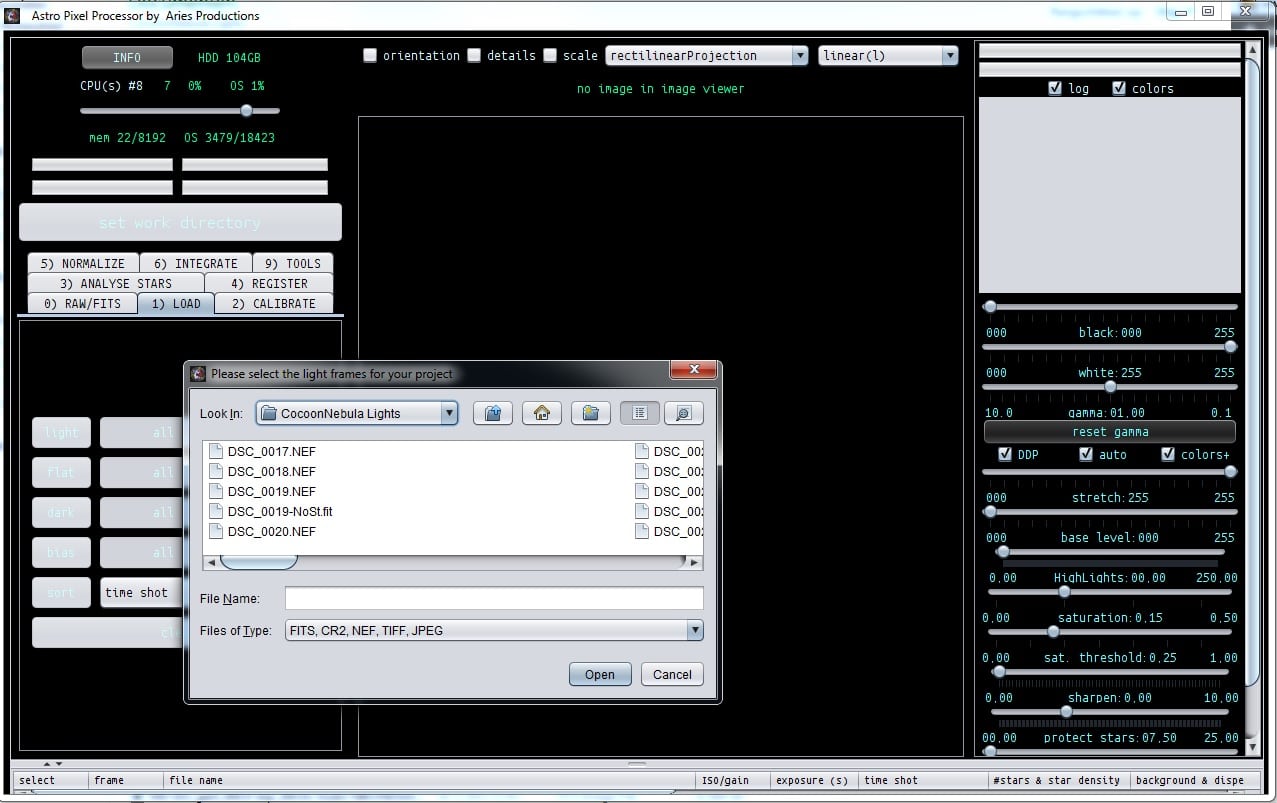
Haverkamp replied to the topic Difference between "Correct Vignetting" & "Remove Light Pollution" in the forum Astro Pixel Processor Beta
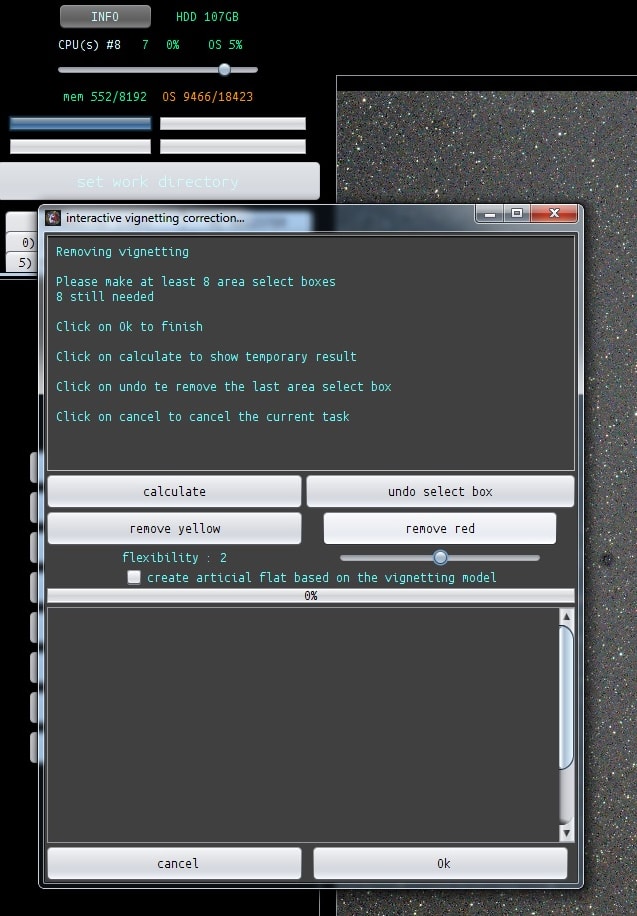
It's the flexibility slider, values 1,2,3 correspond to the models i mentioned. I will fix this soon. I also want to integrate this new frame into the panel on the left instead of the menu, so you don't get different windows...VCmodels
Haverkamp replied to the topic Subs selectie/beoordeling op achtergrondhelderheid. in the forum Methoden en Technieken
Dank je @supernov ;-)
Nog een toetje:
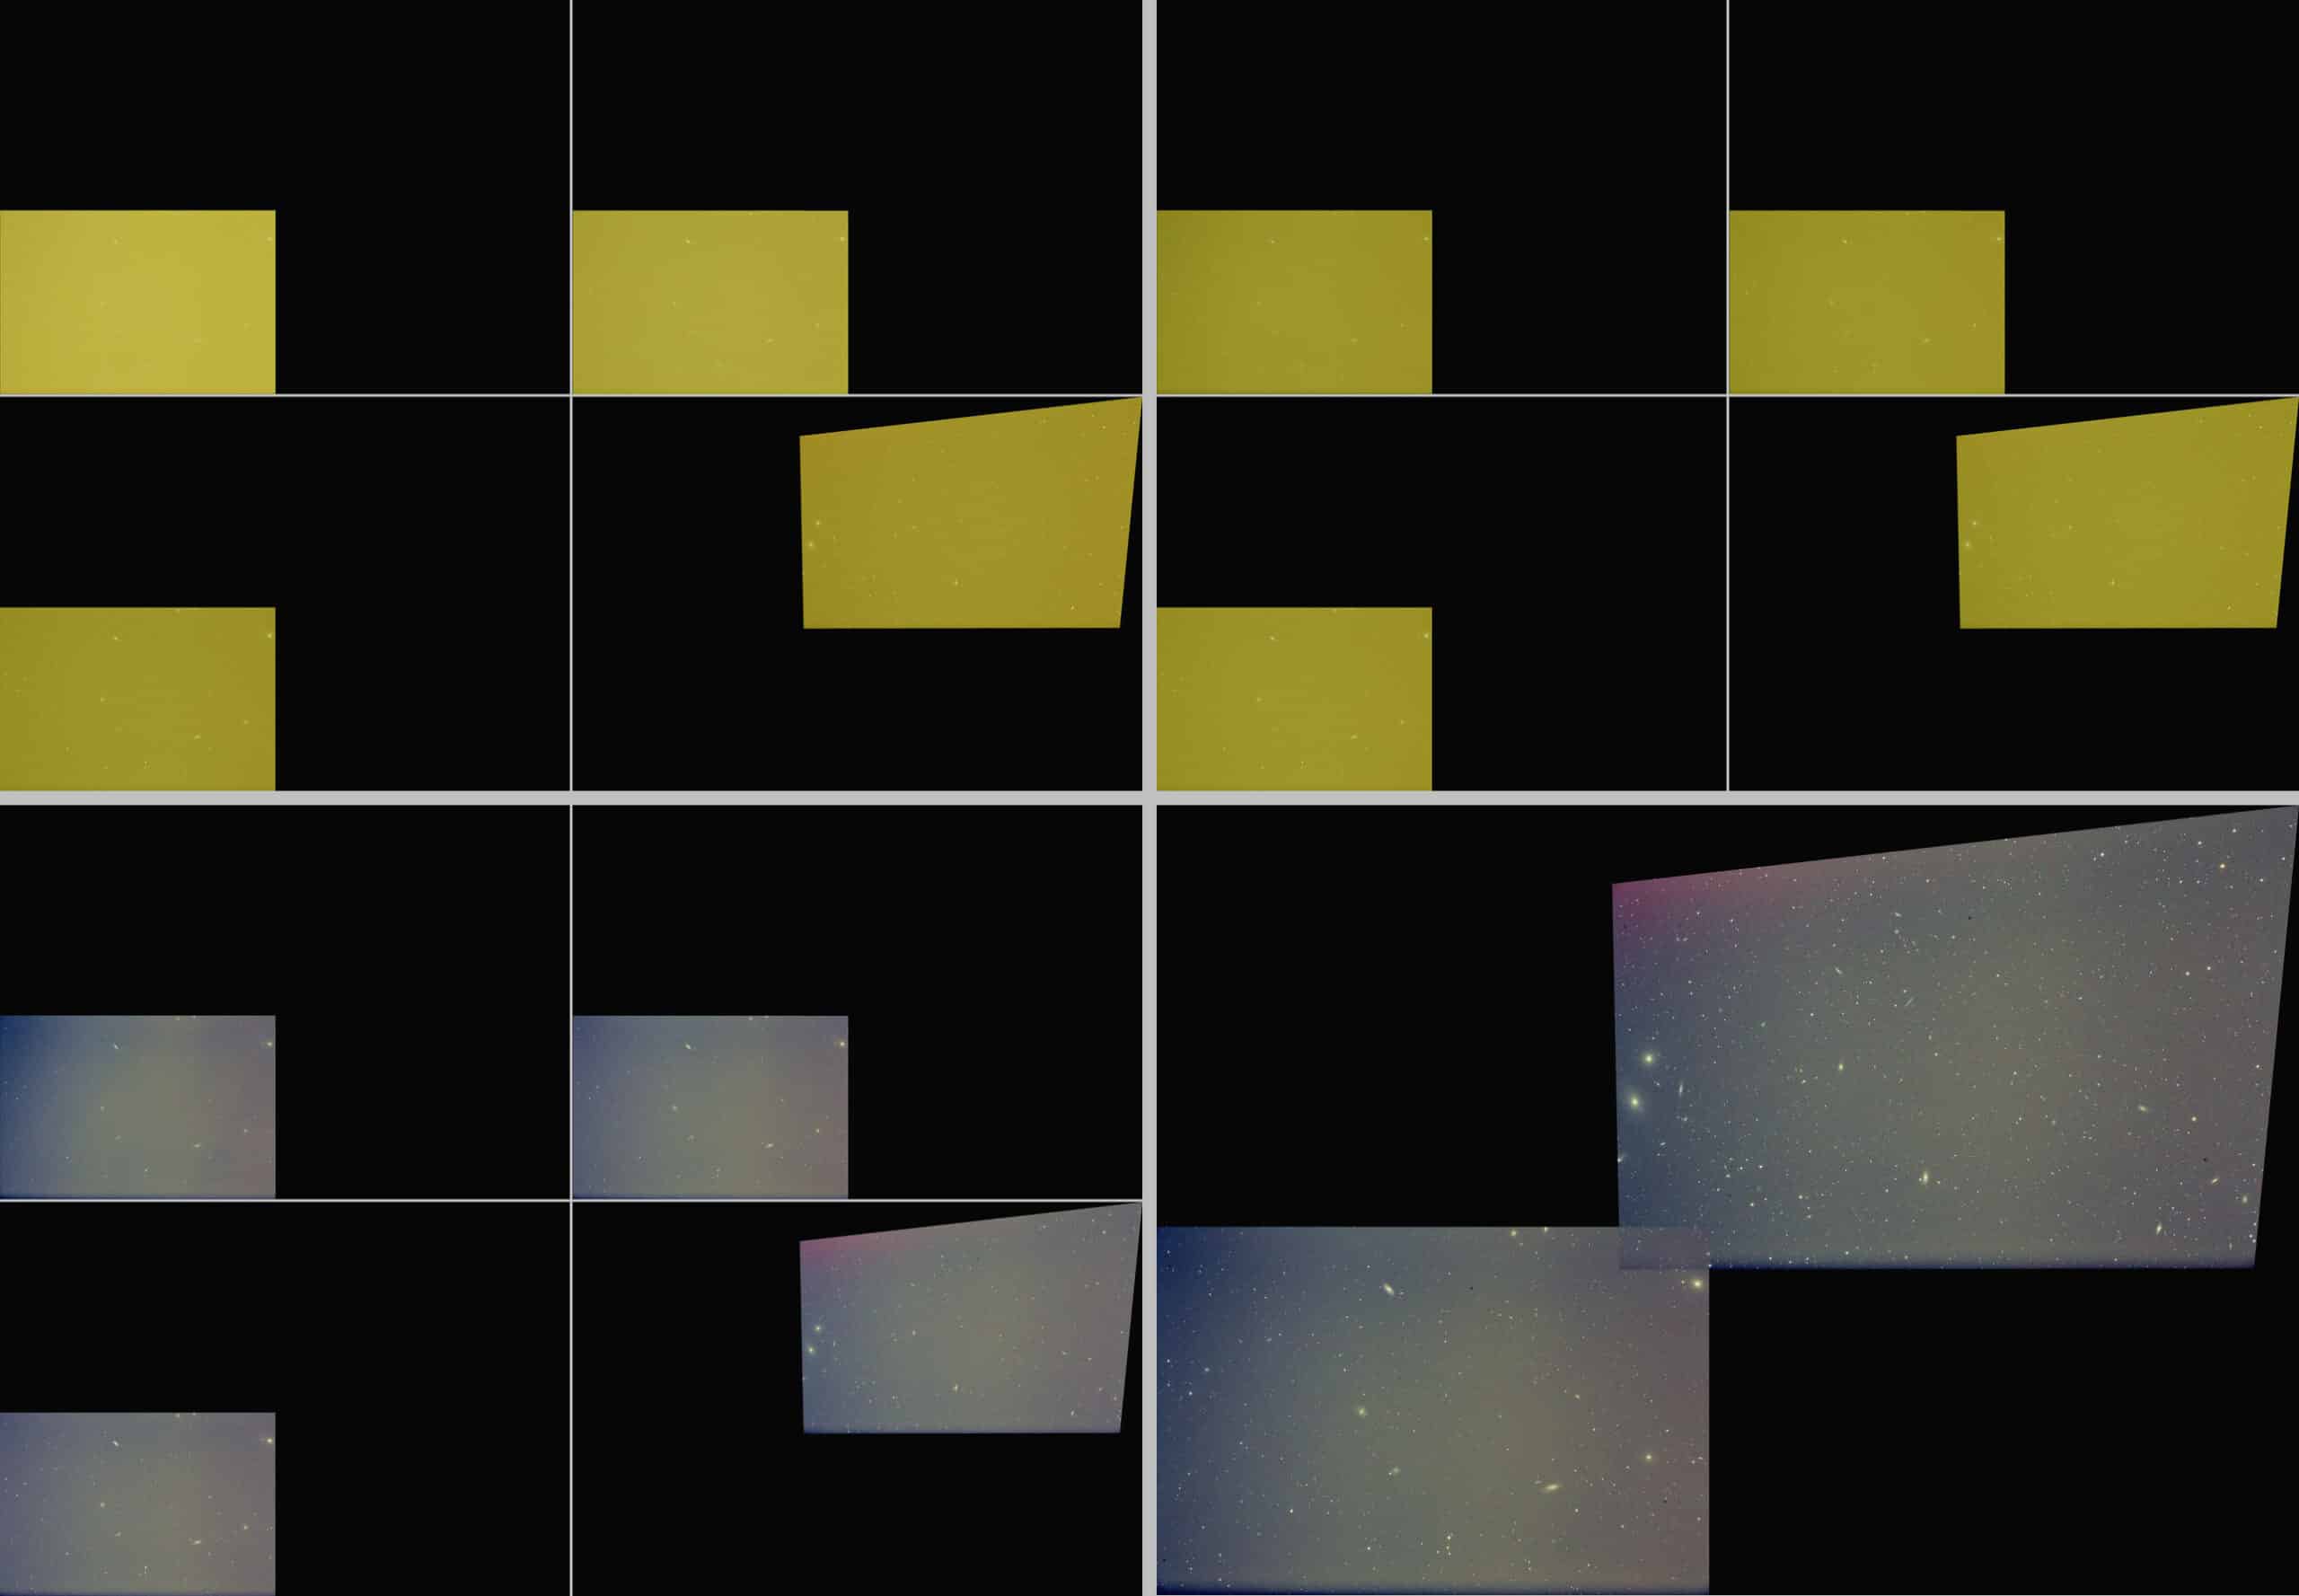
Per hoek, frame 1 to 4 van links naar rechts, van boven naar beneden.
linksboven de vier panels niet genormaliseerd, enkel geregistreerd.
rechtsboven de vier panels genormaliseerd met add+scale en geregistreerd.
linksonder de vier panels genormaliseerd met add+scale en geregistreerd en achtergrond neutralisatie
Rectsonder de integratie zonder correctie verder voor de mosaic naden, ter illustratie van de stappen die plaatsvinden voor normalisatie.
Tussen rechtsboven en linksboven zie je dat frame 1 en 2 linksboven lichter zijn zonder normalisatie.DataNormalization
Haverkamp replied to the topic Subs selectie/beoordeling op achtergrondhelderheid. in the forum Methoden en Technieken
Okee, de analyse uitslagen die APP vindt zie je in de screenprint bij deze tekst. Op het eerste oog zie ik geen heel groot verschil in kwaliteit in deze data.
De volgorde is dezelfde die je toont in het excel bestand? Gesorteerd op opname datum.
- de min en max ster FWHM ( dus hoe meer verschil, hoe ovaler, ik gebruik geen eccentricity, maar toon gewoon de min max FWHM van het ster profiel, dat is volgens mij meer evident.).
1) 2,61 -2,66
2) 2,67 - 2,70
3) 2,25 - 2,83
4 2,51 - 2,74
dit komt overeen met wat PI toont zo te zien
Sterren
1) 950
2) 1008
3) 1111
4) 1102
APP toont minder sterren omdat ik heb geselecteerd dat alleen sterren worden gebruikt die uit minstens 4 pixels bestaan en 8 kappa boven de lokale ruisvloer komen. Die sterren zijn dan ook geschikt voor een goede registratie. Je ziet ook niet helemaal een zelfde verhouding in de star support van PI. Frame 3 en 4 tonen de meeste sterren. Maar frame 1-3 horen bij het panel linksonder, terwijl frame 4 rechtsboven.
Achtergrond en dispersie analyse:
allereerst een kanttekening: dit zijn niet gecalibreerde frames, maar wel van dezelfde setup, dus dispersie als gevolg van vignettering heeft dezelfde invloed. Dus we kunnen nog redelijk de boel vergelijken. Maar normaal wil je deze analyse doen op zo goed als mogelijk gecalibreerde opnames.
En let op, waarde genormaliseerd in 0-1 data range
Lokatie (dan wel achtergrond waarde) voor R G en B:
1) 0,214 0,201 0,152
2) 0,195 0,188 0,149
3) 0,181 0,176 0,146
4) 0,184 0,175 0,145
Op basis van deze waardes zou je verwachten dat frame 3 en 4 het donkerst zijn en dus mogelijk het beste
dispersie (dan wel spreiding van data tov de achtergrond waarde)
1) 0,00425 0,00339 0,00253
2) 0,00371 0,00302 0, 00240
3) 0,00329 0,00266 0,00226
4) 0,00335 0,00262 0,00231
aangezien de data van dezelfde setup is, is het op basis van deze waardes aannemelijk om te denken dat in frame 1 en 2 meer lichtvervuiling en/of gradienten zitten. Dus mogelijk van mindere kwaliteit en/of lastiger te verwerken/bewerken.NormalNormalizationAndQuality

Haverkamp replied to the topic Subs selectie/beoordeling op achtergrondhelderheid. in the forum Methoden en Technieken
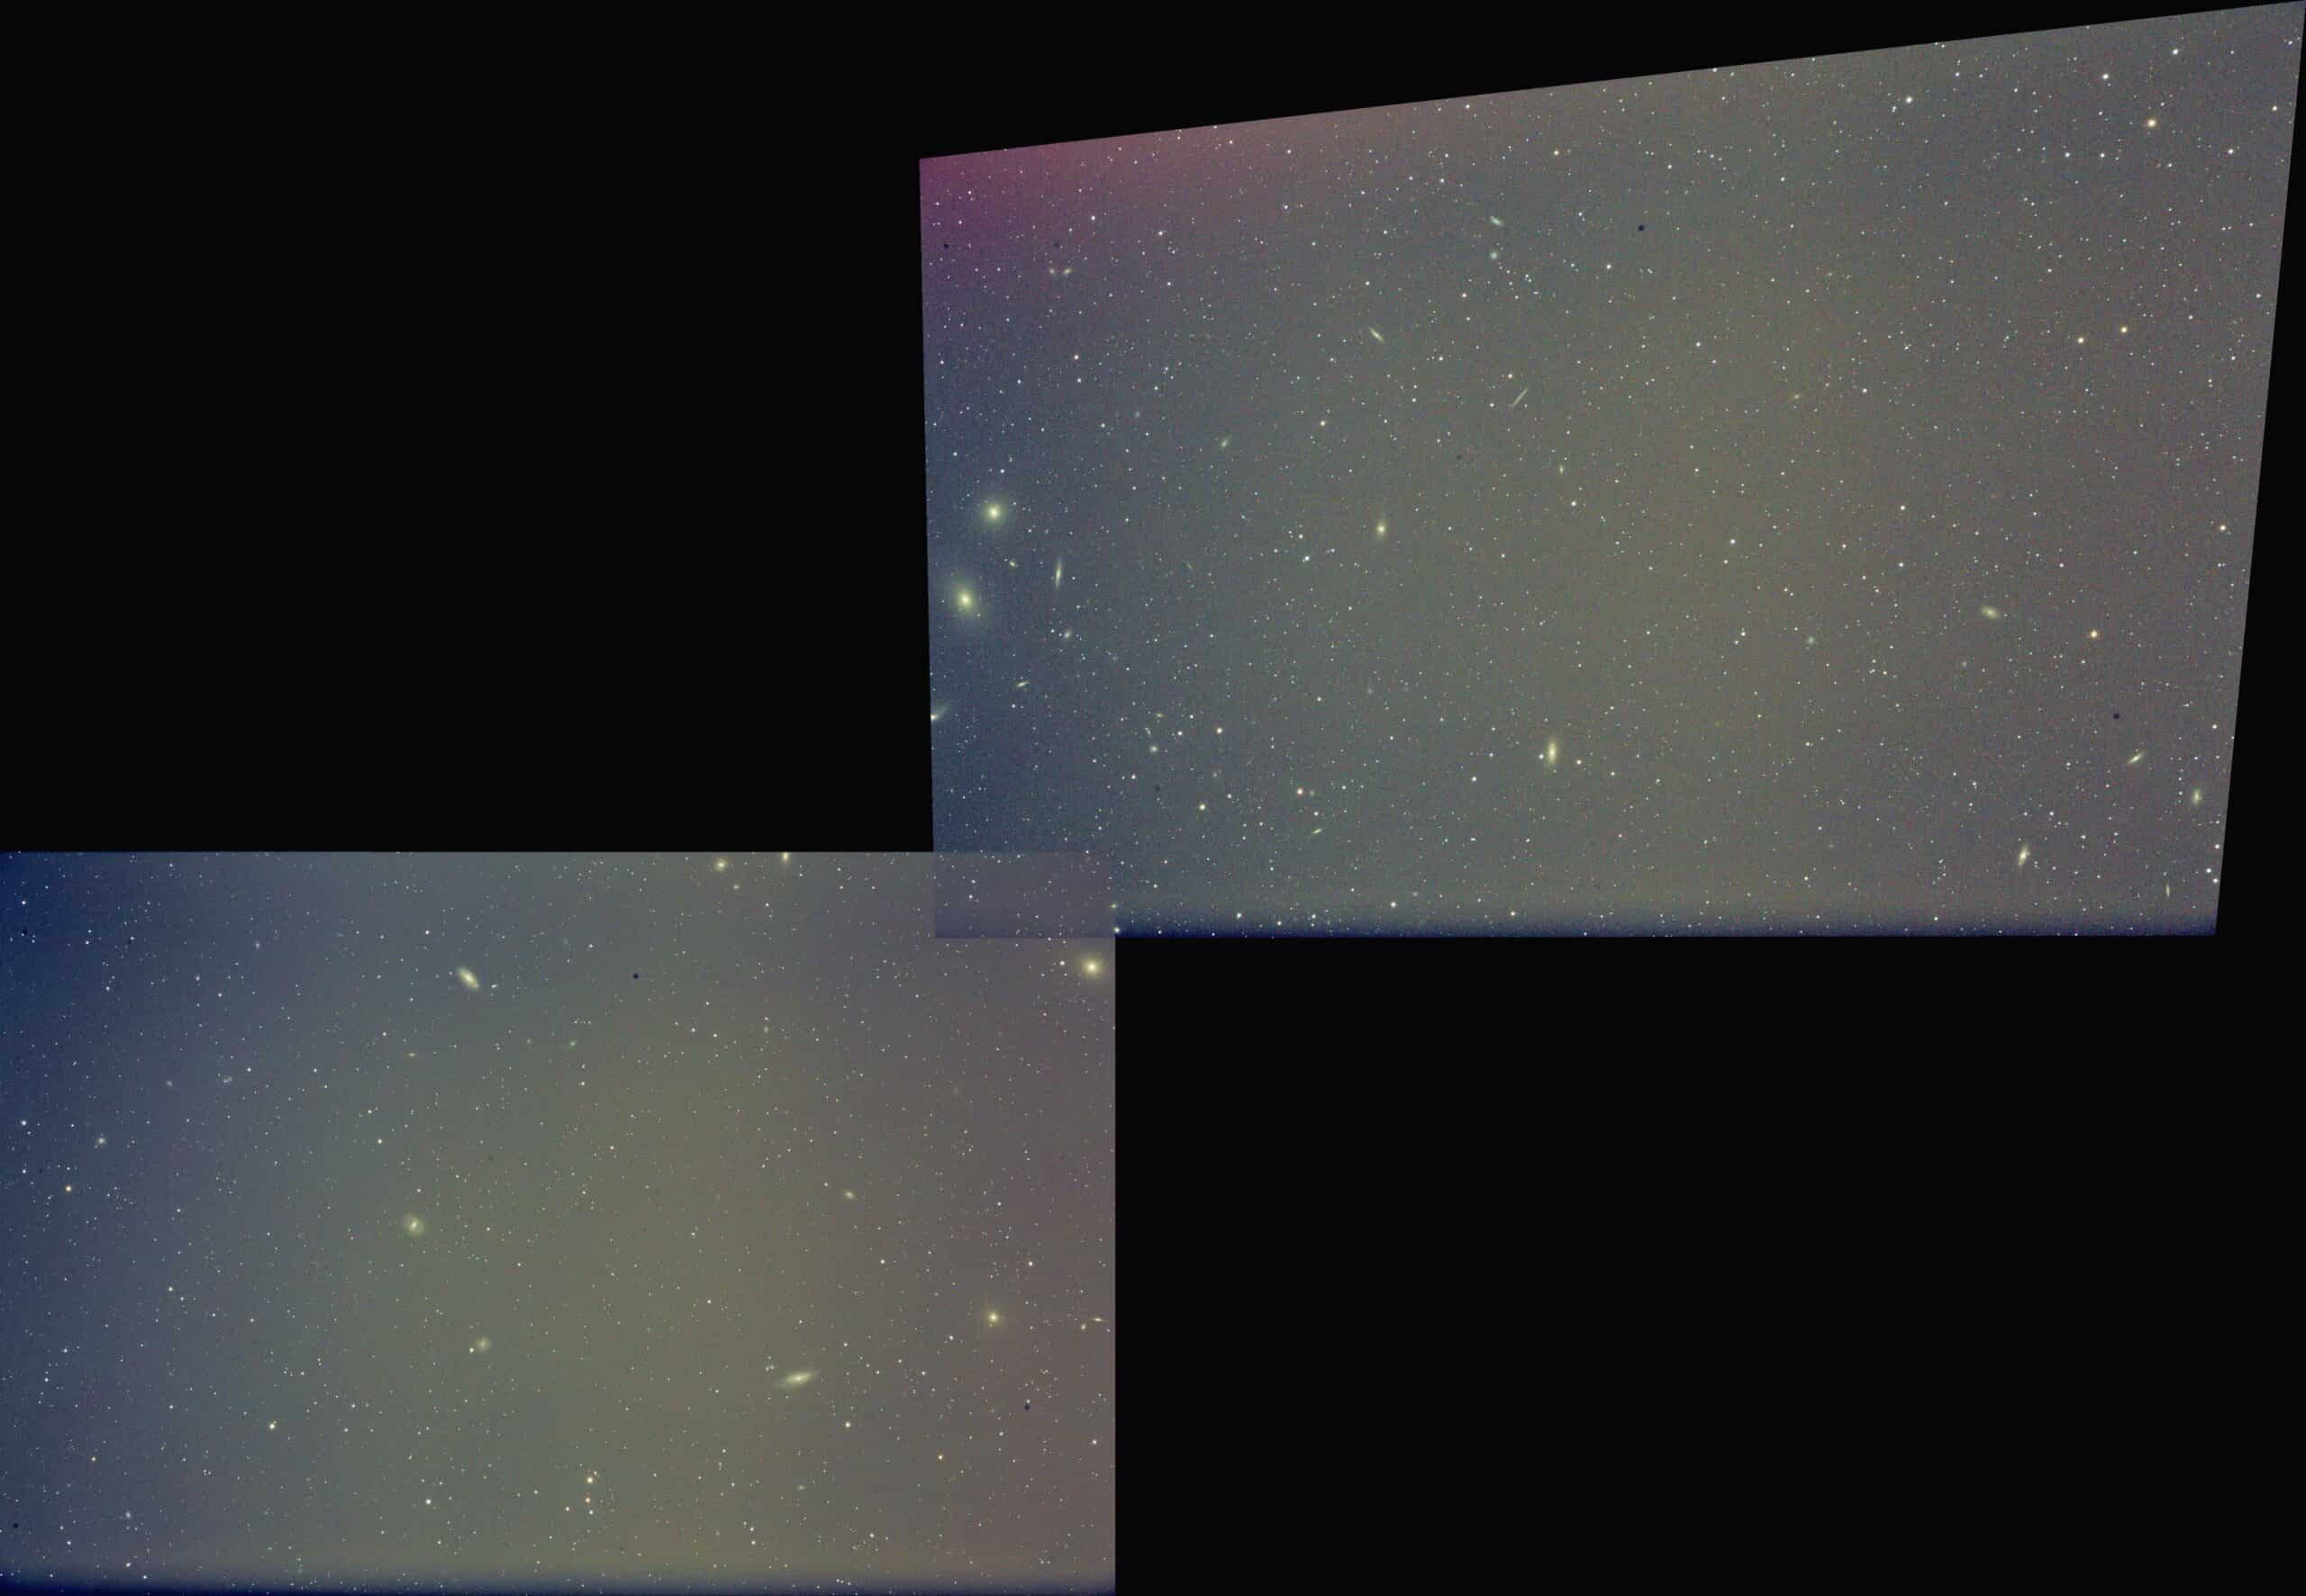
Hmm, daar zit niet veel overlap in... maar als je de andere panels maakt komt dit helemaal goed :-)St-avg-963.0s-NR-x_0.5_MNC-NS-full-eq-add-sc_BWMV_nor-AA-RL-noMBB-St
Hi all,
I am happy to announce that APP has complete support for color management of your pictures using ICC-profiles. Whenever you want to save a color picture in TIFF or JPEG format, you can add an ICC profile of your choice to the meta data or header of the file.
APP has the following ICC built-in:
- sRGB v2.1, which is most widely used and perfect for showing your images on regular monitors and for publication on the internet in JPEG format.
- sRGB v4, new version, but there is still little support for this and a lot of applications including older or obsure browsers don't have support for this.
- AdobeRGB1998, this is widely used in normal photography, but you should realise that most people can't actually use this properly, since the AdobeRGB1998 profile has a larger color gamut than sRGB and most monitors are only able to show sRGB colors. However, saving your pictures with an AdobeRGB1998 format can be nice if you want to print your images. But you'll need to know how the image looks on a monitor that can show this wider color gamut (wider than the sRGB gamut that is).
If there is need for other ICC profiles, just let me know, I'll be happy to add them to Astro Pixel Processer.
I have just done a test for a printer, I uploaded my image with a sRGB v2.1 ICC profile to
https://www.albelli.nl/
for a small print on aliminium. I didn't alter the image for the print, I only made sure the uploaded JPG included the sRGB ICC profile.
A professional printer should then be able to use his own ICC profiles for their printers, to make an accurate color managed print. If you upload an image without an ICC profile. The professional printer needs to guess in what colorspace the image actually is, which you really want to prevent. (but usually they will assume sRGB, since most people only work in sRGB at home).
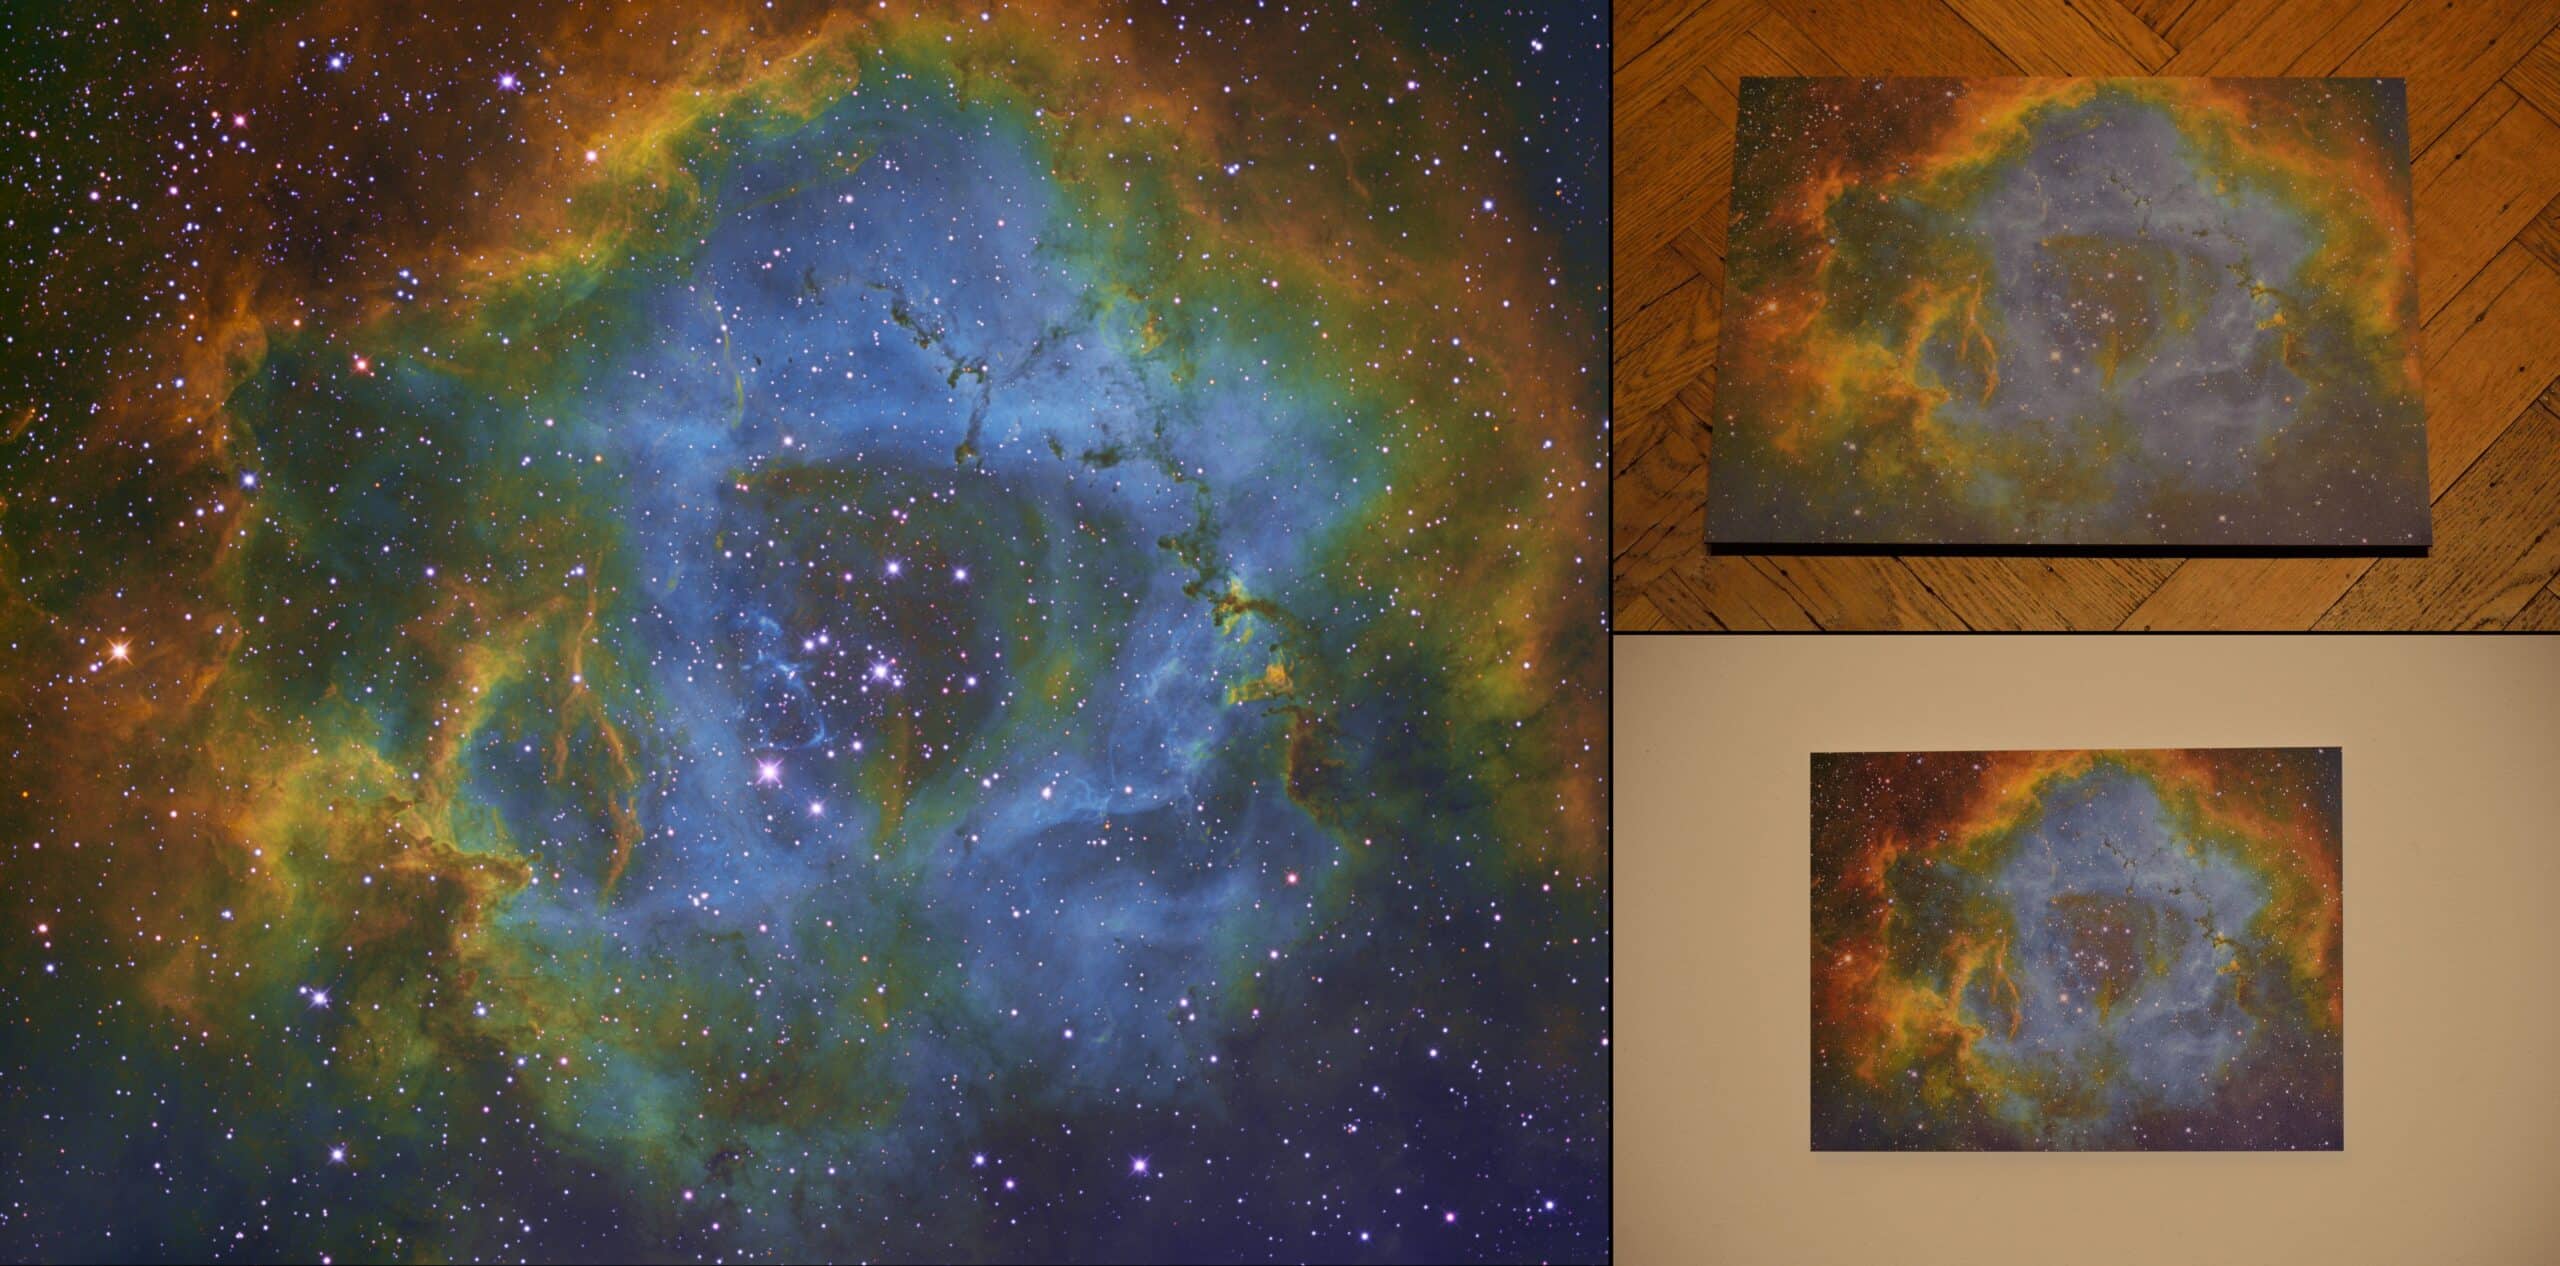
Check the image below, left is the original JPG with the sRGB v2.1 ICC profile, top right is the aluminium print on the floor in warm light, bottom right is the same print on a modestly lit wall. I think the print came out excellent ;-) !
The original image is courtesy of Irving Pieters, André van der Hoeven, Michael van Doorn, Ruud de Vries and Rob Musquetier. Fully processed with Astro Pixel Processor, it's a narrowband Hubble pallette ( SII H-alpha OIII -> RGB) of the Rosette Nebula.OriginalFloorWall