Activity › Forums › Astrotechniek › Camera’s en Accessoires › Nieuwe Raspberry PI camera
Tagged: Magpi
- This topic has 69 replies, 7 voices, and was last updated 4 years, 6 months ago by
 Musquetier.
-
AuthorPosts
-
May 30, 2020 at 12:33 #23419
 MusquetierParticipant
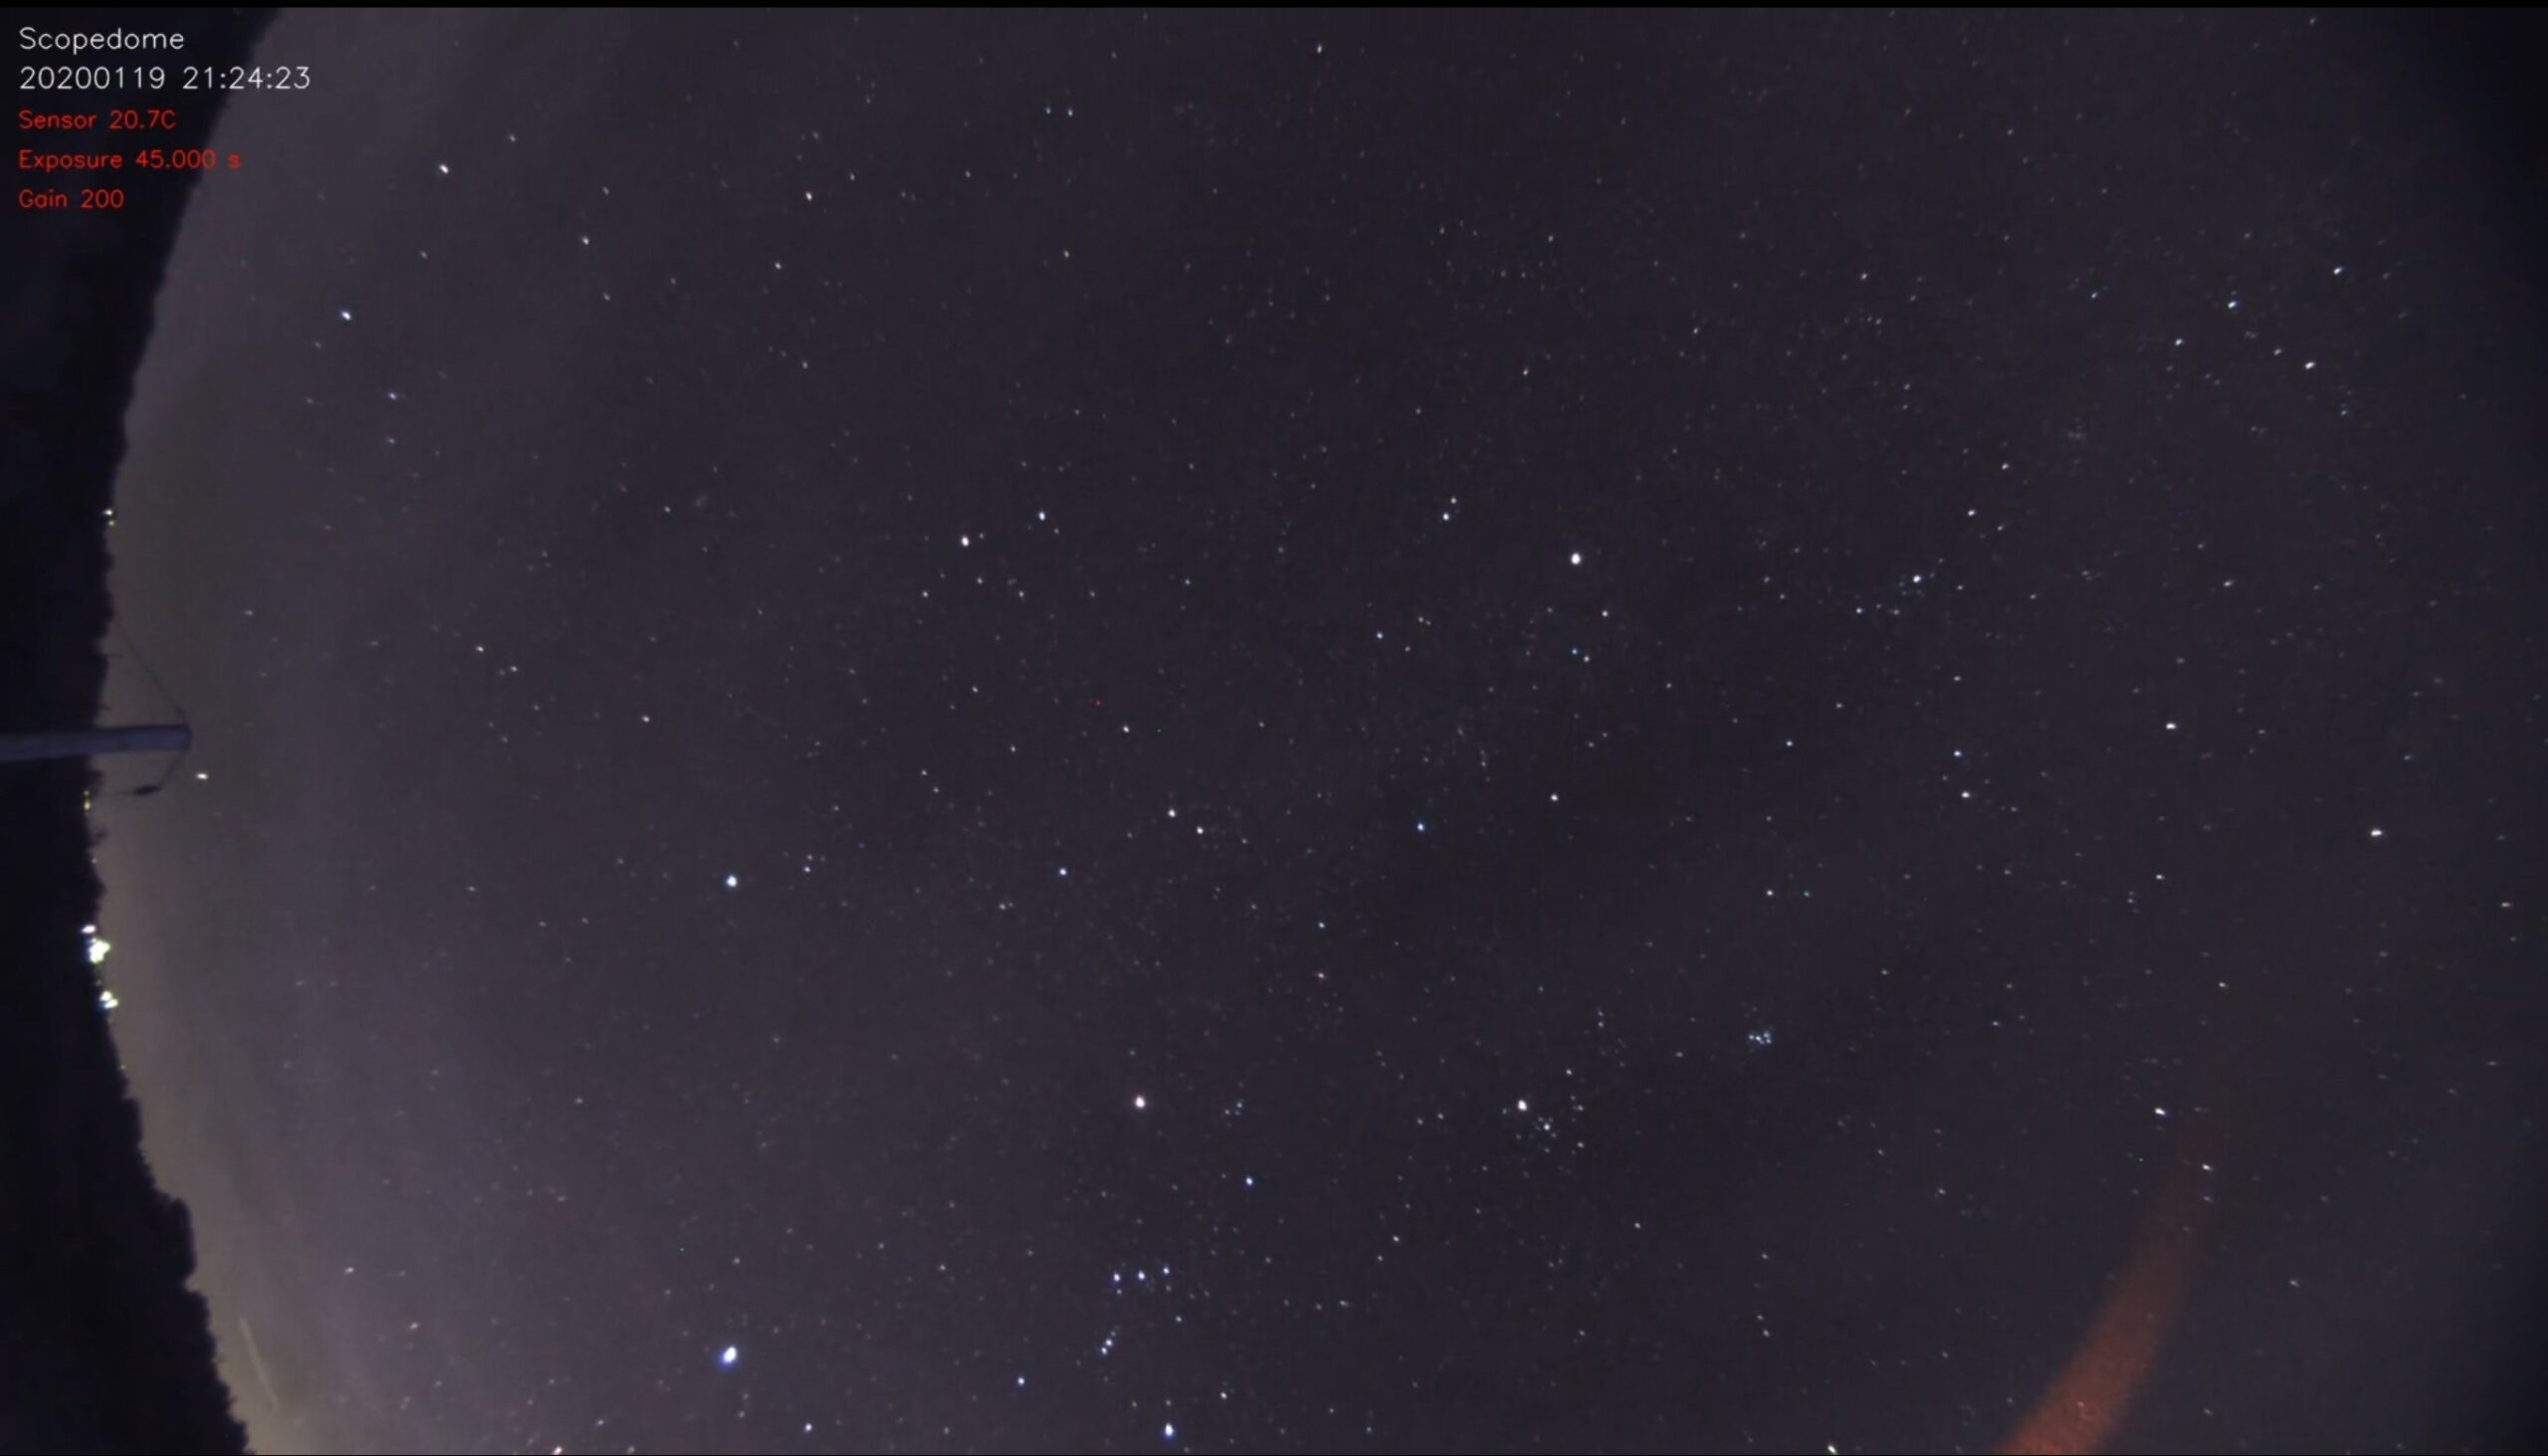
Dit keer een beetje beter gefocust, wat langer belicht (60 sec), een beetje met de white balance gespeeld en de analoge versterking op 4 gezet:
Kwaliteit van het origineel is wel wat beter dan wat YouTube ervan maakt. Zet hem iig op 1080p als je het filmpje afspeelt…
May 31, 2020 at 11:53 #23430 KeesSchererParticipant
Ik snap de keuze voor de fisheye lens voor allsky toepassing niet zo. Door de rechthoekige sensor gaat een enorm deel van de informatie verloren en je ziet daar dan bomen, huizen en duisternis. Bij een wat langer brandpunt mis je maar een klein deel van de hemel en hou je zinvolle schermvulling over. Mijn meegeleverde 2.1 mm lensje geeft een prima beeld b.v.
 May 31, 2020 at 18:57 #23432
Theunissen
ParticipantVoor mij voelt een Fish eye gewoon natuurlijker. Alhoewel jouw argument volledig juist is.
June 3, 2020 at 22:41 #23452MusquetierParticipantHierbij de laatste installatie instructies voor de AllSky software voor de HQ camera (dit keer in het Engels):
Prerequisite RPi 3 or 4 with 16 GB (or greater) memory card and the HQ camera (aka camera V3).
Setup SD card with the Buster NOOB build
Goto: https://www.raspberr…ownloads/noobs/
Choose: NOOBS Lite Network install only and download the zip file.
Copy the content of the ZIP file (so unzipped) onto the SD card.
Put SD card in Raspberry Pi and fire it up…
When starting with Command Line Interface (CLI):
Log in for the first time (pi/raspberry)
Change password to your liking with:
passwd
Configure the Raspberry Pi:
sudo raspi-config
Switch on 5 Interfacing Options->P1 Camera
Optional switch on 5 Interfacing Options->P2 SSH (for ssh access, e.g. with Putty from Windows machine)
Set 7 Advanced Options->Memory Split to 256 MB
Close raspi-config and choose to reboot.
When starting in graphical user interface (GUI):
Answer the localization questions in the dialogues to your liking and change your password.
Start Preferences -> Raspberry Pi Configuration (via the raspberry icon at the left top):
tab System:
– fill in the desired hostname
– select if you want to boot with the graphical (GUI) or command line interface (CLI)tab Interfaces:
– Switch the camera on
– Optional switch SSH on (for ssh access, e.g. with Putty from Windows machine)tab Performance:
– set GPU memory on 256 MBExit the raspi-config application and choose to reboot when the option is presented.
Continue here regardless if you using the GUI or the command line interface
After booting using the GUI option open terminal window (not needed for command line interface):
Update and upgrade the Raspberry Pi:
sudo rpi-update
(answer with y each time y/n is presented)
reboot with:
sudo shutdown -r 0
When needed open terminal window after the reboot. Continue to ensure the Raspberry Pi is fully up to date with:
sudo apt update -y
sudo apt full-upgrade -yEnsure in the future your Raspberry Pi automatically updates all packages:
sudo apt-get install unattended-upgrades -y
Install AllSky HQ camera version:
We make sure git software is installed to download the software from Github (this step might not be needed, I believe git is already in the latest RPi build).
cd ~
sudo apt-get install gitNow we retrieve the latest AllSky software (with HQ camera support):
<span style=”text-decoration: underline;”>git clone </span><span style=”text-decoration: underline;”>https://github.com/RobboRob/allsky.git</span>
Install the Allsky software:
cd ~/allsky
sudo ./install_RPiHQ.sh(Ignore the 2 compile warnings when compiling sunwait.cpp).
Answer y on the question to reboot and open a terminal windows again after the reboot is finished.
Manual starting image capturing can be started via (but it is also possible to automatically start image capturing after a reboot of the Raspberry Pi). During day time the camera should start to capture images which are stored in ~/allsky/image.jpg and are overwritten each time a new image is taken, during the night they are stored in ~/allsky/images/[date]/.
cd ~/allsky
./allsky_RPiHQ.shThe web GUI can be installed via:
cd ~/allsky
sudo gui/install_RPiHQ.shTest the GUI software using your favorite browser via http://[Raspberry Pi IP address]. Default username and password are: admin / secret. Your Raspberry Pi IP address can be obtained via:
hostname -I
Check and change the default settings in the ~/allsky/config.sh file and, when using the Allsky web GUI via the camera settings page, or if you choose to only use the command line interface option check and alter the settings.json file in the ~/allsky directory.
You should be good to go now!!!
More instructions for using the AllSky software can be found at GitHub page https://github.com/RobboRob/allsky; scroll down on this page for the original instruction of the ZWO version of this software…
Functionality not yet implemented for the Raspberry Pi HQ camera:
– dark frame correction
– text annotationsJune 9, 2020 at 07:45 #23465MusquetierParticipantEr zijn nu wat eerste representatieve foto’s geschoten met de HQ camera, zie: https://www.cloudynights.com/topic/707144-new-raspberry-camera-v3-ascom-driver/page-4#entry10247998
June 9, 2020 at 08:15 #23466 InFINNityDeckParticipant
Ik denk dat heel wat amateurs hier erg blij van zouden worden! Ik zie op fora regelmatig slechtere foto’s voorbij komen die met duurdere camera’s geschoten zijn. Zonder meer een prima low-budget alternatief (wel even een Peltier een wat zwarte tape toepassen zoals op CN beschreven)!
Nicolàs
https://www.dehilster.info/astronomy
In the observatory: Mount: 10Micron GM3000HPS, OTAs mounted: SW Esprit 80ED & Esprit 150ED, Celestron C11 XLT EdgeHD, Lunt LS80THA single stack, GTT60 (60mm aperture Galilean Type Telescope), Cameras: ZWO ASI1600MM Cool (2x), ASI174MM, ASI290MM & MC, QHYCCD QHY163M, OTAs on the ground: SW Explorer 300PDS, Bresser Messier 130/650 & 90/500.
June 9, 2020 at 12:34 #23467KeesSchererParticipantVoor de verzameling, Tom’s Hardware artikel (8 juni 2020): Raspberry Pi High Quality Camera Used for Out of This World Astrophotography.
June 9, 2020 at 15:02 #23468ParticipantIk denk dat heel wat amateurs hier erg blij van zouden worden! Ik zie op fora regelmatig slechtere foto’s voorbij komen die met duurdere camera’s geschoten zijn. Zonder meer een prima low-budget alternatief (wel even een Peltier een wat zwarte tape toepassen zoals op CN beschreven)! Nicolàs
Ik denk dat je gelijk hebt. Het enige wat gebruik op dit moment voor amateurs voor mijn gevoel wat ingewikkelder maakt is de Pi en Linux.
June 9, 2020 at 15:47 #23469InFINNityDeckParticipanttsja, dat heet de Wet van Behoud van Ellende (nummer 26 op deze lijst van wijsheden), ook wel bekend als de The law of conservation of misery… ;-)
Nicolàs
https://www.dehilster.info/astronomy
In the observatory: Mount: 10Micron GM3000HPS, OTAs mounted: SW Esprit 80ED & Esprit 150ED, Celestron C11 XLT EdgeHD, Lunt LS80THA single stack, GTT60 (60mm aperture Galilean Type Telescope), Cameras: ZWO ASI1600MM Cool (2x), ASI174MM, ASI290MM & MC, QHYCCD QHY163M, OTAs on the ground: SW Explorer 300PDS, Bresser Messier 130/650 & 90/500.
June 10, 2020 at 00:22 #23471 engelsParticipant
Helemaal eens Marc. Niettemin ga ik mede door Kees Scherer, Pixinsight op een linux machine draaien! Misschien wel de wet van behoud van ellende, maar wel snel.
June 10, 2020 at 00:24 #23472ParticipantPI kun je ook op een Mac draaien. Maar met “Pi” bedoelde ik in dit geval Raspberry Pi.
June 11, 2020 at 08:53 #23473MusquetierParticipantVoor diegene die de AllSky software nu icm de RPi HQ camera sensor gebruiken: vergeet niet af en toe in de ~/allsky directory een “git pull” en hierna een “make” te doen om de laatste file versies weer binnen te krijgen en eventueel te compileren, ik heb de laatste dagen nog enkele kleine verbeteringen doorgevoerd en er enkele bugjes uit gehaald)…
June 11, 2020 at 11:34 #23474 GroenewoldParticipant
Super gaaf werk Rob!
(ja, daar ben ik weer).
June 11, 2020 at 18:19 #23475InFINNityDeckParticipantIk zag zojuist op het ASCOM forum dat Rob’s ASCOM driver de conform-test met succes afgelegd heeft, hij is dus nu 100% ASCOM compatible. Gefeliciteerd!
Nicolàs
https://www.dehilster.info/astronomy
In the observatory: Mount: 10Micron GM3000HPS, OTAs mounted: SW Esprit 80ED & Esprit 150ED, Celestron C11 XLT EdgeHD, Lunt LS80THA single stack, GTT60 (60mm aperture Galilean Type Telescope), Cameras: ZWO ASI1600MM Cool (2x), ASI174MM, ASI290MM & MC, QHYCCD QHY163M, OTAs on the ground: SW Explorer 300PDS, Bresser Messier 130/650 & 90/500.
June 11, 2020 at 19:39 #23476ParticipantKnap werk!
-
AuthorPosts
- You must be logged in to reply to this topic.